Showing posts with label greenhouse. Show all posts

Sunday, December 29, 2013

2013 is Winding Down

It is appropriate to take stock of the year as it draws to a close. As you reflect on the past year, what were the highlights in your life? What trials did you face? And even more importantly, what character lessons did you achieve in response to those trials?

Here are some tips (recommendations) for this season that come to mind:

1) Give thanks by returning a just tithe. Most financial cycles revolve around Jan 1, and now is a good time to check your increase and donations. "'Bring ye all the tithes into the storehouse, that there may be meat in Mine house, and prove Me now herewith, saith the Lord of hosts, if I will not open you the windows of heaven, and pour you out a blessing, that there shall not be room enough to receive it.' Shall we obey God, and bring in all our tithes and offerings, that there may be meat to supply the demands of souls hungering for the bread of life? God invites you to prove Him now, as the old year draws to its close, and let the new year find us with God’s treasuries replenished." {CS 89.1}

"He tells us that He will open the windows of heaven, and pour us out a blessing, that there shall not be room enough to receive it. He pledges His word, 'I will rebuke the devourer for your sakes, and he shall not destroy the fruits of your ground; neither shall your vine cast her fruit before the time in the field, saith the Lord of hosts.' Thus His word is our assurance that He will so bless us that we shall have still larger tithes and offerings to bestow. 'Return unto Me, and I will return unto you, saith the Lord of hosts.'" {CS 89.2}

2) Give thanks for the health you have been blessed with, by ministering to those who do not have that same blessing. This past year our family has been visiting an elderly man in a local nursing home. This friends mind is strong, but his body is broken and weak. He appreciates our visits so very much. Do something for someone else who can not repay you the same kindness.

3) Give thanks for the Bible. Make 2014 a year of solid Bible study. I am working on compiling several
forms of reading the Bible through in a year plans, and I challenge you to read the entire Bible within this next year. There are many benefits for being deeply rooted in God's Word.

4) Give thanks for your farm and fresh produce. This time of year, you are using from the food stored from the past summer, and we all look forward to the coming growing season. We have just past the shortest day of the year (Dec 21), and from now on, the days will slowly but steadily lengthen. (Day length calculator.) In our area, February 1, 2014 is the date that our day length returns to 10 hrs per day. After this point, plants will start to grow again. That will be the time for your green houses and covered grow boxes to shine. Giving thanks means not just enjoying the blessings of good wholesome food, but also give thanks in sharing what you produce with others.

5) Give thanks for Jesus is returning soon. The babe of the Advent season is the King who is returning soon to take those who incorporate His law into their characters. And in that sentence, we have both an expectation, a hope, a salvation; but also a task, a goal and a mission. 1 John 3:2-3 "Beloved, now are we the sons of God, and it does not yet appear what we shall be: but we know that, when he shall appear, we shall be like him; for we shall see him as he is. And every man that has this hope in him purifies himself, even as he is pure."


Monday, August 5, 2013

Cool Dry Summer

The weather in our neck of the woods has been quite a puzzle this year. We had a cooler and very wet spring, then a few weeks of really hot weather (90's) and Indian summer (pleasant days, cool nights) since then. It has felt like fall for weeks now. The really important factor for gardening has been the lack of rain for the past month. The weather has been so cool that warm living plants have not grown as well we are used to seeing.

Watermelons are a month behind last year. We have planted the melons amid the fruit trees which is wood chip mulched. Perhaps the wood chips are cooler for the vines to grow over, and we wonder if this is a part of their slow growth.


Harvests through August 6th
  • Strawberries, raspberries provided a great harvest.
  • Blue Berries provided a sample crop, which was tasty.
  • Tomatoes are in good supply, though we have not canned any as of yet.
  • We are getting plenty of green beans for fresh eating, but not enough yet for preserving.
  • Peppers seem slow, though there are some that have matured.
  • Beets have been good, but seem a bit small and have been drought stressed on occasion.
  • Potatoes are ready to dig.
  • Okra has been on for a few weeks, an d the supply is increasing as the plants enlarge.
  • Onions and Garlic provided a nice crop. We are not sure how well the onions will store over winter. Some may have been sun burned during curing.
  • Zuchinni squash plants have survived perfectly this year in the green house. No die off from squash vine borers! Pollination is by hand, which is a consistent task. Un-pollinated squash just shrivel on the vine like blossom end rot.
  • We also put our cucumbers in the green house, and they are climbing up a net on the back wall (see pic above). This is working well, but pollination (or lack of it) may be decreasing the volume of harvest. No cucumber wilt seen yet!


Wednesday, May 15, 2013

Freeze Protection


On Monday morning, May 13, 2013, we likely had our last hard frost of this spring. To celebrate, we brought out all our laundry to cover the sensitive perennials and fruit trees. At one point, one of the boys said, Hey! This sheet was on my bed!

Late spring frost is a concern for fruit trees (ours were in full bloom), blooming strawberries, raspberries, blueberries and grapes.

Small plants can often be sheltered with an overturned 5 gallon bucket. The strawberries are low to the ground, and we just placed a tarp over the row/bed and secured the corners with buckets filled with water.

Our temps dropped from 31 degrees F at 6 am when I went out to check on things to 28 degrees F just before the sun hit the earth to warm it around 8:30 am. The sky was clear and wind calm. We had the classic radiation frost conditions.

A thin sheet is often enough to prevent frost formation on tender plant tissues, and preserve the harvest. This is possible with several hours of work on a micro farm like ours, but impractical for large farms. Local strawberry fields started irrigation the evening prior, and had an inch of protective ice on the plants by the time the temps rose.

Our 10 day forecast now stretches to May 24, with no danger of frost. The charts show our 10% probability frost date at the end of May, so I think we are fairly safe to set things out of the greenhouse into the field. If I am wrong, then we will have even more things to cover next time ;)


Resources:


Tuesday, December 18, 2012

The Victorian Kitchen Garden

I am fond of 1800's history, and was pleasantly surprised to learn about the program "The Victorian Kitchen Garden". This apparently was a BBC series of the mid 1980's.

Source: Wikipedia on Harry Dodson
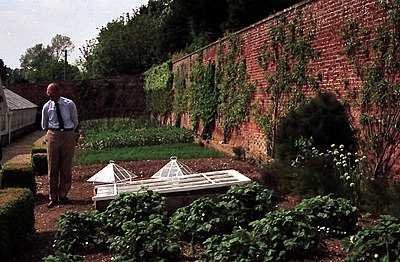
Back in the Victorian period (1800's) there were large walled gardens in each large estate in England. Food production was on a very local scale, and a team of people were employed as gardeners. All of this was new to me, but what I found especially interesting was to learn the tips and techniques from master gardeners of a hundred years ago. A time when there were no commercial fertilizers, few pesticides and a lot of attention to detail and the crop. There was no mono culture in these gardens!

The head gardener was one of the highest seniority staff members on the estate, and he was tasked with producing all of the food needed by the estate-- year round.

I have enjoyed the program, so I will organize links to the videos on you tube. I would caution you to beware of inappropriate content in the "suggested" videos area. It is sad to have good resources thrown in with the filth of a morals lacking society. Click the video link, and go full screen as soon as you can, and of course skip the ads if they are thrust upon you.

Note as of Jan 21, 2013, these video links are not working. The interview with Thoday is working which would give you an idea about the program.

April
May (first 10 mins)
July part 1, July part 2
September part 1September part 2
November

Friday, November 23, 2012

High Tunnel Greenhouse

We have launched into learning first hand about greenhouses. We have a lot to learn, but we are interested in experiencing an extra month+ on each side of our growing season, and doing more with some intensive gardening within the greenhouse.

Our philosophy at this time is to not add additional heat to a greenhouse, but rather to buffer the lows and shelter the plants from desiccation. We won't be trying to grow tomatoes and peppers (warm loving plants) in the winter, rather we will focus on cold hardy plants with the goal of keeping them going all year long.

Our greenhouse dimensions are 16 x 48 feet and is called a high tunnel because you can walk inside of it. In this post, I will outline the placement considerations, assembly steps and tips we learn along the way. You can DIY (do it yourself) where you can purchase fence poles and do your own rib bending and collect the needed hardware. We decided to start with a kit containing all of the poles, hardware and greenhouse grade plastic included.


Location Considerations

Your placement of the greenhouse is important. You want your site to be level, have good sun exposure, and be conveniently accessible to you, power and water.

We cast about in our minds various locations for the greenhouse, and have come to decide on our oldest garden plot, which is the most level ground we have in garden, and is also closest to our pole barn, power and water supply. There are some tall trees to the west of this location, but perhaps we will trim these down, or they may help shade the greenhouse in the summer when it will likely be too hot anyway.

We have brought in a load of well composted horse manure to amend to the soil and help level it out a bit more. It looks good as a plot and location to start a greenhouse.


Parts

The general parts are straightforward:
  • Anchor posts of 3 feet long are driven into the ground ~ 2 feet, with a 15" out of the ground. The anchor posts are driven along the perimeter of the greenhouse every 4 feet along the sides.
  • Hoop poles are set into the anchor posts, held with a connector tube.
  • Ridge pole attaches with hardware along the top ridge of the greenhouse
  • Plastic sheeting holder hardware is attached to the frame
  • End walls are constructed using 2x4s
  • Plastic sheeting is applied and fastened


Assembly

1) Anchors: After selecting the location for the greenhouse, you need to layout the specific corner posts, and make sure everything is square. We wanted to square the greenhouse with the road in front and the pole barn to the side, so we took some measurements, and set the front two corner posts 16 feet apart that face the road. From these we measured out the back corners, measuring 48 feet along the sides, and 50'7" on the diagonal.

A little geometry review: We want the structure to be square. This means that all of the corners need to be right angles. The Pythagorean formula for a "right angled triangle" is a2 + b2 = c2. This means that for a structure 16 x 48, the hypotenuse would measure 50'7". You measure both sides and both diagonals and make adjustments till every measurement is right. Then you set the back corner posts.

We measured the corner posts from soil line to the top of the post 15". We will use 2x12" side boards along the perimeter and 15" will leave some room above the side board for the attachment of the connector and hoop pole to the anchor post. With the four corners at the proper depth into the ground, we strung a flexible tape measure along the long sides and pounded in the side anchors every 4' and to the depth of the tape line. There is a pounding plug shown in the image which allows you to hammer the anchor in without destroying the mating surface of the pole. Once at the proper depth, you can re-orient the holes in the anchor pipe with a screw driver as shown in the image. We had a small level to help make sure we were placing the anchors straight into the ground, a feat generally accomplished.

2) Hoop poles are mated with the anchor posts. This is a fun step, as the greenhouse quickly takes "shape." There is a connector tube of about 5" long which is just large enough in diameter to slide over and onto the anchor post. There is a matching hole for a bolt to tie the connector to the anchor post. The hoop pole, being the same diameter pipe as the anchor post, also slides down into the connector tube. There is a matching hole for a bolt to tie the hoop pole onto the connector.

3) Ridge pole. The greenhouse kit that we purchased has a ridge pole of tubing that attaches a longitudinal pole with each hoop at the center. This ties the entire structure together as one unit. Larger greenhouses may have several longitudinal poles. The connection hardware is made of two brackets with a pipe holder form. Two brackets are rotated 90 degrees to accept both the ridge pole and the hoop pole. There are 4 bolts to hold the brackets together, and the nuts should be placed downward to not puncture the plastic.

4) Corner bracing. On each corner, there is a specialized pole that attaches to the second connector and the first hoop. These have a twist in them and there are right and left bracing poles (the twist is to the right or to the left.)

5) Construct the end walls. The end walls are secured to the hoops with clamps. These clamps need to be installed before the plastic holding strip is applied to the end hoops.

6) Plastic-holding strips. These are attached along the side boards, and along the hoop pole on both ends. This will tie the plastic tight to the front and back hoop along the curve, and along the base sides. The strips are metal, and are attached with 1" self tapping screws.

7) Attach the plastic. The plastic is drawn over the hoop structure as a double layer. When it is secured, there will be two layers of plastic to contend with. This allows air inflation to add some air space between the two layers as an insulating layer. You want to attach and tension the plastic at a temperature of 65 degrees. If you attach it too cold, it would loosen as it warms up. If you attach the plastic when it is hot outside, then when it gets cold, the plastic may be too tight. When the tension is achieved, Z wire is attached to hold the plastic into place.

Remember to attach the fan motor before completely securing both layers of plastic.

8) Insulate the perimeter. We applied tar paper to the outside of the 2x12, and then piled wood chips against the outside perimeter. We plan to put building styrofoam on the inside of the 2x12 to add just a bit more insulation. These will fit nicely between the anchor posts.

9) Mark out the beds. We have a 16 foot interior, and considered several arrangements for the beds and isles. We concluded with 24" beds on each outside wall, 3 walkways running the length of the greenhouse at 18" wide, and the center beds being 42". This gives us 4 distinct beds, and rather easy access to any bed, even for Sunshine and the boys to plant and harvest from the edges. We will put a work table at the back north of the greenhouse, and will make that area our start house as well.


Resources


Tuesday, March 6, 2012

Building Construction

Proverbs 24:27 "Prepare thy work without, and make it fit for thyself in the field; and afterwards build thine house."

We need to set our priorities when starting to develop a homestead. Preparing our crop land would take priority. Crop land and orchards need to be planned, prepared and planted. For even the work of preparing the soil, you will need to properly store tools. You could store tools in a covered trailer. Or you could build a garage, or workshop structure to store tools. Remember to focus on the crops and to not get distracted with the early construction of structures.

If you are starting with bare land, you will have the advantage of being able to plan the ideal placement of your home, a barn, tool shed, etc. I encourage you to develop a master plan, so that you do not constantly have to redo previous work. If you have a master plan at the onset, you can coordinate projects to compliment each other, and in the end make the process more efficient.

Once you decide on your building master plan, set a time-line for the included projects. Organize your projects in order of importance, and so that the projects interact in ideal efficiency. Pray at each step for the Lord's blessing. Psalm 127:1 "Except the LORD build the house, they labour in vain that build it: except the LORD keep the city, the watchman waketh [but] in vain."

I like the idea of having an exact materials list for what the project will need, and obtaining the materials in an efficient manner. The more you plan, the less you will have to make miscellaneous trips to the store for materials. The farther you are out, the more important this will be!


Structures

Structures that you may want to consider in your homestead (some of these may be combined):
  • home
  • root cellar
  • firewood storage under cover
  • garage
  • tool shed
  • work shop
  • pole barn for tractor and implement storage
  • greenhouse
  • seed starting room
  • produce washing / packing area
  • canning kitchen
  • maple sugar shack
  • animal barn(s)
  • chicken coup
I encourage you to take time and plan out your homestead even before you are ready to build. You can start dreaming of how you would best want these structures to work together and in what proximity.


Construction Tools

The minimum would be a good hammer, nails and lumber. A pneumatic nail gun can save a lot of nailing time! If you add nail guns, then you will need an air compressor, hoses and power to run the compressor. A good quality power hand saw, a chop saw and a good table saw will be indispensable. A speed square, framing square, plum bob, level, masonry string, and layout marking pencil are small tools that are also needed.

I hate to say it, but when looking at power tools, you need to condition yourself to looking for and purchasing the most expensive (ie best quality) versions of the tools you need. The economy (plastic) tools are not meant to last for what you will need when building a variety of homestead structures.


Permits and building codes

Find out what is required in your area for permits, inspections and building codes. You will want the best practices for your structure, and some locations allow the home owner to do their own construction. (I would have you find out about this before you even select your property, and don't go to a place with a lot of regulation and control.) Build with better than modern standards and safety, even if no inspections are required. Building codes have been created because of past tragedies, and you do not want to cut corners with safety on your own homestead. Also keep in mind that we will experience more and more damaging wind and storms as time goes by.


Home construction video series

Structures, Tips and Plans

Tuesday, February 28, 2012

Greenhouses

A greenhouse is a weather protecting structure for your garden plants. It could be as simple as a cold frame (a low wooden box covered with glass) to a tube frame, plastic covered high tunnel, to a stud framed glass house. With a greenhouse it is easy to extend your growing season a month earlier in spring, and a month later in fall. Depending on your greenhouse, and your crops, you can extend your harvest into winter.


Uses
  • Seed starter greenhouse
  • Forth season production
  • Flower / cash production

Important concepts
  • base temperature
  • optimum temperature
  • temperature integration
  • photo period
  • irradiance
  • poly sun degradation

Design considerations

The ground warms and cools with the surrounding temperatures. As we cover the ground with the greenhouse, the earth under the house can offer stored heat. Utilize this heat battery to your advantage. In sunny areas, the solar input of energy will be more significant than earth heat radiation. If you are using glass for your glazing, then you will want to orient the angle of the glass to the perpendicular to the elevation of the sun during the winter. This angle is your latitude at the winter solstice. You want the angle of incidence to be low so that most of the light will completely penetrate the glass, and not loose some of it through reflection.

Using a GPS, property map or Google Earth, determine the latitude of your location. Add between 10 and 20 degrees to your site latitude to determine the orientation of your greenhouse glazing. For instance, if your latitude is 35 degrees north, your glazing should be angled at a 45 to 55 degree angle.


Heat storage / sources
  • Water stored inside the greenhouse, in black containers to absorb as much daytime heat as possible. This heat would then be radiated at night to moderate temperatures. One friend of ours has used 55 gallon metal drums full of water in the center of their greenhouse with planter boxes on top of the drums. Another has water containers on the backside of the greenhouse. Another greenhouse we reviewed had a small pool of water within and under the floor.
  • Rock mass as a thermal heat sink. Another greenhouse we have reviewed has a rock wall on the north side of the lean-to greenhouse. Another example is a solarium made with massive amounts of rock as thermal mass.
  • Earth-air tubes are tubes buried deep in the ground and air passed through the tube to take the constant heat from the ground into the air and then into the greenhouse. Electricity is needed to move the air.
  • Below ground radiant heat, with heat being added from a boiler or solar heater.
  • Wood stove heater within the greenhouse.
  • Greenhouse lowered into the surrounding ground, to encourage more earth-heat coupling.
  • Cold sink trench within the greenhouse to hold coldest air down within the soil.

Resources