Showing posts with label vegetable. Show all posts

Monday, August 5, 2013

Cool Dry Summer

The weather in our neck of the woods has been quite a puzzle this year. We had a cooler and very wet spring, then a few weeks of really hot weather (90's) and Indian summer (pleasant days, cool nights) since then. It has felt like fall for weeks now. The really important factor for gardening has been the lack of rain for the past month. The weather has been so cool that warm living plants have not grown as well we are used to seeing.

Watermelons are a month behind last year. We have planted the melons amid the fruit trees which is wood chip mulched. Perhaps the wood chips are cooler for the vines to grow over, and we wonder if this is a part of their slow growth.


Harvests through August 6th
  • Strawberries, raspberries provided a great harvest.
  • Blue Berries provided a sample crop, which was tasty.
  • Tomatoes are in good supply, though we have not canned any as of yet.
  • We are getting plenty of green beans for fresh eating, but not enough yet for preserving.
  • Peppers seem slow, though there are some that have matured.
  • Beets have been good, but seem a bit small and have been drought stressed on occasion.
  • Potatoes are ready to dig.
  • Okra has been on for a few weeks, an d the supply is increasing as the plants enlarge.
  • Onions and Garlic provided a nice crop. We are not sure how well the onions will store over winter. Some may have been sun burned during curing.
  • Zuchinni squash plants have survived perfectly this year in the green house. No die off from squash vine borers! Pollination is by hand, which is a consistent task. Un-pollinated squash just shrivel on the vine like blossom end rot.
  • We also put our cucumbers in the green house, and they are climbing up a net on the back wall (see pic above). This is working well, but pollination (or lack of it) may be decreasing the volume of harvest. No cucumber wilt seen yet!


Tuesday, December 18, 2012

The Victorian Kitchen Garden

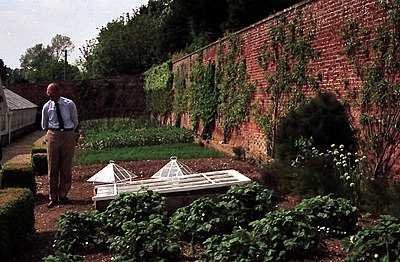
I am fond of 1800's history, and was pleasantly surprised to learn about the program "The Victorian Kitchen Garden". This apparently was a BBC series of the mid 1980's.

Source: Wikipedia on Harry Dodson
Back in the Victorian period (1800's) there were large walled gardens in each large estate in England. Food production was on a very local scale, and a team of people were employed as gardeners. All of this was new to me, but what I found especially interesting was to learn the tips and techniques from master gardeners of a hundred years ago. A time when there were no commercial fertilizers, few pesticides and a lot of attention to detail and the crop. There was no mono culture in these gardens!

The head gardener was one of the highest seniority staff members on the estate, and he was tasked with producing all of the food needed by the estate-- year round.

I have enjoyed the program, so I will organize links to the videos on you tube. I would caution you to beware of inappropriate content in the "suggested" videos area. It is sad to have good resources thrown in with the filth of a morals lacking society. Click the video link, and go full screen as soon as you can, and of course skip the ads if they are thrust upon you.

Note as of Jan 21, 2013, these video links are not working. The interview with Thoday is working which would give you an idea about the program.

April
May (first 10 mins)
July part 1, July part 2
September part 1September part 2
November

Wednesday, September 19, 2012

Green Beans

No garden is complete without an ample selection of legumes. That feels like a bold statement, but there you have it-- the truth! Back in May, I wrote about planting beans, and this post is a followup toward the end of the season.

Legumes are like God sent packets of goodness and nutrition. These plants not only produce healthful food, but they add nitrogen to the soil. Growing beans is like a cover crop and you get a crop out of the process! We need to focus on plants that can do this kind of wonder service in our gardens.

Protein has been the nutritional poster child for the meat industry, and scientific studies are bringing into question our need for the copious amounts of protein on our diets. That said, some protein surely is needed, and legumes are the answer for vegetarians. Legume seeds contain lots of protein. Think about the diet of a farm family like ours who desire to eat primarily from what you grow in your garden. Potatoes are a great source of starch (carbohydrates). Green leafy vegetables are power packed with nutrients, but not much carbs or protein. You need the legumes to fill in the protein part of your vegetarian diet. So you need them, and your garden needs them as well.

Many legume crops can build associations with nitrogen fixing bacteria. This combination of plant and bacteria produces more available nitrogen than is used, and results in a net plus of nitrogen to the soil. I have seen bacteria innoculants that spread the bacteria needed for this association. If you till up a new garden plot, it may be that the needed bacteria for this association may not be present, and then you would miss out on this beneficial activity for the bean plant as well as the improvement of the soil. I don't know a lot about this topic, but there are apparently a variety of strains of bacteria, and a strain of bacteria may do best with a specific legume plant. IE, if you want to add innoculant to a new field prepared for legumes, you should add the one suited for the plant you intend to grow.


2012 Garden Experience

We planted 4 rows of 80 feet each of bush beans, and 2 rows of 80 feet each of pole beans. This has been the year of pole beans, and I am a convert! Yes, I know all about the work required to get the beans up on a structure, but it is well worth the effort. The pole beans have really produced this summer, and the length of production is much longer than the bush bean. My developing opinion is that the bush bean like the Blue Lake is cultured for mass production where there is a single heavy set of beans, and then the field is mechanically harvested and the plants tilled under. Seems a waste but this is how the bush beans seem to grow. One large heavy setting, and not a long stable supply.

Our experience this year has reminded us that the bush beans will start producing earlier than the pole beans. I think the ideal for our family for the future would be 2 rows of bush and 2 rows of pole. Perhaps 4 rows of pole if we want to try to sell some beans, but beans are labor intensive. It takes some time to pick them, and compared to the machine harvested, completely automated process, there is no way to compete in price. Just an aside, but food price is way under market labor values. The only way to compete with the super market is to grow organic and have a way to mark up the price, and then only if you sell directly to the public. I will save this thread for a future muse.

Our method of supporting pole beans is worth sharing. We have tried two methods, and both have done well for us. In both methods, we drove T-posts into the ground every 8 feet down the row. Get the longest T-posts you can buy. We needed a ladder to get high enough to pound them in the ground. The first method is that we tied a metal wire to the top of the row of T-posts, and planted the beans below in the row. As the plants developed, we tied descender string hanging down to the plant for it to climb upon. This makes columns of bean plants. The second method we tried started with the same T-post foundation, but on which we supported a netting material of plastic with 6 inch squares. In this example, we have found the plants are actually spreading out more, and making a leaf wall rather than a series of columns. I actually like the netting idea fairly well.

A friend uses the netting method year after year. When I asked about clean up, they said that they do not try to remove the old vines. In the fall, the take the netting down, and roll it into a roll. Then they leave it outside to decompose the tendrils and vines that have attached to the netting. By spring they report there is some, but not a lot of residue, and that what is left is not a problem for the next years plants to grow on. Year upon year, the rotting off of old vines leads to a stable and acceptable quantity of residue. This sounds a lot better than trying to clean all the vines off the netting! We will give this method a trial this winter.

This year we have been canning beans. For canning of low acid vegetables, you will need a pressure cooker. For our locale, 25 mins at 10 lbs pressure for quart jars is suggested. If you are above 1000 feet elevation, there is an altitude correction, so be sure to take this into account. For canning, it is suggested that you let the beans develop more of the seeds for improving the protein content of the canned bean. Wait will the beans are lumpy with the developing seed in the pod, but pick the bean before the pod becomes leathery. De-string the bean and snap to a size you want for canning. I am looking forward to some beans through the winter!


Wednesday, July 4, 2012

Recipe: Squash Patties

In the summer, we joke that friends at church start locking their car so their back seat is not filled with squash. Once squash comes on for harvest, it comes on all at once!

We get a lot of squash mid summer. We have found the perfect way to preserve squash and use it throughout the year. We make squash patties. This is like a meat substitute patty for sandwiches. We have also had the patties stacked on edge covered by a sauce as an entree.

You can make up these patties in the summer, and freeze them. We have done this with success, but have found that over time the patties can become freezer dried, and the texture is not as good as fresh. What we now do is shred the squash, and freeze the shreds in freezer bags. Then we make up the patties fresh as needed.

Zucchini Patties Recipe:
  • 9 cups grated squash (zucchini, yellow or zucchino Rampicante)
  • 4-6 cups quick oats
  • 10 tsp McKays Chicken style seasoning
  • 2-3 tsp salt
  • 1/4 cup Nutritional Yeast
  • 4 Onions, chopped
  • 2 cups cashews 
  • 1-3 cups bread crumbs or croutons
Mix ingredients together. Bake on skillet on Medium High heat and brown lightly on each side.
1/3 cup batter = small patty
1/2 cup batter = Large patty

May chop onions, bread crumbs and nuts in food processor or blender. Patties freeze well.

Variation:

Substitute for Cashews and Bread crumbs (makes a Gluten Free recipe)
  • 1 to 1 1/2 cup Rice Flour (Blend dry uncooked Brown Rice until fine)
  • 1/2 cup Flax Seeds (Blend dry to flour consistency)

Thursday, May 3, 2012

Beans

Beans are a favorite staple on our homestead. You can pick them young and tender for steaming and fresh eating, or let them mature in the bean pod to a dried bean which can be easily stored and cooked for consumption. Legumes have the benefit of not only being healthy for us to eat, but they can fix nitrogen with the help of bacteria in nodules on their roots.


Nutrition

Beans are high protein food. As green beans, they are perfect fresh, canned or frozen. If you let the beans dry in the pod, they store will as seeds all winter.


Planting

Plant beans two weeks before your areas last frost date, and transplant them to soil one week after your last frost date. Then sow a new patch of beans every 2 weeks for a consistent and long lasting harvest through the summer. Beans generally take 50-60 days to mature, so take this into consideration as you approach the fall season.

Sow bush bean seeds 1 1/2" deep, and 12" apart. Sow pole beans along a climbing trellis.

In our area, there are a host of reasons we don't get good success with planting directly in the field. We have  had good success planting inside, and transplanting the established plant into the field. Soil temperature is a key factor, in that beans do not germinate well when the soil is below 50 degrees F. If sowing into the field, make sure your soil temperatures have risen above 50.


Harvesting and food preservation

For fresh beans, pick them while tender, and eat them as soon after picking as possible. They are simply outstanding! If you are going to freeze the beans, soak them briefly in boiling water (called blanching) to stop the enzyme activity from lowering the bean taste and quality. Cool as quickly as possible, such as dipping into ice water, and then package for freezing. We regularly use 1 gallon freezer bags, and as we set the bag into the freezer, I try to bunch the beans into two sections of the bag, so that we can easily extract 1/2 a gallon for a specific meal without having to thaw the entire bag.


Seed saving

Most beans are self fertilizing, and are very easy to save seed from. Bees can be pollinators, and for seed purity it is suggested that you exclude bees or separate crops by one mile. On select plants that you want to save seed from, allow the pod to fully mature, or be over ripe to a tough and dry pod. Then harvest the pods, and shell the beans for storage. Make sure the beans are well dried before over winter storage. It is expected that beans will remain viable for 4 years.


Varieties we are planting in 2012
  • Blue lake - bush bean 
  • McCaslan - pole bean 
  • Bell's Corn Bean - pole bean * 
  • Gregory's favorite lima  - pole bean *
*Non commercial varieties.


Resources

Sunday, April 22, 2012

Onions

Onions with potatoes are a wonderful fit, both in the skillet and in the garden. We have tried yellow, white and red onions, and it seems we always come back for the yellow ones. They store better than whites or reds, and storage is a big factor for us, since we cant eat hundreds of pounds of unions all at one time.

Last year we started from onion sets, which are small onion bulbs, and had over 50% make seed pods. This year I am trying onion plants in stead. The theory here is that it takes a lot of energy to make the seed pod, and if this can be avoided, you will have larger production toward the onion bulb. Another factor is that the seed stalk rising from the onion causes it to spoil faster. Since onions go to seed on the second year, if the onion set is too large, or undergoes unusual temperature extremes, it may think the planting is the second year, and go to seed. I am hoping that using plants will completely solve the issue this year.

When onions are first planted, their growth is concentrated on new roots and green leaves or tops. The onion will first form a top and then when a specific combination of daylight, darkness, and temperature is reached, bulb formation starts.

"The size of the onion bulb is dependent upon the number and size of the green leaves or tops at the time of bulb maturity. For each leaf there will be a ring of onion; the larger the leaf, the larger the ring will be. The onion will first form a top and then, depending on the onion variety and length of daylight, start to form the bulb. Onions are characterized by day length; "long-day" onion varieties will quit forming tops and begin to form bulbs when the daylength reaches 14 to 16 hours while "short-day" onions will start making bulbs much earlier in the year when there are only 10 to 12 hours of daylight. A general rule of them is that "long-day" onions do better in northern states (north of 36th parallel) while "short-day" onions do better in states south of that line." (web)


Planting suggestions

Onion plants are hardy and can withstand temperatures as low as 20 degrees F. They should be set out 4 to 6 weeks prior to the date of the last average spring freeze. Set plants out approximately one inch deep with a 4 to 6 inch spacing. We set rows in a bed, and space the rows 8 to 12 inches apart. We mark out a 4 foot bed, and have 4 rows in the bed.

Onions are not very good at supressing weed growth, and regular weeding will be needed to protect your crop yield. We have tried adding leaf compost and another year straw to the bed. These items help, but hand weeding seem a needed action on our farm. Always hand-weed any weeds close to your onions as they are easily damaged by garden tools.


Companion plants

Onions do well in companion planting, assisting nightshades and brassicas. If you are having pest pressure on the onions themselves, carrots can help confuse attacking insects. (web)


Resources
  • Onion information (web)

Thursday, April 12, 2012

Strawberries

Strawberries are a great food for your garden. Not only are they easy to grow but they don't require a lot of space. And the strawberries are oh so tasty. I suggest you plant varieties that work well for other area farmers, as some varieties will not grow well in all areas.


Soil requirements and planting

Strawberries love a soil pH in the range of 5.5 to 6.5. Work the planting bed into a fine fluff, and mark out the plant placement.

For a matted row bed, set the plants 18 - 24 inches apart along the row. Space the rows 3 1/2 to 4 feet apart. We leave a 2 foot walking path which we keep clear of spreading strawberry plants with a rototiller.


Plant care

Strawberries have shallow roots, and they should not be allowed to dry out. They need 1-2 inches of water a week, especially when fruit is setting.

Mulching is often placed in the spring and again in the fall after the first freeze to prevent heaving of the plants out of the soil.


Varieties we have chosen to plant in 2012

Ozark Beauty   50 plants
Honeoye          50 plants
Earliglow          50 plants


Resources

Friday, March 2, 2012

Book: Root Cellaring

The best book on Root Cellaring I have read is: Root Cellaring by Mike and Nancy Bubel. I like where the author starts in the first chapter, in a discussion of what crops to grow for winter storage. Having a plan for what you plan to store in your root cellar will assure success.

I especially enjoyed chapter 2, which not only suggest "beets" but lists beet varieties that have proven good keepers, and suggested suppliers for that variety of beets. There is a list of several varieties for each food type.

In the last part of the book, there are some excellent drawings and photos of root cellars. There are ample notes, stories and ideas to help guide in your own cellar project.

I came away after reading the book being sold on our need for a root cellar. I think it is an excellent way to remove dependence on electricity to keep food cool and preserved for a longer time period. Before you start a cellar project, I would suggest your reading this book. There is enough reference material in it, I would suggest you purchase it.


Following are the Book Contents:

Chapter 1         Planting Crops for Fall Storage
Chapter 2         Good Keepers
Chapter 3         Growers Keepers: How to raise top-quality storage vegetables
Chapter 4         How to Harvest and Prepare Vegetables for Storage
Chapter 5         Life After Picking
Chapter 6         Spoilage
Chapter 7         Food Value in Winter Keepers
Chapter 8         Vegetables
Chapter 9         Fruits
Chapter 10       The Underground Garden
Chapter 11       Other Good Foods to Keep in Natural Cold Storage
Chapter 12       Trenches, Keeping-Closets, and Other Vegetable and Fruit Hideaways
Chapter 13       Planning Your Root Cellar
Chapter 14       Keeping Things Humming in the Root Cellar
Chapter 15       The Basement Root Cellar
Chapter 16       The Excavated Root Cellar
Chapter 17       Root Cellaring Experiences
Chapter 18       Cooking Sturdy Keepers

Tuesday, February 28, 2012

Greenhouses

A greenhouse is a weather protecting structure for your garden plants. It could be as simple as a cold frame (a low wooden box covered with glass) to a tube frame, plastic covered high tunnel, to a stud framed glass house. With a greenhouse it is easy to extend your growing season a month earlier in spring, and a month later in fall. Depending on your greenhouse, and your crops, you can extend your harvest into winter.


Uses
  • Seed starter greenhouse
  • Forth season production
  • Flower / cash production

Important concepts
  • base temperature
  • optimum temperature
  • temperature integration
  • photo period
  • irradiance
  • poly sun degradation

Design considerations

The ground warms and cools with the surrounding temperatures. As we cover the ground with the greenhouse, the earth under the house can offer stored heat. Utilize this heat battery to your advantage. In sunny areas, the solar input of energy will be more significant than earth heat radiation. If you are using glass for your glazing, then you will want to orient the angle of the glass to the perpendicular to the elevation of the sun during the winter. This angle is your latitude at the winter solstice. You want the angle of incidence to be low so that most of the light will completely penetrate the glass, and not loose some of it through reflection.

Using a GPS, property map or Google Earth, determine the latitude of your location. Add between 10 and 20 degrees to your site latitude to determine the orientation of your greenhouse glazing. For instance, if your latitude is 35 degrees north, your glazing should be angled at a 45 to 55 degree angle.


Heat storage / sources
  • Water stored inside the greenhouse, in black containers to absorb as much daytime heat as possible. This heat would then be radiated at night to moderate temperatures. One friend of ours has used 55 gallon metal drums full of water in the center of their greenhouse with planter boxes on top of the drums. Another has water containers on the backside of the greenhouse. Another greenhouse we reviewed had a small pool of water within and under the floor.
  • Rock mass as a thermal heat sink. Another greenhouse we have reviewed has a rock wall on the north side of the lean-to greenhouse. Another example is a solarium made with massive amounts of rock as thermal mass.
  • Earth-air tubes are tubes buried deep in the ground and air passed through the tube to take the constant heat from the ground into the air and then into the greenhouse. Electricity is needed to move the air.
  • Below ground radiant heat, with heat being added from a boiler or solar heater.
  • Wood stove heater within the greenhouse.
  • Greenhouse lowered into the surrounding ground, to encourage more earth-heat coupling.
  • Cold sink trench within the greenhouse to hold coldest air down within the soil.

Resources

Wednesday, February 22, 2012

Spring Planting

The days are ticking down toward spring planting. This is exciting! I would like to outline the steps our farm undergoes in late February to get ready for spring planting. We start planting seeds indoors on the week of March 8th. This is based on our zip codes last frost date. We generally have our last frost around May 3. We don't set out tender plants till May 10 (and then look at the 10 day forecast just to be sure). Remember that frosts can sneak up on you on clear sky nights without weather forecast warning. I have even seen light frost with 10 degrees safety margin in the forecast.

If you have not yet obtained your seeds, now is the time! Following are the seed companies we have used over the past several years:

It is also time to setup your start trays in which you will start your transplants. We use recycled 4x8 foot drop ceiling light fixtures (4 bulbs), placed on 4x4 inch blocks which lifts the light fixtures just above the trays. The light should be as close to the plant as possible to give the maximum light exposure. If your plants are tall and leggy, they do not have enough light.

We have used grow heating mats in the past. I found that if I cover the light fixture with a blanket, the heat of the light fixture warms the under contents adequately as measured with a soil probe thermometer. Be careful if you try this. Make sure you don't have too much heat creating a fire danger. I set up several test configurations on my seed starting setup, and measured the temperatures obtained. The variables: no light or added heat, light on, heating pad and blanket cover. All of these measures were taken on the same light unit, at a room temperature of 60-70 degrees. In my testing, I found:
  1. Soil at room temp, no light or heat added    60 deg
  2. Heating pad on only                                    80 deg
  3. Heating pad on covered with a blanket       86 deg
  4. Light on only                                               62 deg
  5. Light on covered with a blanket                  82 deg
  6. Light on + heating pad on                           84 deg
  7. Light on + heating pad on + blanket            96 deg

When we plant, we want to remember the goal is a progressive harvest, and this means not planting all of the cabbage for a single harvest, but progressive plantings. Elliot Coleman, in the book Four Seasons Harvest, suggests this schedule on page 88:
  • Beans - every 2 weeks
  • Beets - every 2 weeks
  • Carrots - every 2 weeks
  • Celery - twice: early spring, and 3 months before fall frost
  • Corn - every 2 - 3 weeks (some varieties vary in length so keep this in mind)
  • Cucumbers - two or three plantings: at month intervals
  • Lettuce and greens - every week or two, extending the entire season
  • Peas - twice: early spring and midsummer
  • Radishes - every week
  • Spinach - every week during spring and late summer
  • Summer squash - two or three plantings at month intervals

We have created charts for planting dates based on the projected last frost date in spring. I will describe how we have constructed our chart, and then you can modify the specific dates based on your last frost date. I will only list the first planting of a variety here, though remember the suggested schedule above related to progressive plantings.

In the chronology below, the word "start" means seeding a transplant tray to start seedlings in side under lights. "Transplant to soil" means taking some of these seedlings and transplanting these into their final location in the garden. "Plant in soil" means we seed directly to the garden. We do not notate seedling transplants to larger pots indoors, but in several cases, this is needed. We have eggplant inside a long time before we set it out, as an example. We largest pot we use inside is 1 gallon.

Eight weeks before last frost date (Mar 8), we start the cold crops: cabbage, cauliflower, kale and lettuce.
Seven weeks before last frost date (Mar 15), we start egg plant and broccoli. Eggplant is a slow growing, warm loving plant, but it needs a long growing time to get it to harvest, so we start some really early. Onions can be planted in soil.
Six weeks before last frost date (Mar 22), we plant in soil: arugula, spinach and peas. 
Five weeks before last frost date (Mar 29), we start endive and turnip. We transplant to soil: cabbage, cauliflower. Plant in soil: radishes. 
Four weeks before last frost date (Apr 5), we start peppers and tomatoes. We plant in soil: beets and potatoes.
Three weeks before last frost date (Apr 12), we transplant to the soil: broccoli and lettuce.
Two weeks before last frost date (Apr 19), we start beans. We plant in soil carrots and chard.
One week before last frost date (Apr 26), we start cucumbers, summer squash and melons.
Week of last frost date (May 3), we start okra, another warm loving plant that we will transplant to soil in 4 weeks.
One week post frost date (May 10), we start pumpkins. We transplant to soil the beans. We plant corn and a successive planting of beans into soil.
Two weeks post frost date (May 17), we transplant to soil cucumbers, summer squash and melons.
Three weeks post frost date (May 24), we transplant to soil peppers and tomatoes.
Four weeks post frost date (May 31), we transplant to soil the okra and pumpkins.

While the seedlings or transplants are being established in soil, more diligent effort with weeding will be required. As soon as the plants are large enough to withstand some side dressing of mulch, apply this and add to it as you are able. This will do wonders for controlling your weeks, and lessening your hoeing work.


Soil

I wanted to have you think about the soil you use for your starter trays. We have used commercial starting mixes with good results in the past. Some references talk about using pasteurized soil, where harmful bacteria have been killed, but not so hot that the organic material is turned to charcoal. Be aware that if you use untreated garden soil, you may have more problems with damping off when used in a greenhouse or starter house application. I don't have a lot of experience pro or con, but pass on the word of caution from others.


Hardening off

When plants are started inside or in a greenhouse, the plants are tender. If placed directly outside, they may be burned and die. In our experience there are two key issues: light intensity and stem strength. New plants that have been inside have been shielded from the full intensity of the sun, and if the plant is directly transplanted outside with no hardening, the plant may be set back by leaf burn. Stem strength is also an issue, as indoors the plants are not subjected to wind stress, and stem strength develops based on need. I have sometimes set an oscillating fan to blow across the plant trays. I set plants out in the middle of the spring day that is sunny and warm for a limited amount of time. This time I increase an hour a day leading up to the date we transplant to soil.


Transplanting

When you are ready to transplant to soil, you will want to mark out the transplant bed in advance. We use a transplant trowel which is perfectly shaped to open the soil to receive the new plant. Take care to adjust the roots and rootlets to prevent root ball. Gently firm the soil around the plant, as this will improve capillary action to bring water to the roots. Generally you will want to plant the seedling at the same soil depth as they were grown prior. An exception is tomatoes, which will root out of a buried stem. There may be benefit to transplanting to the base of the first leaves.


Resources

Sunday, January 22, 2012

Common Sense Nutrition Rules

In my study of nutrition and food, I have come face to face with a startling fact. Americans eat very poorly. In an article I will post tomorrow explaining the value of organic foods, I have come to the realization that organic is not the prime issue of concern in the American diet. Our young people are getting far more calories from soft drinks than from all their combined vegetable consumption (web). To argue that the few vegetables that they eat be organic is missing the point of eating healthfully.

So what are we eating rather than food? What is an edible food like substance? The classic example is the Twinkie. It can sit on the shelf and not rot or mold and hold its texture for years. It seems the fungi and bacteria have better sense as to what is good food than most Americans!


So here are some simple diet rules:
  1. Eat food, not too much, mostly plants.
  2. Don't eat anything your great grandmother wouldn't recognize as food.
  3. Don’t eat anything with more than five ingredients, or ingredients you can't pronounce.
  4. Stay out of the middle of the supermarket; shop on the perimeter of the store. Real food tends to be on the outer edge of the store near the loading docks, where it can be replaced with fresh foods when it goes bad.
  5. Don't eat anything that won't eventually rot. "There are exceptions -- honey -- but as a rule, things like Twinkies that never go bad aren't food," Pollan says.
  6. Always leave the table a little hungry.
  7. Enjoy meals with the people you love.
  8. Don't buy food where you buy your gasoline. (rule 1-8 from web)
  9. Don't purchase a cereal that will color the milk. (video)
  10. The whiter the bread, the sooner you'l be dead. (video)
  11. Cook for yourself, it's going to be healthier than what you're buying. (web and video)
  12. Don't buy a food that is advertised on TV. (video)
  13. Wash hands and food with running water.
  14. Don't eat foods that once had a face. 

Do you have a favorite rule that helps your family eat healthfully?


Resources:

Monday, December 26, 2011

Diversity

When you are planning your farm, you need to think about diversity. Mono crop farming is not being self reliant. You are growing one crop, in the desire to sell that crop and then purchase what you need. While I don't suggest the goal is financial isolation, the model of years past was not mono crop farming. It is not sustainable or self-supportive if one crop fails, or you fail to find a buyer for your one crop. The idea of independence is harmonious with diversity. Farmers of the past may have had a cash crop, but they also had a personal garden to support the variety of food needs for their families.

Diversity is good for being able to supply all of your home needs. It allows you to offer this same diverse spread of food for your customers. It protects against a complete loss with one crop failure. Diversity allows more complete crop rotation, in mini-rotation cycles, and ultimately aids in soil-development.

Currently, we are participating in four areas of farm diversity as self support and cash crop income. Our current list is: 1) full spectrum vegetable crops, 2) perennial fruit crops, 3) plant propagation and 4) animals. Items we could add in the future: medicinal herbs, essential oils, candles, wood fuel, fiber arts, crafts, flowers (fresh or dried), CSA/ASC, farmers markets, road side vegetable stand, and I am sure the list could continue to even more diversity.


Vegetable crops: are naturally diverse, and we want to offer a balanced diet with our produce. Garden development has a lot of pre-work, in amending and healing your soil to be balanced, complete and mineral rich, good organic matter content, etc. Some vegetables will grow best in your area, and we suggest planning your balance from what your climate and area supports best. For homestead use, you will want to plan on your food preservation and storage capacity. For public sales, you will want to find the best interface in your area. Some venues to consider: road-side stand, CSA/ASC, restaurant contracts, grocery wholesale, and/or farmers market. You can consider the time of picking, and quickly chilling food in the field to preserve freshness.

Some farmers we talk with enjoy the CSA/ASC repeated contacts with their customers, while others find the weekly schedule rigorous to fulfill a weekly demand. While I am suggesting diversity, you need to start only what you can handle, and this likely means you need to ramp up what ever production level you want to commit to in a sane and family friendly way.


Perennial fruit crops: these range from easy to hard depending on the types of fruit to be grown, and the climate and pest pressures around your farm. In Michigan, it was common to hear of some fruit crop failure each year.

The list would include: apples, pears, peaches, apricots, plums, pomegranates, nut trees, grapes, raspberries, black berries, blue berries, strawberries, etc. The advantage of the perennial fruits is that they are generally more established, and require less frequent intensive care as compared to vegetable annuals. In some areas, fruit pests are a problem, and bringing organic fruit to market is a challenge. We need to educate consumers that surface imperfections are not the problem, rather insecticide drenched fruit is the problem.

Customer contact could be similar to the vegetable markets. I have seen one organic tree farm offer a "rent a tree CSA" in which you could purchase the produce to be harvested (and even harvest it yourself) from one specific tree. This makes a direct connection between the tree and the customer, which is very satisfying.


Plant propagation: is working with trees, bushes, ornamentals, etc, where you are multiplying a plant. The focus could be on developing stock for your own orchard, or to sell as a cash crop. It can still be diversified but time is the key. Taking cuttings, allowing them to root, grafting if needed, growing to sell-able age, will in total be several years.

Find markets for plants, and focus on what these markets need. Plan to offer your product at a good price when entering a new market, but establish being local to your advantage. Avoid the rush to the bottom when it comes to price. You could sell retail to the public, and consider mail order options as well. I would think that wholesale to a store would provide more volume, especially if you are in a very remote or rural location.


Animals: are a long standing tradition for historic farms. Farm animals were used to assist with farm work, like oxen and horses to production animals such as chickens and bees. There may be interest in milk or hair products (fiber arts) from various animals. Some animals would require significant infrastructure and tools, such as dairy barns, and milk processing facilities, or bee hives and tools. Expand as your knowledge can afford and as the Lord opens the way.


So, how can you diversity? Consider the options available to you, and the income sources that may avail you a living and support your budget. I encourage diversity as long as you can effectively give adequate attention to the existing operation. The word for today: diversity.