Showing posts with label recipes. Show all posts

Thursday, August 8, 2013

Recipe: Ketchup

We want to eat home processed foods as much as possible. We want to avoid industrial and chemical processed foods as we are able, so we have started experimenting with creating our own condiments: pickles, ketchup, mayonnaise, etc. We are posting our recipes and experiences for others to stand on our shoulders, and see if together we can come up with something even better!

We prefer to not use vinegar in our cooking. We don't like the taste and I am dubious about the health claims touted about its use. It is created from spoilage, and I don't think rotted food or resulting products need to be a part of our diet. Just my view, I have nothing based in science to back this up.

We do not use a lot of ketchup, but it is nice on baked potatoes and I put a dab on a sandwich. So how to do you make home-made ketchup? Well, I thought it would be easy, but it is not as easy as you would think, especially if you are looking to nix the vinegar.

I tried making ketchup starting with several gallons of tomato puree boiled down to tomato paste. To be completely honest, I started adding ingredients against Sunshine's suggestions, and then I would add a bit more salt to cover the sugar, and so forth. You likely have gotten the idea that it came out a bit stronger than I prefer. I plan to start over with our recipes. Following are four recipes that a close friend shared with us. I hope to try them all, and if possible improve on them. My goal is to end up with a recipe that calls for raw tomatoes rather than tomato juice or paste as referenced in some of these recipes.

Here are the recipes for your review:


Ketchup - Mrs. G. (preferred by our friend who offered these recipes)

6 oz Tomato paste
1 tsp salt
3 Tbsp olive oil
3 Tbsp lemon juice
2 Tbsp honey
1/2 tsp garlic powder or 1 clove fresh
1 tsp onion powder
1/2-3/4 cup water

Place all ingredients in container and stir well
Chill


Ketchup - Uncle George

Tomato Juice. 1/2 cup
Tomato Paste. 1/2 cup
Onion pwd. 1/8 tsp
Lemon jc, fresh. 1/3 cup
Brown Sugar 3. tbsp
Salt. 1 tsp
Garlic powder. 1/16 tsp
Coriander. 1/16 tsp
Flavored Season salt. 1/2 tsp
Blend above all together in blender.

Instant clear gel. 1tsp. Add to blender while it is running.


A garden vegetarian sandwich in a pita.
Ketchup- Mrs. B.

2 cups tomato sauce
1-6oz can tomato paste
1/4 cup sweetener
2 1/2 Tbsp lemon juice
2 Tbsp Braggs
1 1/2 tsp salt
1/2 tsp celery salt
1/2 tsp basil

Blend all ingredients together until smooth.
Place in saucepan. Bring to boil and simmer 20 minutes stirring occasionally.
May be frozen.


Ketchup - Mrs. P.

6 oz tomato paste
6 oz water
1 Tbsp lemon juice
1 tsp sucanat
1/2 tsp salt
1 tsp onion powder
1 tsp basil
1/2 tap oregano
1/4 tsp garlic

Blend well.


Another attempt: (2013)

Well, it is a new harvest year, and time to experiment again with home-made ketchup. My goal is to start with raw tomatoes and not use store purchased tomato paste. Today we started with Roma tomatoes blended smooth, and measured out 4 cups of raw puree.

We boiled down the puree in a large sauce pan to tomato paste. (Take care not to burn it!) I am guessing we ended up with around 1 3/4 cups of tomato paste.

To the tomato paste we added:
  • 1 Tbsp sugar
  • 1 Tbsp lemon juice
  • 1 1/2 tsp salt
  • 1/2 tsp celery salt
  • 1/2 tsp brags aminos
  • 1 tsp Italitan seasoning
  • 1/4 tsp onion powder
  • 1/4 tsp garlic powder

Our testimony on this batch is that the entire batch was finished off before the end of one meal. (See pic above as proof. :) I think the mixture had slightly more salt than needed. Also I am not sure the Italian seasoning did much for the mixture. I will try removing it from the next batch.


Yet another try:

Emboldened by the success of this morning, I have enlarged the batch, and used some fresh ingredients:
  • 12 cups tomato puree
  • 3 Tbsp sugar
  • 3 Tbsp lemon juice
  • 1 Tbsp salt
  • 1 tsp celery salt
  • 1 tsp brags aminos
  • 1 Tbsp fresh onion (blend with tomatoes)
  • 1 medium garlic clove (blend with tomatoes)


Thursday, January 31, 2013

Jar Spouts

A few posts ago we talked about how Sunshine has been making soymilk from raw soy beans, and that process has really been working well for our family. We are sure we have paid for the machine already, and we like being able produce our own soymilk, which is a daily food item for our family.

We are hesitant to put hot liquids into plastics because of the potential of leaching of plastic chemicals into the food, and therefore into our bodies. For this reason, we have been searching for a glass container which would hold an ample supply of soymilk. We purchased a glass pitcher from Amazon, but found the spout not properly crafted for leak-less pour when the pitcher was completely full. It would do fine with the pitcher about 1/2 full, where the angle of the spout was ideal. Until trying the pitcher for myself I was not able to understand how some reviewers would complain about the pouring and others would say it did just fine.

I thought I would share with you are current solution. We found some screw on lids for normal canning jars. The lid pours well no matter how full the jar, and we have located small and large mouth lids. This has allowed us to use the 2 quart jars for our soymilk, which is an ideal size for our volume of use. I took a picture of these lids (note the gray lids with spouts while the white lids are solid) so you could get an idea of what we found. Here is a link to purchase the small mouth lids. These worked so well, we then ordered the large mouth lids as well.

We have found these lids are just what we have been looking for, and have been working well for a variety of liquid storage needs.

Thursday, January 3, 2013

Vegi Sour Cream

Sunshine is always on the look out for healthy eating ideas. And wow! she is a good cook. She recently produced a new recipe that ranked tops with all our family taste testers. (Some of whom have very discriminating tastes.) The creation? Vegetable based Sour Cream. She had in mind some other spread recipes as ideas, and made this recipe on her own. It is a keeper!

Some may wonder, why go to the trouble to make a Sour Cream from vegetable sources? So let's delve into  the topic of health for just a moment.

Animal products, specifically milk as in this post, contain a significant amount of fat. Fat is one of the features of milk making it so versatile. Think about the progression of concentration in this list: whole milk (3%), sour cream (20%), heavy cream (40%), hard cheese (95%), butter (100%). There are variations of fat percentages in various product brands, but the numbers listed are representative.

It takes one gallon of milk to make a gallon of milk. (profound aye? well, follow on.)
It takes 8 gallons of milk to make a gallon of heavy cream.
It takes 21 gallons of milk to make a gallon of butter.

But along with that concentration of fat there is also the potential of concentration of other items which may be of concern. Let's say the cow has natural or artificial hormones excreted in the milk. These would be concentrated by the same percentages in the milk products produced. To purchase these concentrated products from the store opens yourself to all of the unknown dangers of a vast array of vectors. Any time we concentrate food products, we allow the potential for concentrations of poisons as well.

On top of the factors present in milk itself, we also have external contamination dangers from the modern food inc industry, where foods are consolidated and intermingled, and potentially cross contaminated. Buy local means to buy from a farmer or a retailer who has not had a lot of processing steps between you and the source! Better yet, grow your own!

So, gently stepping off my podium, I will proceed to invite you into our kitchen. Sunshine has a treat for you!

The recipe below does have a lot of fat calories via the oil in the recipe, and Sunshine will continue tweaking things to lower the fat content. This recipe provides you a low cost, vegetable source sour cream substitute.

Vegi Sour Cream by Sunshine:

Blend all ingredients together until smooth:
  • 2 boxes of MoriNu Tofu, extra firm (12.3 oz boxes)
  • 2/3 cup oil
  • 1/4 cup lemon juice
  • 1 tsp honey
  • 1 tsp salt
  • 1/4 tsp onion powder
  • 1/8 tsp garlic powder
  • 1/8 tsp apple cider vinegar
Thin with soymilk if needed.


Monday, September 17, 2012

Okra

Okra is a wonder plant. It is hardy, loves hot weather, will grow and put on a wonderful crop in the north, and does not require special handling or rich soils. We find it has very low pest pressure. These characteristics put this plant into our must grow category.

When I was in high school, I had the job of harvesting okra on a farm. Those plants were so spiny, that you would end up like a pin cushion after a session of picking the slender pods. The modern okra we have been planting is much improved from what I remember of those days long ago. Clemson Spineless is true to its name, and very productive.

Okra has reportedly been cultivated for thousands of years, and its origin is not sure. Some references claim northeast Africa. It is a hot loving plant, and this is evident when you try to start seeds in the soil. Where I live in the north, I have much better success starting okra in a warm, seed house environment. These seeds just don't want to germinate in cool soil. It takes several months of growth before the plants really get large and start to produce heavily. Starting them early indoors is an effective way to extend your harvest of this wonderful vegetable.

The okra plant has a beautiful flower, followed by a seed pod which grows and enlarges as it matures. As you pick the pods, you will get a feel for how large you like them. There comes a point in the pods maturity, where the cell wall of the pod becomes hard and fibrous. We like to harvest the pods before they get hard, and we find that the rage for picking is 4 to 6 inches in pod length.

Out of an 80 foot row of okra, we will harvest around 1/8 bu two times a week. That comes to around 6 meals a week with okra as a major dish of the meal. Okra has gotten a bad name because there are ways to fix okra which extenuate the perception of slime. I have not had boiled okra, and from what I hear, I may not try it. We do enjoy it as an addition to soups, but it would not be a major ingredient. Most often we cut the pods into small rounds, and saute them. In this form, they are very tasty, and can be included in a variety of entrees for a pleasant filler. We like to add some Lawry's Season Salt as we saute them.

At times I have wished for even more okra than we presently have. Perhaps I will consider two rows of 80 feet each next year! An experience from a local friend may be instructive. My friend planted four rows of okra, and on two of the rows, they added alfalfa fertilizer pellets. The rows that were fertilized did poorer than the two rows that had no amendments. This would have to be tested more to take it out of the fluke or hearsay labels, but my experience does seem to confirm that okra does not need high nutrient soil to thrive.

I hope you try some okra this next year. Do you want any of our fall seeds pods? Saving just one okra pod will yield around 50 seeds! We would love to share with you.

Wednesday, July 4, 2012

Recipe: Squash Patties

In the summer, we joke that friends at church start locking their car so their back seat is not filled with squash. Once squash comes on for harvest, it comes on all at once!

We get a lot of squash mid summer. We have found the perfect way to preserve squash and use it throughout the year. We make squash patties. This is like a meat substitute patty for sandwiches. We have also had the patties stacked on edge covered by a sauce as an entree.

You can make up these patties in the summer, and freeze them. We have done this with success, but have found that over time the patties can become freezer dried, and the texture is not as good as fresh. What we now do is shred the squash, and freeze the shreds in freezer bags. Then we make up the patties fresh as needed.

Zucchini Patties Recipe:
  • 9 cups grated squash (zucchini, yellow or zucchino Rampicante)
  • 4-6 cups quick oats
  • 10 tsp McKays Chicken style seasoning
  • 2-3 tsp salt
  • 1/4 cup Nutritional Yeast
  • 4 Onions, chopped
  • 2 cups cashews 
  • 1-3 cups bread crumbs or croutons
Mix ingredients together. Bake on skillet on Medium High heat and brown lightly on each side.
1/3 cup batter = small patty
1/2 cup batter = Large patty

May chop onions, bread crumbs and nuts in food processor or blender. Patties freeze well.

Variation:

Substitute for Cashews and Bread crumbs (makes a Gluten Free recipe)
  • 1 to 1 1/2 cup Rice Flour (Blend dry uncooked Brown Rice until fine)
  • 1/2 cup Flax Seeds (Blend dry to flour consistency)

Monday, February 13, 2012

Micro Greens & Sprouts

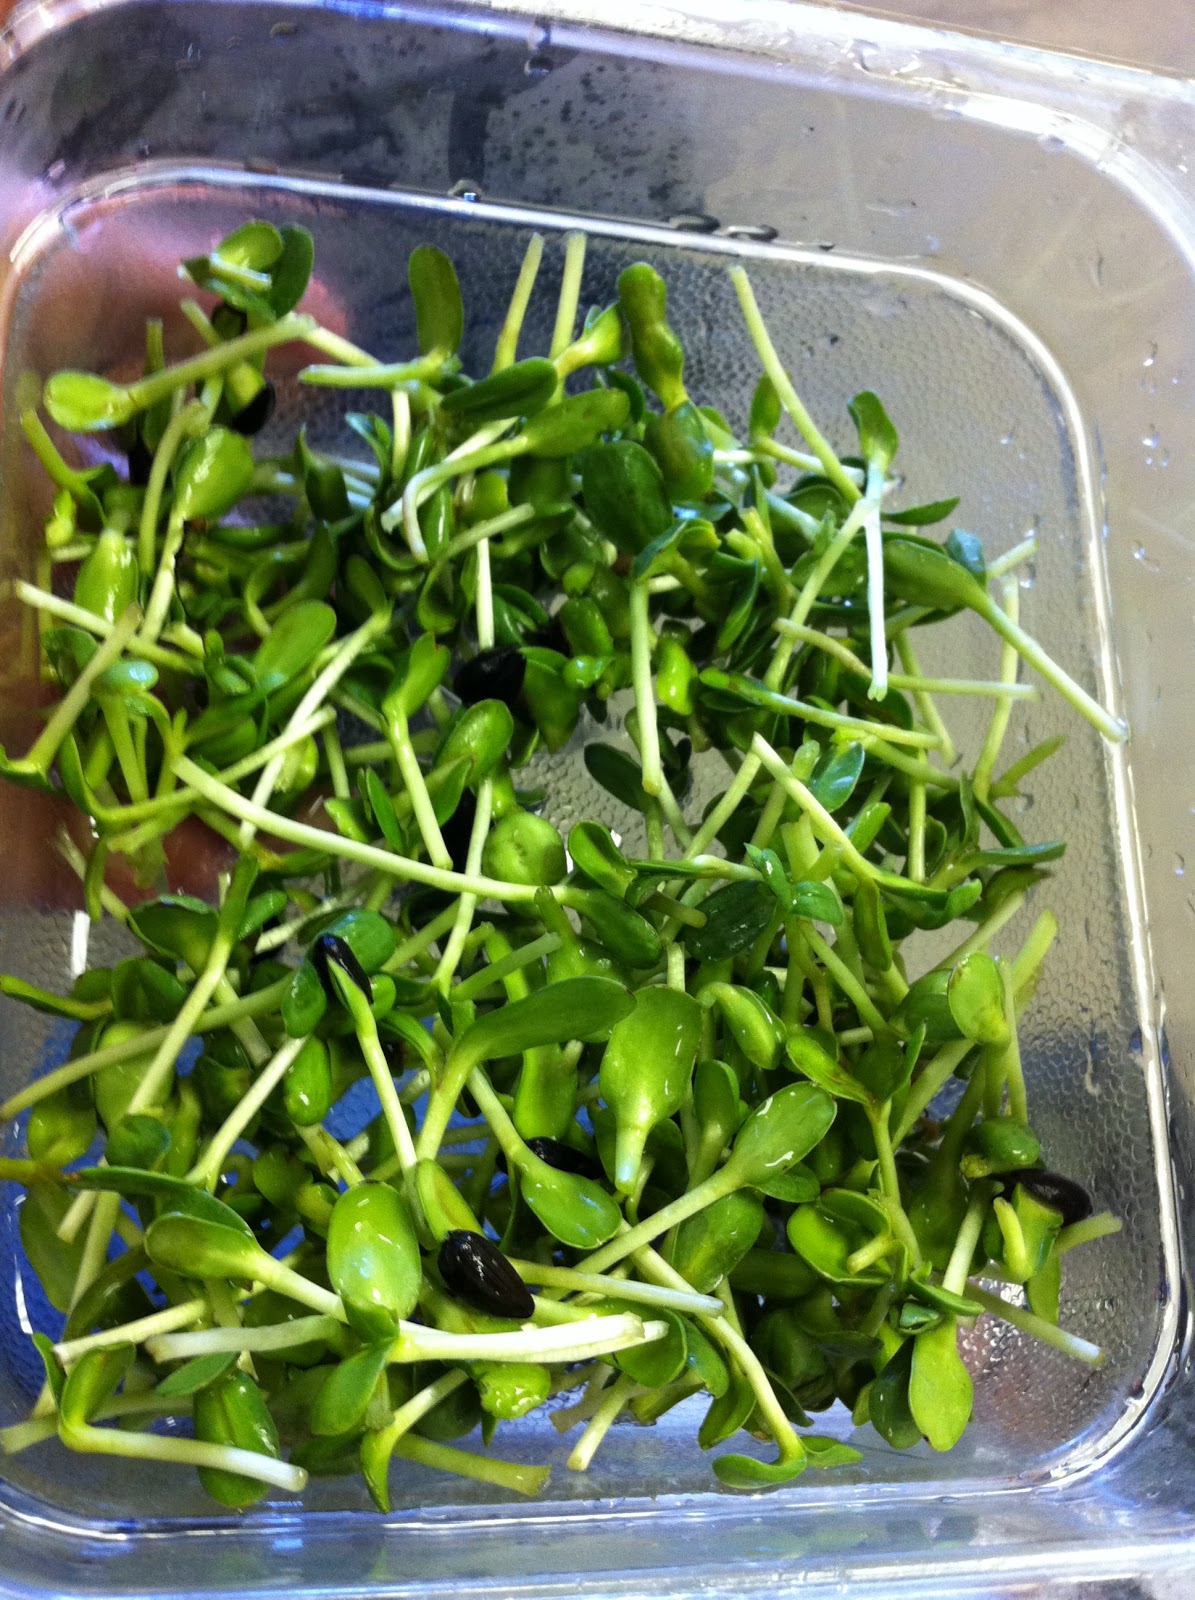
Microgreens are tiny leafed vegetables. Microgreens are just baby vegetable plants, used as greens. They are beyond sprouts stage, and are harvested when less than two inches tall. Some call them "vegetable confetti."

Commonly grown varieties of microgreens include: Amaranth, Arugula, Beets, Basil, Cabbage, Celery, Chard, Chervil, Cilantro, Cress, Fennel, Kale, Mustard, Parsley, Radish, and Sorrel. Several varieties can be mixed together to create combinations of tastes, textures and colors. The crops used for microgreens usually do not include lettuces because they are too delicate and wilt easily. Both baby greens and microgreens lack any legal definition. The terms "baby greens" and "microgreens" are marketing terms used to describe their respective categories.


Health Claims

There are many Internet sites that claim superior nutritional benefit from eating microgreens. As outlined in an article, Fresh Origins points out that most of these have not been backed up by scientific nutritional analysis. We need to be cautious about calling microgreens the next "wonder" food.


Why?

So why the interest in microgreens? For one the flavors of these small plants are almost explosive. You can enjoy a dazzling array of new flavors. Plants are at their absolute peak of flavor intensity at the microgreens stage of life.

The greens are easy to grow indoors, in a greenhouse or in a garden. Some refer to microgreens as the perfect counter-top gardening.

Chefs favor microgreens as a garnish, but these plants are versatile enough to be used as a sandwich topper, salad, in a soup or as a centerpiece to a main dish.


Growing Microgreens

Often microgreens are grown in trays with the seeds being dense enough to fill the tray with greens (as in the first image in this post). Many plants will grow fine with a mesh or fiber bedding and water. You can place around 2 cups of slightly acidic water in a tray with your seeds. Keep them in the dark for several days, and then expose them to light to green up for harvest.. A few plants do best with actual soil, such as sunflower, buckwheat, pea, cilantro and beet.

Various crops will be ready for microgreen harvest from 10 days to several weeks. You can experiment with the size of greens you prefer, and harvest as you desire. Since the plants will continue to grow, you have a range of sizes to choose from.

Sunflower, buckwheat, beet and pea all need to be pre-soaked in cold water.  Each should be soaked for 6 to 8 hours, except for beet seeds which should only be pre-soaked for an hour or two.

Amaranth, Bok Choi, and arugula do not like full sun. They do best with indirect light.


Sprouts

Sprouts are germinated seeds and are typically consumed as an entire plant (root, seed, and shoot), depending on the species. For example, sprouts from almond, pumpkin, and peanut reportedly have a preferred flavor when harvested prior to root development. Sprouts are legally defined, and have additional regulations concerning their production and marketing due to their relatively high risk of microbial contamination compared to other greens. Growers interested in producing sprouts for sale need to be aware of the risks and precautions, and oversight required by the FDA.


Resources

Sunday, February 12, 2012

Recipe: Curing Olives

If you have access to raw olives in your area, as we did when we lived in California, you should consider curing them yourself. The process is not all that hard, and quite fun to have buckets full of olives, rather than just a small can. We still have some treasured cans of home cured olives.

We have found that curing olives is easy. The suggested times are approximate, and if you go shorter or longer, the process is very forgiving. The times listed are for moving the process along efficiently. If you had to let the olives sit in a mixture hours longer, it really would not matter.

Uncured (raw) olives have a very strong, bitter taste. This can be soaked out with regular water changes over a months time. A much shorter method would be to immerse the olives in a lye solution, as described below. Take precautions when working with lye. Lye can cause burns. Wear chemical-resistant gloves and safety glasses whenever you're working with lye. The lye is a strong base, and nutralizes the raw olive acid. Once pH neurtal, you will want to infiltrate the olives with salt for taste. Then you can preserve the olives for later use.

It helps if you separate the olives into groups of similar size and ripeness. The black raw olives will cure a little faster than the green raw olives. Another benefit to sorting when the olives are raw is that the olives are easier to handle as firm and raw rather than after they are cured and soft.


Recipe
  1. Mix 4 T lye in each gallon of water. Be sure the lye is completely dissolved. Cover the olives with the lye solution. Stir occasionally to be sure the olives on the surface are completely cured. Let the olives soak for 48 hours.
  2. Pour off the lye solution and rinse the olives. I found the lye and the fat made soap suds when rinsed.
  3. Mix 2 T lye in each gallon of water, and again cover the olives with this solution. Stir occasionally. Let the olives soak for another 48 hours.
  4. Cut into a few olives to see if the lye has reached the pit. You can see the penetration of the lye as a color change in the flesh of the olive. If the penetration is not to the pit: rinse, and prepare a fresh lye solution as in step 3. Let the olives soak for 6 to 12 hours and test again.
  5. Rinse olives thoroughly for 24 to 48 hours by changing the water 4 times a day. This will wash out the lye and you can test to see if the lye is gone by tasting an olive. If there is a very little of the lye left, it will be washed out in the next few steps which adds salt to the olives.
  6. Mix 2 T salt per each gallon of water. Cover the olives and let them soak for 24 hours.
  7. Rinse well. Mix 3 T salt per each gallon of water. Cover the olives and let them soak for 24 hours.
  8. Rinse well. Mix 4 T salt per each gallon of water. Cover the olives and let them soak for 24 hours.
  9. Rinse well. Mix 5 T salt per each gallon of water. Cover the olives and let them soak for a final 24 hours.
At this point, the olives are cured, and ready to eat. You can refrigerate the olives and eat them fresh for several weeks. If you have more olives than you can use in this time period, then the olives should preserved in brine or by being canned or frozen.

Since you have removed the acid from the olive in the curing process, you would need to can then in a pressure caner: for a quart: 10 lbs pressure for 30 minutes. If you are at altitude, remember to make a time correction.

If you want to preserve the olives in brine:
  1. 3/4 C salt per gallon of water                    1 week
  2. 1 3/4 C salt per gallon of water                 1-2 weeks
  3. 1 3/4 C salt per gallon of water                 Put into jars and exclude air
Note that if you preserve your olives in brine, they will be too salty to eat. You will want to place the olives in fresh water to draw some of the salt out before consumption.

We really enjoyed working with olives, and would continue if we still lived in California. At our high point, we were processing 50 gallons of olives at a time. Some time is required, but not a lot. The time would depend on the volume your are having to rinse, perhaps 5 minutes per 5 gallon bucket. I found placing a garden hose in the bottom of the bucket, and allowing the water to overflow the bucket would keep most of the olives in the bucket, and after a few minutes, they would be fully rinsed.

If you have access to olives, cure them yourself!

Monday, February 6, 2012

Garden Recipes

I love food. I love growing it. I love eating it.

Most Americans don't eat many vegetables. I think many realize we should eat more vegetables, and cut down on packaged edible food like substances.

So you grow a wonderful garden... What do you do with all these vegetables? Well you eat a lot of it fresh from the garden: some raw, some cooked. The simpler the combination the better. Think simple foods, in simple combinations should be our focus for menu planning. What is left over you work to preserve for the winter.

Nutrient rich foods look and taste great. I can not wait to try some of these recipes from my garden.

Here are some excellent resources for you and your CSA:
  1. Natural Earth Farms recipes
  2. Live Earth CSA recipes by ingredient
  3. Mariquita CSA vegetable recipes A to Z
  4. A Veggie Venture's Recipe Box
  5. Top 10 Recipes for CSA Veggies
  6. Anchor Run Farm recipes
  7. Sang Lee Farm recipes
  8. Kayam Farm recipes
  9. Prairieland CSA recipes
  10. Full Belly Farm recipes

Perhaps you can locate a recipe that uses an ingredient food you have not grown before. Take this challenge: grow the food, and try out the new recipe. Expand your garden variety and recipe favorites.

Do you have a garden favorite? Post it as a comment. Let's get cooking.

Friday, January 20, 2012

Pickles

The joy of a sandwich is in the pickles. Sunshine would contest this, as she really likes the bread. I do love pickles, and onions on homemade bread. Add a vegetarian patty, some garden greens and home made mayo... truly you have a recipe for lunch bliss.

Back to the pickles... It is impossible to get pickles as good as I will tell you how to make. They can not be purchased-- at any price. I would surely buy them if they were for sale, and you are welcome and encouraged to make pickles for part of your cash crop. So what is so special about home made pickles?
  1. Use mineral rich and nutritious cucumbers without a load of pesticides
  2. The cucumber patch will bear so heavily that you have to do something with them! With such a supply you can indulge yourself to pick some small cucumbers for pickling.
  3. You can avoid vinegar and sidestep pickling of your gut.
  4. The process does not involve spoilage / fermentation, so it is quick and relatively easy.
  5. The acidic portion is lemon juice, which is the only component we do not raise on our farm. Everything you put in is the best quality components possible.
  6. You get to be artistic and creative as you pack your jars. Your pickle jars can be a work of art in themselves.

The recipe:

(Special thanks to our close friends for sharing this recipe with us a few years back.) Plan on around 2 cups of liquid per packed quart jar. Mix up the liquid portion of the recipe, and heat to a boil. This will be poured over the solids assembled in the jar and then water bathed for 8 mins. Our smallest canner can process 3 quart jars. We have the larger 7 quart jar canner that I often use. I don't pressure the pickles, just water bath at a rolling boil.

Ingredient              1 quart              3 quarts          7 quarts

Water                    1.5 c                   3 c                 9 c
Lemon juice           0.5 c                  1 c                 2.5 c
Salt                        1.5 T                  3 T                 1 c


In each jar, place:

1 grape leaf or slice of cabbage (to keep the pickles crisp)
1/4 onion sliced
2 stalks of dill
1-2 garlic cloves

Place the grape leaf in the bottom of the jar. Pack the jar tight with cucumbers, and layer the cloves and onions as you go. A friend told me that removing the blossom end of the cucumber will also improve crispness. With some research, I found a claim that there is an enzyme in the blossom end that may contribute to softness. Cut 1/8 inch from the blossom end to remove this potential.

Some suggest using soft water in your recipe, or boiling hard water the day before and pouring off the lop layer for use.

Once all of your jars are assembled with the layered cucumbers, pour in the boiling liquid, seal the jar and water bath at a boil for 8 mins. When the time is up, immediately remove the jars and tighten the lids. Set them out to cool apart from other jars so they do not as a group exchange heat with each other. The heating process will soften your pickles, so quickly cooling them is the goal.


Our experience:

We have canned pickles with this recipe for two years now, and last year we grew our own onions, garlic and dill. We had a lot of pickles to can. Early in the canning process last year, I found I was loosing a high percentage to spoilage (47%). Needless to say, when you are growing the cucumbers, the onions, the garlic and dill, to loose a quart jar to spoilage, it is enough to bring you to tears. (Well, almost.)  I came to four hypotheses for our spoilage trouble:
  1. I tightened the large mouth lids too tight, and the pressure caused the lids to loosen / buckle and fail.
  2. I experimented with lower amounts of lemon juice in the early batches. My memory from two years ago was that the lemon juice was a bit strong. I tried decreasing the lemon juice down to 2 c per 7 quart mix. This could have made the mixture more pH friendly to spoilage organisms.
  3. Acid in the mixture ate through the (now cheaply made) metal lids, causing them to fail.
  4. Heating time might have not been long enough.

To mitigate these possible factors:
  1. I was careful not to over tighten the large mouth lids.
  2. I returned to the original recipe, and used 3c lemon juice per 7 quart batch. Later I tried 2.5 c with no increase in spoilage.
  3. Since we only had metal lids, I was not able to modify this concern. I did take care not to get the contents liquid on the underside of the lid, if possible. I will use Tattler lids from now on.
  4. I increased heating time, and then later returned back to 8 mins. with no increase in spoilage. I suggest you not fudge the water bath time to less than 8 mins. of rolling boil.
Note, if a jar was once sealed, and you find it unsealed in the pantry, DO NOT EAT THE CONTENTS! Discard it safely where no animals or children will get to it. Consider it spoiled, even if it appears "normal". This canning wisdom would apply to any canned product, but be especially cautious of low acid foods.


Our canning goals are based on a yearly cycle, and we figure out how many quarts we would like in an average week. This past year we aimed for 2 quarts a week, and that led to our target of 104 quarts of pickles for the year. Remember that you will have all of the cucumber season to prepare them. I would often do 3 or 7 quarts every other day, and a few batches of 21 quarts, till our yearly quota was met. Let the cucumbers seep in the canned jars of lemon juice, onions and garlic for at least 2 weeks. I prefer to wait a month before opening a jar.

Prepare now to can pickles this coming year. You need some extra cucumber rows, onions and plenty of dill. The delicious results will improve your sandwiches all year long.