When putting on deck boards, check for the pattern of the rings of each board. To help prevent cuping of the boards, always put "bark side up".
Showing posts with label construction. Show all posts
Showing posts with label construction. Show all posts
Sunday, May 18, 2014


Thursday, February 14, 2013
Efficient Heating
In the middle of winter in the north land, we sit around the stove and think of planting in spring. It is true that burning with wood heats you up several times: 1) to cut the wood, split it and stack it for drying, 2) Moving the dry wood staging it for ready consumption, and 3) to be heated with the fire of your wood burning appliance.
But how efficient is that wood burning appliance? Are you sending a lot of heat up into the winter air, and therefore having to gather a lot more each winter than if you had a more efficient burn process? Well, I guess that is a simple formula to agree to: the more efficient, the less wood you have to burn. Burn efficiency is really determined by your stove design. One you have the stove there are some things you can do to help. I will review the things we all can do to improve any stove, and then I would like to speculate some on the most deficient stove designs that could be created.
Principles for any stove to work its best
The type of wood you have available will determine how much heat or thermal energy that wood can release when burned. Hard woods have more internal energy than soft wood. There are interesting wood thermal charts like this one. Considering the situation where you are heating your home with the wood you have on your land, you may not have a choice between selecting hard woods for your fire (say if you are in the far north or west, and have only soft woods available.) If you have a choice, hard woods will give more heat per unit volume of wood, and produce less ash. Some soft woods have so much pitch, they are hardly worth using for firewood.
What we can all do is make sure our wood has been allowed to dry well before use. The key to getting wood to dry is splitting it (opening up the grain) and stacking it where it has good air flow through the stack. Keeping rain out of and off of the wood pile is also very important. I prefer to do most of my wood cutting in winter and early spring while it is still cool outside. This would give the wood 9 to 14 months to dry before use which is ideal.
Another factor is that wood burns more efficiently if split into smaller pieces. A portion of a round will burn more cleanly than a large and intact round. The balance of this is the effort it takes to split the round, so take this for what it is worth in your situation.
Principles for making an efficient stove
Most of us can not go into the stove creation business, but I must admit, I want to build my own wood burning stove. There are options for the adventurous. Have you every heard of a "thermal mass heater"? These are large (massive) stone or cob structures built into a home through which the exhaust from a fire passes. Most all of the exhaust energy is absorbed by the mass of the structure, and by the time the gasses exit from the chimney the air is warm but no longer hot. This makes for a very efficient stove, considering efficiency being measured by how much heat is captured in the home compared to the total released. Many of these stoves work best with a smaller hot fire to heat the mass, which then radiates this heat throughout the following hours maintaining a comfortable room temperature.
For an efficient fire burn, you need small sized fuel. You also want the burn chamber to be hot. So hot that the volatile gasses from the wood completely burn. For this to happen the temperature of the burn chamber must be around 800 degrees F. One idea is to have the combustion chamber enclosed in an insulative material. You can also preheat the burn air by the intake air passing through the coals (to warm it) and then provide the air of active combustion above. An insulated chimney directly above the burn chamber gives a place for the volatile gasses to mix with oxygen and any remaining gasses to burn. This also improves the air draw and air flow through the combustion chamber. This design is commonly called a "rocket stove" which holds a lot of interest.
Putting these two ideas together, and you have a "rocket stove mass heater".
Before I get too busy with spring planting, I think I will play with some designs, and see what I can come up with. I will add photos to this post as I go along. (so check back for this article).
Stay warm!
Resources:
But how efficient is that wood burning appliance? Are you sending a lot of heat up into the winter air, and therefore having to gather a lot more each winter than if you had a more efficient burn process? Well, I guess that is a simple formula to agree to: the more efficient, the less wood you have to burn. Burn efficiency is really determined by your stove design. One you have the stove there are some things you can do to help. I will review the things we all can do to improve any stove, and then I would like to speculate some on the most deficient stove designs that could be created.
Principles for any stove to work its best
The type of wood you have available will determine how much heat or thermal energy that wood can release when burned. Hard woods have more internal energy than soft wood. There are interesting wood thermal charts like this one. Considering the situation where you are heating your home with the wood you have on your land, you may not have a choice between selecting hard woods for your fire (say if you are in the far north or west, and have only soft woods available.) If you have a choice, hard woods will give more heat per unit volume of wood, and produce less ash. Some soft woods have so much pitch, they are hardly worth using for firewood.
What we can all do is make sure our wood has been allowed to dry well before use. The key to getting wood to dry is splitting it (opening up the grain) and stacking it where it has good air flow through the stack. Keeping rain out of and off of the wood pile is also very important. I prefer to do most of my wood cutting in winter and early spring while it is still cool outside. This would give the wood 9 to 14 months to dry before use which is ideal.
Another factor is that wood burns more efficiently if split into smaller pieces. A portion of a round will burn more cleanly than a large and intact round. The balance of this is the effort it takes to split the round, so take this for what it is worth in your situation.
Principles for making an efficient stove
Most of us can not go into the stove creation business, but I must admit, I want to build my own wood burning stove. There are options for the adventurous. Have you every heard of a "thermal mass heater"? These are large (massive) stone or cob structures built into a home through which the exhaust from a fire passes. Most all of the exhaust energy is absorbed by the mass of the structure, and by the time the gasses exit from the chimney the air is warm but no longer hot. This makes for a very efficient stove, considering efficiency being measured by how much heat is captured in the home compared to the total released. Many of these stoves work best with a smaller hot fire to heat the mass, which then radiates this heat throughout the following hours maintaining a comfortable room temperature.
For an efficient fire burn, you need small sized fuel. You also want the burn chamber to be hot. So hot that the volatile gasses from the wood completely burn. For this to happen the temperature of the burn chamber must be around 800 degrees F. One idea is to have the combustion chamber enclosed in an insulative material. You can also preheat the burn air by the intake air passing through the coals (to warm it) and then provide the air of active combustion above. An insulated chimney directly above the burn chamber gives a place for the volatile gasses to mix with oxygen and any remaining gasses to burn. This also improves the air draw and air flow through the combustion chamber. This design is commonly called a "rocket stove" which holds a lot of interest.
Putting these two ideas together, and you have a "rocket stove mass heater".
Before I get too busy with spring planting, I think I will play with some designs, and see what I can come up with. I will add photos to this post as I go along. (so check back for this article).
Stay warm!
Resources:
- Rocket Stove Design (pdf)
- Work Shop Rocket Stove (video)
- Rocket Stove Principles (web)
- Rocket Stoves in Latin America (video)
- Designing Efficient Wood Heating Stoves (pdf)
Tuesday, December 18, 2012
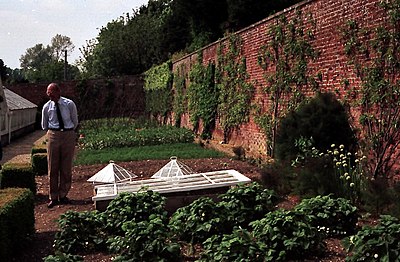
The Victorian Kitchen Garden
I am fond of 1800's history, and was pleasantly surprised to learn about the program "The Victorian Kitchen Garden". This apparently was a BBC series of the mid 1980's.
Back in the Victorian period (1800's) there were large walled gardens in each large estate in England. Food production was on a very local scale, and a team of people were employed as gardeners. All of this was new to me, but what I found especially interesting was to learn the tips and techniques from master gardeners of a hundred years ago. A time when there were no commercial fertilizers, few pesticides and a lot of attention to detail and the crop. There was no mono culture in these gardens!
Note as of Jan 21, 2013, these video links are not working. The interview with Thoday is working which would give you an idea about the program.
April
September part 1, September part 2
November
 |
| Source: Wikipedia on Harry Dodson |
The head gardener was one of the highest seniority staff members on the estate, and he was tasked with producing all of the food needed by the estate-- year round.
I have enjoyed the program, so I will organize links to the videos on you tube. I would caution you to beware of inappropriate content in the "suggested" videos area. It is sad to have good resources thrown in with the filth of a morals lacking society. Click the video link, and go full screen as soon as you can, and of course skip the ads if they are thrust upon you.
Note as of Jan 21, 2013, these video links are not working. The interview with Thoday is working which would give you an idea about the program.
May (first 10 mins)
July part 1, July part 2September part 1, September part 2
November
Tuesday, March 6, 2012
Building Construction
Proverbs 24:27 "Prepare thy work without, and make it fit for thyself in the field; and afterwards build thine house."
We need to set our priorities when starting to develop a homestead. Preparing our crop land would take priority. Crop land and orchards need to be planned, prepared and planted. For even the work of preparing the soil, you will need to properly store tools. You could store tools in a covered trailer. Or you could build a garage, or workshop structure to store tools. Remember to focus on the crops and to not get distracted with the early construction of structures.
 If you are starting with bare land, you will have the advantage of being able to plan the ideal placement of your home, a barn, tool shed, etc. I encourage you to develop a master plan, so that you do not constantly have to redo previous work. If you have a master plan at the onset, you can coordinate projects to compliment each other, and in the end make the process more efficient.
Once you decide on your building master plan, set a time-line for the included projects. Organize your projects in order of importance, and so that the projects interact in ideal efficiency. Pray at each step for the Lord's blessing. Psalm 127:1 "Except the LORD build the house, they labour in vain that build it: except the LORD keep the city, the watchman waketh [but] in vain."
I like the idea of having an exact materials list for what the project will need, and obtaining the materials in an efficient manner. The more you plan, the less you will have to make miscellaneous trips to the store for materials. The farther you are out, the more important this will be!
Structures
Structures that you may want to consider in your homestead (some of these may be combined):
Construction Tools
The minimum would be a good hammer, nails and lumber. A pneumatic nail gun can save a lot of nailing time! If you add nail guns, then you will need an air compressor, hoses and power to run the compressor. A good quality power hand saw, a chop saw and a good table saw will be indispensable. A speed square, framing square, plum bob, level, masonry string, and layout marking pencil are small tools that are also needed.
I hate to say it, but when looking at power tools, you need to condition yourself to looking for and purchasing the most expensive (ie best quality) versions of the tools you need. The economy (plastic) tools are not meant to last for what you will need when building a variety of homestead structures.
Permits and building codes
Find out what is required in your area for permits, inspections and building codes. You will want the best practices for your structure, and some locations allow the home owner to do their own construction. (I would have you find out about this before you even select your property, and don't go to a place with a lot of regulation and control.) Build with better than modern standards and safety, even if no inspections are required. Building codes have been created because of past tragedies, and you do not want to cut corners with safety on your own homestead. Also keep in mind that we will experience more and more damaging wind and storms as time goes by.
Home construction video series
Resources
We need to set our priorities when starting to develop a homestead. Preparing our crop land would take priority. Crop land and orchards need to be planned, prepared and planted. For even the work of preparing the soil, you will need to properly store tools. You could store tools in a covered trailer. Or you could build a garage, or workshop structure to store tools. Remember to focus on the crops and to not get distracted with the early construction of structures.

Once you decide on your building master plan, set a time-line for the included projects. Organize your projects in order of importance, and so that the projects interact in ideal efficiency. Pray at each step for the Lord's blessing. Psalm 127:1 "Except the LORD build the house, they labour in vain that build it: except the LORD keep the city, the watchman waketh [but] in vain."
I like the idea of having an exact materials list for what the project will need, and obtaining the materials in an efficient manner. The more you plan, the less you will have to make miscellaneous trips to the store for materials. The farther you are out, the more important this will be!
Structures
Structures that you may want to consider in your homestead (some of these may be combined):
- home
- root cellar
- firewood storage under cover
- garage
- tool shed
- work shop
- pole barn for tractor and implement storage
- greenhouse
- seed starting room
- produce washing / packing area
- canning kitchen
- maple sugar shack
- animal barn(s)
- chicken coup
Construction Tools
The minimum would be a good hammer, nails and lumber. A pneumatic nail gun can save a lot of nailing time! If you add nail guns, then you will need an air compressor, hoses and power to run the compressor. A good quality power hand saw, a chop saw and a good table saw will be indispensable. A speed square, framing square, plum bob, level, masonry string, and layout marking pencil are small tools that are also needed.
I hate to say it, but when looking at power tools, you need to condition yourself to looking for and purchasing the most expensive (ie best quality) versions of the tools you need. The economy (plastic) tools are not meant to last for what you will need when building a variety of homestead structures.
Permits and building codes
Find out what is required in your area for permits, inspections and building codes. You will want the best practices for your structure, and some locations allow the home owner to do their own construction. (I would have you find out about this before you even select your property, and don't go to a place with a lot of regulation and control.) Build with better than modern standards and safety, even if no inspections are required. Building codes have been created because of past tragedies, and you do not want to cut corners with safety on your own homestead. Also keep in mind that we will experience more and more damaging wind and storms as time goes by.
Home construction video series
- Framing Floors and Stairs (video)
- Framing Walls (video)
- Framing Roofs (video)
- Construction Companion Book (pdf)
Structures, Tips and Plans
- Greenhouse Structures (pdf)
- Farm Structures and Plans (web list)
- Farm Information, videos and information NDSU (web list)
- Root Cellar (pdf)
Resources
Subscribe to:
Posts (Atom)
