Showing posts with label gardening. Show all posts

Tuesday, February 11, 2014

The Cold

Wind can press the cold deeper into your clothing, like relentless icy fingers seeking out the warmth within. Cold and heat are forces in a tug-of-war. We see it in the global weather: Polar vortex winds have created unusually cold weather patterns across the USA. We see the tug-of-war in our garage that we use as a cold cellar (since we have not built a proper root cellar) in the effort to keep that unheated space above the deep freeze temperatures outside. And for sure we see the tug-of-war in our hearts, between the icy cold of selfishness, and the warmth of graciousness, love and self-sacrifice.

So, what is a garden lover to do when conditions are cold and environmentally hostile in our part of the north? Since we have over 2 feet of snow on the level, there is no working with the soil. I am glad about the snow though, as it is a blanket against the very cold sub zero temps we have experienced. So, back to my question, what is a garden lover to do? If you can't fight it, embrace it!

We have enjoyed wilderness winter camping, with low temps of 9 F and wind chill of -10 F. At the time I wondered about our sanity in this endeavor. But after several weeks of preparation, we spent 3 days (two nights) out in the wilderness -winter camping.


We quickly decided we needed to improve on the items packed in for this weekend. The list congealed into three categories:

1) The things we brought that we were glad we had
2) The things we brought that we never used (ugg! for we had to pack them in and out)
3) The things we dearly wish we had brought

Surprisingly, I filled an entire page with items in these three categories. Here is a small sample of my lists:


1) The things we brought that we were glad we had:

2) The things we brought that we never used... Well this was a long list. We brought a lot of food, and a lot of clothes, most of both were never touched. We also brought some equipment that was not used, partly because we did not know the exact situation we would find ourselves in, and partly because we are new at winter camping.


3) The things we dearly wish we had brought:
  • more reliable fire starting tools (two items failed one after the other at the same meal)
  • headlamp (it is really hard to work at fixing a meal in the dark while one hand is occupied holding a flash light. And in the winter, it is dark a lot more than in summer.)
  • emergency whistle
  • snow shoes (I want to make some! I now have the appreciation that snow shoes are not optional for winter camping in 2-3 foot snow.)

The experience was a good one. We enjoyed the challenge, and had fun in the snow as well. The second night was not as windy, and we had 6" of new fluffy snow when we woke up. I am still in recovery mode from our 10 mile hike one of the days...Whew.

Hopefully the icy fingers of winter will soon start to loosen its death grip, and drip by drip the snow should start to melt. It will be a real joy to see the first crocus this spring.

Consider the tug-of-war in your heart, and share some warmth with others today.


Wednesday, May 15, 2013

Freeze Protection


On Monday morning, May 13, 2013, we likely had our last hard frost of this spring. To celebrate, we brought out all our laundry to cover the sensitive perennials and fruit trees. At one point, one of the boys said, Hey! This sheet was on my bed!

Late spring frost is a concern for fruit trees (ours were in full bloom), blooming strawberries, raspberries, blueberries and grapes.

Small plants can often be sheltered with an overturned 5 gallon bucket. The strawberries are low to the ground, and we just placed a tarp over the row/bed and secured the corners with buckets filled with water.

Our temps dropped from 31 degrees F at 6 am when I went out to check on things to 28 degrees F just before the sun hit the earth to warm it around 8:30 am. The sky was clear and wind calm. We had the classic radiation frost conditions.

A thin sheet is often enough to prevent frost formation on tender plant tissues, and preserve the harvest. This is possible with several hours of work on a micro farm like ours, but impractical for large farms. Local strawberry fields started irrigation the evening prior, and had an inch of protective ice on the plants by the time the temps rose.

Our 10 day forecast now stretches to May 24, with no danger of frost. The charts show our 10% probability frost date at the end of May, so I think we are fairly safe to set things out of the greenhouse into the field. If I am wrong, then we will have even more things to cover next time ;)


Resources:


Tuesday, January 15, 2013

Tool Repair

The days are short in the north winter. The temps dive to the bottom of the thermometer flask, and the night winter air seems to stab at you more than any other time of year. I have a pile of gardening and seed catalogs always close by with wonderful pictures of ripe harvest products. I decided that if I look at too many pretty pictures, I will want to move south, and get a jump on spring planting! If you have not obtained your spring seed, yes it is past time for that. Not that you will be planting really soon, but some seeds may already be sold out. Make your selections early, and assure yourself of the seeds you will need for the coming year. Better yet is to have saved your own seed from your previous crops. We are saving more and more of our seed, and look forward to being seed independent.

So what should we be doing in these cold winter nights? Tool repair.

Now is a good time to clean, sharpen and oil the tools. I suggest a wooden handle rub to keep the wood in good condition. I have a small hammer that had some considerable summer abuse, and whose wooden neck is broken in two. This is an ideal project to fill some evening time, and return the tool to service, as good as new again.

You may want to organize your tools as well, and come up with a way to keep them orderly and neatly arranged.

If you like me find yourself straying back to the seed catalogs; consider making a planting schedule and crop rotation map, so you have a plan on where and when for your spring and summer planting goals.

It is only mid January, and I am thinking about playing in the dirt. Spring will not come too soon, I am sure. Get ready, and stay active in the dark nights of winter!


Tuesday, December 18, 2012

The Victorian Kitchen Garden

I am fond of 1800's history, and was pleasantly surprised to learn about the program "The Victorian Kitchen Garden". This apparently was a BBC series of the mid 1980's.

Source: Wikipedia on Harry Dodson
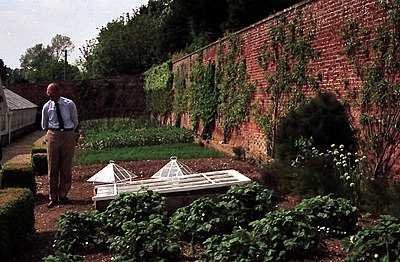
Back in the Victorian period (1800's) there were large walled gardens in each large estate in England. Food production was on a very local scale, and a team of people were employed as gardeners. All of this was new to me, but what I found especially interesting was to learn the tips and techniques from master gardeners of a hundred years ago. A time when there were no commercial fertilizers, few pesticides and a lot of attention to detail and the crop. There was no mono culture in these gardens!

The head gardener was one of the highest seniority staff members on the estate, and he was tasked with producing all of the food needed by the estate-- year round.

I have enjoyed the program, so I will organize links to the videos on you tube. I would caution you to beware of inappropriate content in the "suggested" videos area. It is sad to have good resources thrown in with the filth of a morals lacking society. Click the video link, and go full screen as soon as you can, and of course skip the ads if they are thrust upon you.

Note as of Jan 21, 2013, these video links are not working. The interview with Thoday is working which would give you an idea about the program.

April
May (first 10 mins)
July part 1, July part 2
September part 1, September part 2
November

Friday, November 23, 2012

High Tunnel Greenhouse

We have launched into learning first hand about greenhouses. We have a lot to learn, but we are interested in experiencing an extra month+ on each side of our growing season, and doing more with some intensive gardening within the greenhouse.

Our philosophy at this time is to not add additional heat to a greenhouse, but rather to buffer the lows and shelter the plants from desiccation. We won't be trying to grow tomatoes and peppers (warm loving plants) in the winter, rather we will focus on cold hardy plants with the goal of keeping them going all year long.

Our greenhouse dimensions are 16 x 48 feet and is called a high tunnel because you can walk inside of it. In this post, I will outline the placement considerations, assembly steps and tips we learn along the way. You can DIY (do it yourself) where you can purchase fence poles and do your own rib bending and collect the needed hardware. We decided to start with a kit containing all of the poles, hardware and greenhouse grade plastic included.


Location Considerations

Your placement of the greenhouse is important. You want your site to be level, have good sun exposure, and be conveniently accessible to you, power and water.

We cast about in our minds various locations for the greenhouse, and have come to decide on our oldest garden plot, which is the most level ground we have in garden, and is also closest to our pole barn, power and water supply. There are some tall trees to the west of this location, but perhaps we will trim these down, or they may help shade the greenhouse in the summer when it will likely be too hot anyway.

We have brought in a load of well composted horse manure to amend to the soil and help level it out a bit more. It looks good as a plot and location to start a greenhouse.


Parts

The general parts are straightforward:
  • Anchor posts of 3 feet long are driven into the ground ~ 2 feet, with a 15" out of the ground. The anchor posts are driven along the perimeter of the greenhouse every 4 feet along the sides.
  • Hoop poles are set into the anchor posts, held with a connector tube.
  • Ridge pole attaches with hardware along the top ridge of the greenhouse
  • Plastic sheeting holder hardware is attached to the frame
  • End walls are constructed using 2x4s
  • Plastic sheeting is applied and fastened


Assembly

1) Anchors: After selecting the location for the greenhouse, you need to layout the specific corner posts, and make sure everything is square. We wanted to square the greenhouse with the road in front and the pole barn to the side, so we took some measurements, and set the front two corner posts 16 feet apart that face the road. From these we measured out the back corners, measuring 48 feet along the sides, and 50'7" on the diagonal.

A little geometry review: We want the structure to be square. This means that all of the corners need to be right angles. The Pythagorean formula for a "right angled triangle" is a2 + b2 = c2. This means that for a structure 16 x 48, the hypotenuse would measure 50'7". You measure both sides and both diagonals and make adjustments till every measurement is right. Then you set the back corner posts.

We measured the corner posts from soil line to the top of the post 15". We will use 2x12" side boards along the perimeter and 15" will leave some room above the side board for the attachment of the connector and hoop pole to the anchor post. With the four corners at the proper depth into the ground, we strung a flexible tape measure along the long sides and pounded in the side anchors every 4' and to the depth of the tape line. There is a pounding plug shown in the image which allows you to hammer the anchor in without destroying the mating surface of the pole. Once at the proper depth, you can re-orient the holes in the anchor pipe with a screw driver as shown in the image. We had a small level to help make sure we were placing the anchors straight into the ground, a feat generally accomplished.

2) Hoop poles are mated with the anchor posts. This is a fun step, as the greenhouse quickly takes "shape." There is a connector tube of about 5" long which is just large enough in diameter to slide over and onto the anchor post. There is a matching hole for a bolt to tie the connector to the anchor post. The hoop pole, being the same diameter pipe as the anchor post, also slides down into the connector tube. There is a matching hole for a bolt to tie the hoop pole onto the connector.

3) Ridge pole. The greenhouse kit that we purchased has a ridge pole of tubing that attaches a longitudinal pole with each hoop at the center. This ties the entire structure together as one unit. Larger greenhouses may have several longitudinal poles. The connection hardware is made of two brackets with a pipe holder form. Two brackets are rotated 90 degrees to accept both the ridge pole and the hoop pole. There are 4 bolts to hold the brackets together, and the nuts should be placed downward to not puncture the plastic.

4) Corner bracing. On each corner, there is a specialized pole that attaches to the second connector and the first hoop. These have a twist in them and there are right and left bracing poles (the twist is to the right or to the left.)

5) Construct the end walls. The end walls are secured to the hoops with clamps. These clamps need to be installed before the plastic holding strip is applied to the end hoops.

6) Plastic-holding strips. These are attached along the side boards, and along the hoop pole on both ends. This will tie the plastic tight to the front and back hoop along the curve, and along the base sides. The strips are metal, and are attached with 1" self tapping screws.

7) Attach the plastic. The plastic is drawn over the hoop structure as a double layer. When it is secured, there will be two layers of plastic to contend with. This allows air inflation to add some air space between the two layers as an insulating layer. You want to attach and tension the plastic at a temperature of 65 degrees. If you attach it too cold, it would loosen as it warms up. If you attach the plastic when it is hot outside, then when it gets cold, the plastic may be too tight. When the tension is achieved, Z wire is attached to hold the plastic into place.

Remember to attach the fan motor before completely securing both layers of plastic.

8) Insulate the perimeter. We applied tar paper to the outside of the 2x12, and then piled wood chips against the outside perimeter. We plan to put building styrofoam on the inside of the 2x12 to add just a bit more insulation. These will fit nicely between the anchor posts.

9) Mark out the beds. We have a 16 foot interior, and considered several arrangements for the beds and isles. We concluded with 24" beds on each outside wall, 3 walkways running the length of the greenhouse at 18" wide, and the center beds being 42". This gives us 4 distinct beds, and rather easy access to any bed, even for Sunshine and the boys to plant and harvest from the edges. We will put a work table at the back north of the greenhouse, and will make that area our start house as well.


Resources


Wednesday, October 3, 2012

Wheat

I do not yet have any experience planting wheat, but I do enjoy bread. We have decided it is time to learn some things about growing wheat.

Winter wheat is planted in the fall, to allow the seeds to germinate, and set some roots. Then in the spring, it is ready to go. I have read that planting wheat in the fall will offer the farmer a 3 to 4 week head start, with harvest earlier next year.

Wheat does well in the western USA with their dry early summers. This is when the grain is maturing, and a lot of rain in this time period could lead to molds and grain quality issues. Our area is not known for growing wheat, but with global warming and the midwest drought, we may be the next wheat growing belt. Anyway, we want to see how it would go.

Earlier this week, I planted a field with a new kind of wheat: Khorsan, or Kamut wheat. It is a old variety, and reportedly has low allergy symptoms for those who are allergic to wheat. We are not wheat allergic, but it may be a matter of time considering the GMO contamination in the general food supply. There is linkage to GMO foods and general increased allergy response. I am also interested in the wheat as it has a different genetic makeup, and may resist GMO wheat pollen if it were around.

I found some references that called for planting Kamut in the fall, and then another references that suggested planting it in the spring. I had a field ready, so I planted it by broadcast, and I will see if it takes and any comes up. If it freezes out, I will just replant in the spring, so no great loss. To broadcast, it is suggested to put out 1/2 of your seed volume in one direction, and then go perpendicular, and spread the remaining 1/2 of seed. This will help to give an even sowing. A small crank broadcaster is suggested, but in the old days, I am sure people just spread by hand. The more even the sowing the better.

So tuck this topic away in your mind, and we will revisit it again in the spring, and again at harvest time. I look forward to the day when I could make a loaf of bread entirely from wheat I grew. That has long been a wish of mine, like a check box on my life list of things I want to do.

Here goes!


Resources:

Monday, September 17, 2012

Okra

Okra is a wonder plant. It is hardy, loves hot weather, will grow and put on a wonderful crop in the north, and does not require special handling or rich soils. We find it has very low pest pressure. These characteristics put this plant into our must grow category.

When I was in high school, I had the job of harvesting okra on a farm. Those plants were so spiny, that you would end up like a pin cushion after a session of picking the slender pods. The modern okra we have been planting is much improved from what I remember of those days long ago. Clemson Spineless is true to its name, and very productive.

Okra has reportedly been cultivated for thousands of years, and its origin is not sure. Some references claim northeast Africa. It is a hot loving plant, and this is evident when you try to start seeds in the soil. Where I live in the north, I have much better success starting okra in a warm, seed house environment. These seeds just don't want to germinate in cool soil. It takes several months of growth before the plants really get large and start to produce heavily. Starting them early indoors is an effective way to extend your harvest of this wonderful vegetable.

The okra plant has a beautiful flower, followed by a seed pod which grows and enlarges as it matures. As you pick the pods, you will get a feel for how large you like them. There comes a point in the pods maturity, where the cell wall of the pod becomes hard and fibrous. We like to harvest the pods before they get hard, and we find that the rage for picking is 4 to 6 inches in pod length.

Out of an 80 foot row of okra, we will harvest around 1/8 bu two times a week. That comes to around 6 meals a week with okra as a major dish of the meal. Okra has gotten a bad name because there are ways to fix okra which extenuate the perception of slime. I have not had boiled okra, and from what I hear, I may not try it. We do enjoy it as an addition to soups, but it would not be a major ingredient. Most often we cut the pods into small rounds, and saute them. In this form, they are very tasty, and can be included in a variety of entrees for a pleasant filler. We like to add some Lawry's Season Salt as we saute them.

At times I have wished for even more okra than we presently have. Perhaps I will consider two rows of 80 feet each next year! An experience from a local friend may be instructive. My friend planted four rows of okra, and on two of the rows, they added alfalfa fertilizer pellets. The rows that were fertilized did poorer than the two rows that had no amendments. This would have to be tested more to take it out of the fluke or hearsay labels, but my experience does seem to confirm that okra does not need high nutrient soil to thrive.

I hope you try some okra this next year. Do you want any of our fall seeds pods? Saving just one okra pod will yield around 50 seeds! We would love to share with you.

Monday, August 6, 2012

Garden Record - 2012

Aug 6         Most everything from the garden is coming on for harvest now. Large tomatoes, okra, corn and beans. Picked about 1/2 of the first planting of corn, with a frozen yield of ___ qts. Picked 2 bu of string beans, with a frozen yield of ___ qts.

July 26         Counted up the potato early harvest: 560 lbs. This represents 6/10 of our harvest (the 15 bushels picked on the 17th.) We sorted all of the potatoes and only the firm, uncut and completely dry potatoes went into the seller for longer term storage. Our rows are 90' and 6 rows equals 540 feet, yielding just over a pound of potatoes per foot of planted row.

July 17         Harvested 15 bushels of potatoes from 6/10 of our plantings. (4/10 was planted later and is still maturing.)

July 4           We have almost completed install of our drip irrigation system. We have needed it with all the heat and dry weather! Our corn is knee high on the 4th of July.

June 1          Planted more lettuce in the shaded garden. Finished planting water mellon and cucumbers in the field.

May 20        Picked up 7 round bales of old alfalfa hay to use as mulch. With a week of no rain, and hot temps into the lower 90's, we need mulch to keep moisture in the soil. We planted 5 rows of lettuce in our forest garden plot.

May 17         We planted 12 of 15 fruit trees to complete our small orchard. We planted our beans plot, and are looking forward to see when some of them will poke through the ground. We have tilled a garden area under the forest canopy for salads and tender greens to thrive in the cooler temperatures and shade through the summer heat. We hope to plant in this area soon.

May 11         Started our orchard. Planted 3 of 15 trees. Two cherry's and one peach tree.

April 24         Bees have arrived and are installed in their two hives. First load of compost for this season: 6 yards, wet. It did not want to come out of the dump trailer, so lots of shoveling.

April 18         Planted 55 lbs of seed potatoes, 500 onion plants, 20 grape vines. Used our "middle buster" tractor implement for the first time, and like it. It makes a nice deep furrow, perfect for planting potatoes.

Chitting watermelon seeds just prior to planting.
April 17          We now have on hand 80 lbs of seed potatoes to plant. We have 500 onion plants ready to set out. We ate our first meal of morel mushrooms this year. News reports confirm our fears of weather related fruit crop damage. "Michigan Fruit Production Devastated by Bizarre Weather" is one current news title.

April 13          Planted the blueberries and strawberries today. Thanks to some friends who helped us plant!

April 10          We had snow falling today, but all melted on the ground. The wind is cold and has a bite to it! Tonight is predicted to be a hard frost, so we pray for the fruit farmers. We do not have any sensitive plants out right now, but all of the trees have leafed out, and fruit is in flower or has set. Today we pick up 300 strawberry plants, 30 blueberry plants and 30 grape vines. We trenched for the planting of our blueberry plants. Planting will be on Friday when it is predicted to be warmer.

March 29        We have beets and mach to transplant to the garden. These were started in 288 plug trays. The Lord answered, and a killing frost was averted in our immediate area. His will be done for the month of April. It may be that if the fruit trees pass the delicate flower stage without a freeze, that the setting fruit may be slightly more hardy to a light frost. Today we have been blessed by the gift of MANY raspberry plants from friends who cleaned up their patch.

March 26        Tonight, a killing frost is forecast. All tender plants need to be covered. How does a farmer cover acres of orchard? We may likely loose all flowering fruit in the next 24 hours. Pray frost damage will be minimized. We could easily loose all tree leaves this spring due to frost. Trees would be forced to reform leaves if the tender tissue is frosted. Not all trees have leafed out in our area, but April is a long month. There will likely be another or many more frosts before our normal last frost date in May arrives.

March 22         We continue to have unusually warm temps. The local fruit trees are in bloom, and this is too early, considering the likelihood of an April frost. Field seed beds are coming along nicely. We would like to get some leaf compost before we finish all seed beds. Plants started indoors: beets, lettuce, brocholli, swis chard, cabbage.

March 13-16   Transplanted lettuce and arrugula to formal 4 foot beds. Chitting peas. 1 lb of dry peas rendered over 1/2 gal volume of soaked seeds. This volume planted 2x 4 x 60 foot beds. Each bed had 2 fences of 2 rows each. (4 rows total per 4 foot bed.)

Monday, May 21, 2012

Lettuce

Lettuce plants grow in cool weather, and with a little protection may overwinter. Most dark greens are good sources of Vitamin C and other nutrients. The rule of thumb is, usually, the darker the greens, the more nutritious the leaf.

For a market garden, you will get more income for leaf and lettuce crops per square foot of garden space.


Planting

Early spring is a great time to plant your lettuce seeds. Lettuce likes the cooler temps, generally 40 to 60 degrees F. In warmer climates, you can likely grow lettuce until it reaches about 80 degrees F. If you plant seeds in the spring, you should try to get started at least a month before the hot weather hits your area. You can also plant in the late summer for a fall harvest.

Something new that we are trying this year is the planting of lettuce in a shaded garden under a part of our forest canopy. The trees are large, and tree trunks are spread far apart. This area that is significantly cooler than our open field gardens in the heat of the day. A friend has reported good success with this type of forest planting. We will see how it goes for us this year! (UPDATE, this did not work for us in 2012. I think you have to get the plants started in the early spring. There just was not enough light in this plot to get the lettuce going.)

We make a shallow furrow, and sprinkle in the seeds. Then we cover with the slightest dusting of potting soil to help hold moisture. Some seeds need light to germinate, so don't bury those kind of seeds.

You should see seedlings sprouting in 7 to 10 days. When your lettuce is about 1 to 2 inches high, you should thin the plants a bit so that there is about eight inches of space between each other. If you want to have lettuce growing throughout the season, you can plant different types every few weeks (about 10 to 14 days apart). This is called successive planting. (web)


Planting Record 2012

This late winter, we noticed some small lettuce volunteer plants coming up from the Black Seed Simpson leaf lettuce patch. Last year we allowed the patch to go to seed, and new plants were growing even though there was snow outside. When we could work the soil, we transplanted these into a lettuce bed, and they filled the bed of 4' by 60'. We have been eating this lettuce all spring, and it is just now starting to rise up getting ready to bolt. For the past week or so, we have noticed this lettuce becoming a bit bitter as our temperatures have been rising.

From this experience, we can see that lettuce can really grow early in the season!

On May 21 we planted 5 rows in the woods consisting of:
  1. Lettuce Sangria MTO
  2. Lettuce Beleah Rose
  3. Lettuce Cimmaron
  4. Romaine Lettuce Red Amish Deer Tongue
  5. Romaine Lettuce Parris Island

As of June 10, we can conclude that we waited too long to plant in the woods, or that our woods are too dark. There are some small weeds growing, but the lettuce planted does not seem to be doing well.


Pests

Lettuce can be attacked by a variety of insects and animals. I have seen small lettuce plants in a green house covered by aphids. Insecticidal soap can be effective deterrent for aphids.

Rabbits and deer could also be attracted to your offering of salad. Fencing is suggested if animal pressure is high.


Harvest

We suggest you harvest in the early part of the day. I think lettuce plants are crisper and a bit sweeter in the early morning as compared to afternoon harvests. Cool lettuce quickly and store them in a cool location. The crop should be cleaned, and then dried to prevent spoilage.


Resources
  • Pests of Lettuce (web)

Thursday, May 3, 2012

Beans

Beans are a favorite staple on our homestead. You can pick them young and tender for steaming and fresh eating, or let them mature in the bean pod to a dried bean which can be easily stored and cooked for consumption. Legumes have the benefit of not only being healthy for us to eat, but they can fix nitrogen with the help of bacteria in nodules on their roots.


Nutrition

Beans are high protein food. As green beans, they are perfect fresh, canned or frozen. If you let the beans dry in the pod, they store will as seeds all winter.


Planting

Plant beans two weeks before your areas last frost date, and transplant them to soil one week after your last frost date. Then sow a new patch of beans every 2 weeks for a consistent and long lasting harvest through the summer. Beans generally take 50-60 days to mature, so take this into consideration as you approach the fall season.

Sow bush bean seeds 1 1/2" deep, and 12" apart. Sow pole beans along a climbing trellis.

In our area, there are a host of reasons we don't get good success with planting directly in the field. We have  had good success planting inside, and transplanting the established plant into the field. Soil temperature is a key factor, in that beans do not germinate well when the soil is below 50 degrees F. If sowing into the field, make sure your soil temperatures have risen above 50.


Harvesting and food preservation

For fresh beans, pick them while tender, and eat them as soon after picking as possible. They are simply outstanding! If you are going to freeze the beans, soak them briefly in boiling water (called blanching) to stop the enzyme activity from lowering the bean taste and quality. Cool as quickly as possible, such as dipping into ice water, and then package for freezing. We regularly use 1 gallon freezer bags, and as we set the bag into the freezer, I try to bunch the beans into two sections of the bag, so that we can easily extract 1/2 a gallon for a specific meal without having to thaw the entire bag.


Seed saving

Most beans are self fertilizing, and are very easy to save seed from. Bees can be pollinators, and for seed purity it is suggested that you exclude bees or separate crops by one mile. On select plants that you want to save seed from, allow the pod to fully mature, or be over ripe to a tough and dry pod. Then harvest the pods, and shell the beans for storage. Make sure the beans are well dried before over winter storage. It is expected that beans will remain viable for 4 years.


Varieties we are planting in 2012
  • Blue lake - bush bean 
  • McCaslan - pole bean 
  • Bell's Corn Bean - pole bean * 
  • Gregory's favorite lima  - pole bean *
*Non commercial varieties.


Resources

Sunday, April 22, 2012

Onions

Onions with potatoes are a wonderful fit, both in the skillet and in the garden. We have tried yellow, white and red onions, and it seems we always come back for the yellow ones. They store better than whites or reds, and storage is a big factor for us, since we cant eat hundreds of pounds of unions all at one time.

Last year we started from onion sets, which are small onion bulbs, and had over 50% make seed pods. This year I am trying onion plants in stead. The theory here is that it takes a lot of energy to make the seed pod, and if this can be avoided, you will have larger production toward the onion bulb. Another factor is that the seed stalk rising from the onion causes it to spoil faster. Since onions go to seed on the second year, if the onion set is too large, or undergoes unusual temperature extremes, it may think the planting is the second year, and go to seed. I am hoping that using plants will completely solve the issue this year.

When onions are first planted, their growth is concentrated on new roots and green leaves or tops. The onion will first form a top and then when a specific combination of daylight, darkness, and temperature is reached, bulb formation starts.

"The size of the onion bulb is dependent upon the number and size of the green leaves or tops at the time of bulb maturity. For each leaf there will be a ring of onion; the larger the leaf, the larger the ring will be. The onion will first form a top and then, depending on the onion variety and length of daylight, start to form the bulb. Onions are characterized by day length; "long-day" onion varieties will quit forming tops and begin to form bulbs when the daylength reaches 14 to 16 hours while "short-day" onions will start making bulbs much earlier in the year when there are only 10 to 12 hours of daylight. A general rule of them is that "long-day" onions do better in northern states (north of 36th parallel) while "short-day" onions do better in states south of that line." (web)


Planting suggestions

Onion plants are hardy and can withstand temperatures as low as 20 degrees F. They should be set out 4 to 6 weeks prior to the date of the last average spring freeze. Set plants out approximately one inch deep with a 4 to 6 inch spacing. We set rows in a bed, and space the rows 8 to 12 inches apart. We mark out a 4 foot bed, and have 4 rows in the bed.

Onions are not very good at supressing weed growth, and regular weeding will be needed to protect your crop yield. We have tried adding leaf compost and another year straw to the bed. These items help, but hand weeding seem a needed action on our farm. Always hand-weed any weeds close to your onions as they are easily damaged by garden tools.


Companion plants

Onions do well in companion planting, assisting nightshades and brassicas. If you are having pest pressure on the onions themselves, carrots can help confuse attacking insects. (web)


Resources
  • Onion information (web)

Thursday, April 19, 2012

Potatoes

Potatoes are a staple of our family. They are perhaps my favorite vegetable, and this year, we are growing a lot of them. By planting a lot of them, I am going to have to build a root cellar this fall to store all our harvest.

We have always enjoyed potatoes from the store, but when we grew our own for the first time, it was like an explosion of soft, tender flavor. "Wow" could be heard over and over around our table. Our youngest boy wondered if he had been transported to potato paradise. "These are the best potatoes ever!" I hope I have encouraged you to try growing potatoes. They are simple to grow, and don't take a lot of work to maintain till harvest. We had no pest pressure last year, and we are moving this years planting location to the other side of the garden. We hope if there was a potato beetle that we did not see, its larva will die before finding the location of the new crop.


Varieties

There are many varieties of potatoes. We have only tried a few, and will branch out over time to try more. If you are new at potatoes, try what other area gardeners suggest works well in your area. I suggest you get certified virus free seed potatoes. It is possible to plant again from your own stock, but I hear that the size of the potatoes will diminish over time if you have virus buildup.


Our history for 2012

April 19, planted:

Yukon Gold       75#
Red Pontiac         7#

We have found that 7# of red potatoes took up 80 feet of row space (one row). Also planted 50# of Yukon Gold, and we ended up with 4 additional rows of 80 feet. We have yet 25# to plant.

July 17: Counted up the potato early harvest: 560 lbs. This represents 6/10 of our planted rows,15 bushels. We sorted all of the potatoes and only the firm, uncut and completely dry potatoes went into the seller for longer term storage. Our rows are 90' and 6 rows equals 540 feet, yielding just over a pound of potatoes per foot of planted row.

When harvesting potatoes, we found some of the seed potatoes still intact, but soft or spoiling. We took care to sort these out of our harvest, to not spoil the new harvest.

August 2: Attempted a fall planting, by planting 1/2 bu of sprouting potatoes. We will see how this goes.

November 4: The second planting survived the early October frosts with just some slight leaf burn, but were dead by the end of October. We harvested perhaps 4 bu from the second planting. They were fine potatoes, but since the plants did not die down on their own, I think an earlier planting date would have been helpful to the yield.


Planting

It is suggested that you plant your potatoes about 2 weeks before your last frost. Potatoes can withstand some cooler temps, but not prolonged or hard freezing.

Potatoes can be planted in hills or rows. Last year we tried hills, and we did not have as dense or complete production as we would have had with a row. So, after testing it out, rows is our planting format of choice from now on. You set the seed potatoes 18 to 24" apart within the row, and set the rows from 3 to 5 feet apart.

We have a 3 point implement called a "middle buster" for setting a planting furrow. It will also work perfectly for digging the potatoes in the fall. We have seen this tool demonstrated by a friend last fall. We started with a straight track in the field, and then returned for the next pass and drove the wheel down in the previous track. This resulted in the furrows being just over 3 foot apart, which is perfect for potatoes.

Prior to planting, you can chit the seed potatoes by setting them in a warmer location, out of direct sun light. this will encourage the eyes to sprout, and speed up the early growth process. If you have sprouts, point the sprouts upwards. These will be stems for the plant. If you have large potatoes with several developing eyes, you can slice the potato into sections around each eye. Then each section can be planted on its own. If you do slice the seed potatoes, allow them to sit out for several days for the cut surface to harden a scab. This will help prevent rot that may happen if the cut potato was immediately planted.


Pests

Virus blight and insects are potato crop killers. Crop rotation will help in both cases.


Companion plants

Beans, cabbage, corn, and horseradish are excellent companion plants. Some even claim these make the potatoes taste better.

Tansy, nasturtium, coriander, and catnip planted nearby repel Colorado potato beetle.

Interplant potatoes with lettuce, scallions, radishes, and spinach. All of these crops mature fast and will be harvested long before the potatoes are ready to harvest.


What not to plant with potatoes

Avoid planting potatoes with tomatoes, sunflowers, raspberries, pumpkins, squash, and cucumbers. These plants may encourage blight.

Don't plant potatoes in an area that has been planted with any other Solanaceous crops in the last three+ years. This includes tomatoes, peppers, and eggplant.


Family story

Family history has passed down this true story: My great grandfather was Irish and a potato farmer in Iowa. At harvest, he had a wagon piled high of good sized potatoes, and with his horse team he pulled the load into town. Stopping by the grocery, he inquired as to how many potatoes he could sell.

The grocer came out to the street and said, "I won't buy any of your potatoes, not a one! These large Irish potatoes have a holes in them. My customers do not like the hollow space in their potatoes, and I will buy none from you!" My great grand father as convincingly replied, "Not a one of my potatoes has a hole!"  He picked a large potato from the pile, and taking his knife, sliced the potato in half. There to his dismay was a very large void -- a hole in his potato.

The story goes that he said nothing more, but got on the wagon and drove to another grocery. I would guess he limited his claims from then on.


Resources

Thursday, April 12, 2012

Strawberries

Strawberries are a great food for your garden. Not only are they easy to grow but they don't require a lot of space. And the strawberries are oh so tasty. I suggest you plant varieties that work well for other area farmers, as some varieties will not grow well in all areas.


Soil requirements and planting

Strawberries love a soil pH in the range of 5.5 to 6.5. Work the planting bed into a fine fluff, and mark out the plant placement.

For a matted row bed, set the plants 18 - 24 inches apart along the row. Space the rows 3 1/2 to 4 feet apart. We leave a 2 foot walking path which we keep clear of spreading strawberry plants with a rototiller.


Plant care

Strawberries have shallow roots, and they should not be allowed to dry out. They need 1-2 inches of water a week, especially when fruit is setting.

Mulching is often placed in the spring and again in the fall after the first freeze to prevent heaving of the plants out of the soil.


Varieties we have chosen to plant in 2012

Ozark Beauty   50 plants
Honeoye          50 plants
Earliglow          50 plants


Resources

Thursday, March 15, 2012

Spring planting has begun!

If your area is like ours, it is a very early and unseasonably warm spring. We are planting the cold crops, and it feels like we could plant more!

Check out our spring planting post for details.

Yesterday we volunteered with a friend to prune a vineyard, and we were able to take all the trimming we wanted to propagate new grape plants. If all of these live, we will have lots of grape plants to share!

I have a lot of information I want to post in this blog, but I find less time available for the computer. My posts will have to slow down for the summer, but I will not forget you! I will keep learning and will share as soon as possible!

Friday, March 2, 2012

Book: Root Cellaring

The best book on Root Cellaring I have read is: Root Cellaring by Mike and Nancy Bubel. I like where the author starts in the first chapter, in a discussion of what crops to grow for winter storage. Having a plan for what you plan to store in your root cellar will assure success.

I especially enjoyed chapter 2, which not only suggest "beets" but lists beet varieties that have proven good keepers, and suggested suppliers for that variety of beets. There is a list of several varieties for each food type.

In the last part of the book, there are some excellent drawings and photos of root cellars. There are ample notes, stories and ideas to help guide in your own cellar project.

I came away after reading the book being sold on our need for a root cellar. I think it is an excellent way to remove dependence on electricity to keep food cool and preserved for a longer time period. Before you start a cellar project, I would suggest your reading this book. There is enough reference material in it, I would suggest you purchase it.


Following are the Book Contents:

Chapter 1         Planting Crops for Fall Storage
Chapter 2         Good Keepers
Chapter 3         Growers Keepers: How to raise top-quality storage vegetables
Chapter 4         How to Harvest and Prepare Vegetables for Storage
Chapter 5         Life After Picking
Chapter 6         Spoilage
Chapter 7         Food Value in Winter Keepers
Chapter 8         Vegetables
Chapter 9         Fruits
Chapter 10       The Underground Garden
Chapter 11       Other Good Foods to Keep in Natural Cold Storage
Chapter 12       Trenches, Keeping-Closets, and Other Vegetable and Fruit Hideaways
Chapter 13       Planning Your Root Cellar
Chapter 14       Keeping Things Humming in the Root Cellar
Chapter 15       The Basement Root Cellar
Chapter 16       The Excavated Root Cellar
Chapter 17       Root Cellaring Experiences
Chapter 18       Cooking Sturdy Keepers

Tuesday, February 28, 2012

Greenhouses

A greenhouse is a weather protecting structure for your garden plants. It could be as simple as a cold frame (a low wooden box covered with glass) to a tube frame, plastic covered high tunnel, to a stud framed glass house. With a greenhouse it is easy to extend your growing season a month earlier in spring, and a month later in fall. Depending on your greenhouse, and your crops, you can extend your harvest into winter.


Uses
  • Seed starter greenhouse
  • Forth season production
  • Flower / cash production

Important concepts
  • base temperature
  • optimum temperature
  • temperature integration
  • photo period
  • irradiance
  • poly sun degradation

Design considerations

The ground warms and cools with the surrounding temperatures. As we cover the ground with the greenhouse, the earth under the house can offer stored heat. Utilize this heat battery to your advantage. In sunny areas, the solar input of energy will be more significant than earth heat radiation. If you are using glass for your glazing, then you will want to orient the angle of the glass to the perpendicular to the elevation of the sun during the winter. This angle is your latitude at the winter solstice. You want the angle of incidence to be low so that most of the light will completely penetrate the glass, and not loose some of it through reflection.

Using a GPS, property map or Google Earth, determine the latitude of your location. Add between 10 and 20 degrees to your site latitude to determine the orientation of your greenhouse glazing. For instance, if your latitude is 35 degrees north, your glazing should be angled at a 45 to 55 degree angle.


Heat storage / sources
  • Water stored inside the greenhouse, in black containers to absorb as much daytime heat as possible. This heat would then be radiated at night to moderate temperatures. One friend of ours has used 55 gallon metal drums full of water in the center of their greenhouse with planter boxes on top of the drums. Another has water containers on the backside of the greenhouse. Another greenhouse we reviewed had a small pool of water within and under the floor.
  • Rock mass as a thermal heat sink. Another greenhouse we have reviewed has a rock wall on the north side of the lean-to greenhouse. Another example is a solarium made with massive amounts of rock as thermal mass.
  • Earth-air tubes are tubes buried deep in the ground and air passed through the tube to take the constant heat from the ground into the air and then into the greenhouse. Electricity is needed to move the air.
  • Below ground radiant heat, with heat being added from a boiler or solar heater.
  • Wood stove heater within the greenhouse.
  • Greenhouse lowered into the surrounding ground, to encourage more earth-heat coupling.
  • Cold sink trench within the greenhouse to hold coldest air down within the soil.

Resources

Wednesday, February 22, 2012

Spring Planting

The days are ticking down toward spring planting. This is exciting! I would like to outline the steps our farm undergoes in late February to get ready for spring planting. We start planting seeds indoors on the week of March 8th. This is based on our zip codes last frost date. We generally have our last frost around May 3. We don't set out tender plants till May 10 (and then look at the 10 day forecast just to be sure). Remember that frosts can sneak up on you on clear sky nights without weather forecast warning. I have even seen light frost with 10 degrees safety margin in the forecast.

If you have not yet obtained your seeds, now is the time! Following are the seed companies we have used over the past several years:

It is also time to setup your start trays in which you will start your transplants. We use recycled 4x8 foot drop ceiling light fixtures (4 bulbs), placed on 4x4 inch blocks which lifts the light fixtures just above the trays. The light should be as close to the plant as possible to give the maximum light exposure. If your plants are tall and leggy, they do not have enough light.

We have used grow heating mats in the past. I found that if I cover the light fixture with a blanket, the heat of the light fixture warms the under contents adequately as measured with a soil probe thermometer. Be careful if you try this. Make sure you don't have too much heat creating a fire danger. I set up several test configurations on my seed starting setup, and measured the temperatures obtained. The variables: no light or added heat, light on, heating pad and blanket cover. All of these measures were taken on the same light unit, at a room temperature of 60-70 degrees. In my testing, I found:
  1. Soil at room temp, no light or heat added    60 deg
  2. Heating pad on only                                    80 deg
  3. Heating pad on covered with a blanket       86 deg
  4. Light on only                                               62 deg
  5. Light on covered with a blanket                  82 deg
  6. Light on + heating pad on                           84 deg
  7. Light on + heating pad on + blanket            96 deg

When we plant, we want to remember the goal is a progressive harvest, and this means not planting all of the cabbage for a single harvest, but progressive plantings. Elliot Coleman, in the book Four Seasons Harvest, suggests this schedule on page 88:
  • Beans - every 2 weeks
  • Beets - every 2 weeks
  • Carrots - every 2 weeks
  • Celery - twice: early spring, and 3 months before fall frost
  • Corn - every 2 - 3 weeks (some varieties vary in length so keep this in mind)
  • Cucumbers - two or three plantings: at month intervals
  • Lettuce and greens - every week or two, extending the entire season
  • Peas - twice: early spring and midsummer
  • Radishes - every week
  • Spinach - every week during spring and late summer
  • Summer squash - two or three plantings at month intervals

We have created charts for planting dates based on the projected last frost date in spring. I will describe how we have constructed our chart, and then you can modify the specific dates based on your last frost date. I will only list the first planting of a variety here, though remember the suggested schedule above related to progressive plantings.

In the chronology below, the word "start" means seeding a transplant tray to start seedlings in side under lights. "Transplant to soil" means taking some of these seedlings and transplanting these into their final location in the garden. "Plant in soil" means we seed directly to the garden. We do not notate seedling transplants to larger pots indoors, but in several cases, this is needed. We have eggplant inside a long time before we set it out, as an example. We largest pot we use inside is 1 gallon.

Eight weeks before last frost date (Mar 8), we start the cold crops: cabbage, cauliflower, kale and lettuce.
Seven weeks before last frost date (Mar 15), we start egg plant and broccoli. Eggplant is a slow growing, warm loving plant, but it needs a long growing time to get it to harvest, so we start some really early. Onions can be planted in soil.
Six weeks before last frost date (Mar 22), we plant in soil: arugula, spinach and peas. 
Five weeks before last frost date (Mar 29), we start endive and turnip. We transplant to soil: cabbage, cauliflower. Plant in soil: radishes. 
Four weeks before last frost date (Apr 5), we start peppers and tomatoes. We plant in soil: beets and potatoes.
Three weeks before last frost date (Apr 12), we transplant to the soil: broccoli and lettuce.
Two weeks before last frost date (Apr 19), we start beans. We plant in soil carrots and chard.
One week before last frost date (Apr 26), we start cucumbers, summer squash and melons.
Week of last frost date (May 3), we start okra, another warm loving plant that we will transplant to soil in 4 weeks.
One week post frost date (May 10), we start pumpkins. We transplant to soil the beans. We plant corn and a successive planting of beans into soil.
Two weeks post frost date (May 17), we transplant to soil cucumbers, summer squash and melons.
Three weeks post frost date (May 24), we transplant to soil peppers and tomatoes.
Four weeks post frost date (May 31), we transplant to soil the okra and pumpkins.

While the seedlings or transplants are being established in soil, more diligent effort with weeding will be required. As soon as the plants are large enough to withstand some side dressing of mulch, apply this and add to it as you are able. This will do wonders for controlling your weeks, and lessening your hoeing work.


Soil

I wanted to have you think about the soil you use for your starter trays. We have used commercial starting mixes with good results in the past. Some references talk about using pasteurized soil, where harmful bacteria have been killed, but not so hot that the organic material is turned to charcoal. Be aware that if you use untreated garden soil, you may have more problems with damping off when used in a greenhouse or starter house application. I don't have a lot of experience pro or con, but pass on the word of caution from others.


Hardening off

When plants are started inside or in a greenhouse, the plants are tender. If placed directly outside, they may be burned and die. In our experience there are two key issues: light intensity and stem strength. New plants that have been inside have been shielded from the full intensity of the sun, and if the plant is directly transplanted outside with no hardening, the plant may be set back by leaf burn. Stem strength is also an issue, as indoors the plants are not subjected to wind stress, and stem strength develops based on need. I have sometimes set an oscillating fan to blow across the plant trays. I set plants out in the middle of the spring day that is sunny and warm for a limited amount of time. This time I increase an hour a day leading up to the date we transplant to soil.


Transplanting

When you are ready to transplant to soil, you will want to mark out the transplant bed in advance. We use a transplant trowel which is perfectly shaped to open the soil to receive the new plant. Take care to adjust the roots and rootlets to prevent root ball. Gently firm the soil around the plant, as this will improve capillary action to bring water to the roots. Generally you will want to plant the seedling at the same soil depth as they were grown prior. An exception is tomatoes, which will root out of a buried stem. There may be benefit to transplanting to the base of the first leaves.


Resources

Wednesday, January 25, 2012

Winter Gardening

We all love fresh items from the garden. It is a bundle of goodness to bring in a fresh harvest for immediate consumption. I don't think everything we eat needs to be raw, but I do think our food should be as fresh as possible. I love cutting a zucchini or yellow squash, and seeing the beads of fluid bulging out from the cut edge. That is healthy eating fresh from the garden!

We love our 3 season harvest, but how do we get a harvest from that elusive 4th season? Garden plants generally will not tolerate the mistreatment of winter. Some plants do not do well in cold tempratures, and most will die if frozen. We live in the northern USA, so we have cold winter weather with plenty of snow. The further north, the less the total hours of sunlight possible in the winter months. Available sunlight is further limited by winter cloudy weather.

I would like to explore options for growing fresh produce during the winter.
  1. You can grow crops more cold tolerant.
  2. You can insulate from the cold.
  3. You can add heat to the plant environment.
  4. You can start plants in the fall to give them a head start for winter harvest.

To be successful with winter gardening, I think the best plan is to try not to fight nature. Change the crops you grow to those most friendly to cold weather. Use covers as your insulation, and as a last resort, add heat. Many winter growers plan on no added heat to their growing areas, and if you start with this as your plan, it will be much easier to make good plant variety choices, and good practices. Heating a growing space can require a LOT of heat, so consider this carefully before you decide to heat a space. Also note, that any system you use will be fragile. If you depend on heat, then it only takes a few hours of failure to freeze the crop. Several people I know heat their greenhouses with wood, and all through the winter they get up in the middle of the night, and stoke the fire in the greenhouse. They were painfully aware of how demanding this is on your schedule and vacation options. Also remember the quantity of wood that will be required for such an endeavor.


What to plant?

If you want to focus on plants that are cold hardy, consider these:
  • Arugula                   15 F / -9 C
  • Beets                        20 F / -7 C
  • Broccoli                   25 F / -4 C
  • Brussel sprouts         0 F / -16 C
  • Cabbage                   5 F / -14 C
  • Carrot                      15 F / -9 C
  • Cauliflower              25 F / -4 C
  • Chard                       20 F / -7 C
  • Clattonia (miners l)  10 F / -12 C
  • Chinese cabbage      15 F / -9 C
  • Collard                     10 F / -12 C
  • Corn salad                 8 F / -13 C
  • Endive                       5 F / -15 C
  • Favas                         10 F / -12 C
  • Kale                           8 F / -13 C
  • Kohlrabi                     15 F / -9 C
  • Garlic                         8 F / -13 C
  • Leek                           8 F / -13 C
  • Lettuce                       24 F / -4 C
  • Minutina                    15 F / -9 C
  • Mustard greens          15 F / -9 C
  • Parsnip                       8 F / -13 C
  • Rutabaga                    15 F / -9 C
  • Spinach                      8 F / -13 C
  • Turnip                        15 F / -9 C

We enjoy kale year round, even in terribly cold temps. We have kale all summer, and it stays strong during the fall. In winter the kale crowns collect a cap of snow and with this very minimal protection, we can collect kale all through the winter. It is a model hardy winter garden plant. It seems to freeze solid, and during a warm spell, it thaws and continues growing. If it does not have a snow cap, the crown could be desiccated and die. In my experience, drying out is more damaging than cold temperatures. We suggest a large fall crop of kale, as our chickens love the greens all through the winter, when there are fewer other greens to offer them.

Lettuce is another hardy winter plant. I have seen it freeze stiff, but with a little warmth it will gently thaw and continue to live. Harvest the greens when thawed if you want to use them as salad greens. If you pick them frozen they will be wilted when they thaw. Again, some minimal covering on your winter garden will prevent your plants from desiccating. Freezing may be tolerated, but not freeze drying.

Another crop we have had good winter success is broccoli. The leaf tissue can be burned with a hard freeze, but the plant withstands light freezing very well. I suggest you plan your crop harvest for early to mid winter, and with the cold temps, the crop should hold quite well.

Cauliflower is another brassica that will do well in winter. Tie the topmost leaves to shade and cover the head to keep it white.


Winter gardening is even better!

I find the brassicas do even better in the cold weather than in the summer. Additional benefits to winter gardening according to Eliot Coleman are:
  1. Reduced pest problems
  2. Reduced disease problems
  3. Less need to water
  4. Lower weed pressure
Another factor in favor of winter gardening is that many of the root crops convert some of their storage starch to sugars, as this helps raise their freezing tolerance. A wonderful side benefit for the gardener is the food becomes sweeter. I have noted that many of the crops that do well in the winter do not ship well. If you want some quality kale in the winter, you will need to grow it yourself.


Green house

With a simple plastic layer cover, we have seen temperatures moderated. Some consider each layer of plastic comparable to land 500 miles south. The University of Michigan has demonstration green houses using high tunnels, and a floating row covers (2 layers) and they are able to have beautiful cold season crops all winter long with no addition of heat. Remember the temperatures listed above. You do not have to keep the plants warm, you just have to mitigate the harshest of the cold lows. A friend local to us grows greens all winter with minimal heat using a single layer plastic high tunnel green house.


When to plant?

Most all seeds require some warmth to germinate well. I suggest starting the plants in the fall, and get a good size root and plant developed before the winter cold hits. The plants will not grow when the temperatures are close to or below freezing. Depending on your area, and your targets for harvest, you will want to adjust your schedule. Many suggest July or early August for a fall / winter crop.


Sprouts in a jar, all year long

We find alfalfa sprouts in a quart jar will germinate in our kitchen window any time of the year. Winter seems even better for sprouts than summer, as we have less spoilage of the older sprouts. Take 1.5 Tablespoons of seeds, and soak in a cup of water in a quart glass jar. After the seeds soak well, perhaps 8 - 12 hours, drain off the water, and set the sprouts jar on a window sil. We rinse / hydrate the sprouts twice a day. They will sprout in a day or so, and will be ready to eat in 4-6 days. Depending on how many you can incorporate into your diet, you can progressively start the jars to have a constant supply of healthy sprouts. Microgreens are plants just beyond the sprouts stage, say around 2 inches tall.


How-to ideas:
  • Indoor planters before southern exposure windows.
  • Planters such as 5 gal buckets, stored under a sheet of plastic, with a heat light in a protected space, such as a barn or garage.
  • Greenhouse using plastic or glass as an insulation covering.
  • Use a second row cover within the greenhouse, offering 2 layers of insulation.
  • I am interested in earth-air tubes, which takes heat from the deep ground when air is blown through it. Air could enter the tube at a frigid 10 degrees, and exit unto the greenhouse at 47 degrees (or your local deep earth temperature).
  • I have seen 55 gal barrels of water used in green houses as a back wall growing stand. Water has a very high specific heat, meaning it stores heat well, and can slowly release this stored heat through the night into a greenhouse environment.
  • A friend of mine is interested in developing plans and statistics for green houses sunk into the ground around 4 feet, and adding insulation to the southern side of the green house.

Since we like to eat year round, I think we should get some good experience growing food year round as well. What experiences do you have to share?


Resources