Showing posts with label tools. Show all posts

Thursday, February 14, 2013

Efficient Heating

In the middle of winter in the north land, we sit around the stove and think of planting in spring. It is true that burning with wood heats you up several times: 1) to cut the wood, split it and stack it for drying, 2) Moving the dry wood staging it for ready consumption, and 3) to be heated with the fire of your wood burning appliance.

But how efficient is that wood burning appliance? Are you sending a lot of heat up into the winter air, and therefore having to gather a lot more each winter than if you had a more efficient burn process? Well, I guess that is a simple formula to agree to: the more efficient, the less wood you have to burn. Burn efficiency is really determined by your stove design. One you have the stove there are some things you can do to help. I will review the things we all can do to improve any stove, and then I would like to speculate some on the most deficient stove designs that could be created.

Principles for any stove to work its best

The type of wood you have available will determine how much heat or thermal energy that wood can release when burned. Hard woods have more internal energy than soft wood. There are interesting wood thermal charts like this one. Considering the situation where you are heating your home with the wood you have on your land, you may not have a choice between selecting hard woods for your fire (say if you are in the far north or west, and have only soft woods available.) If you have a choice, hard woods will give more heat per unit volume of wood, and produce less ash. Some soft woods have so much pitch, they are hardly worth using for firewood.

What we can all do is make sure our wood has been allowed to dry well before use. The key to getting wood to dry is splitting it (opening up the grain) and stacking it where it has good air flow through the stack. Keeping rain out of and off of the wood pile is also very important. I prefer to do most of my wood cutting in winter and early spring while it is still cool outside. This would give the wood 9 to 14 months to dry before use which is ideal.

Another factor is that wood burns more efficiently if split into smaller pieces. A portion of a round will burn more cleanly than a large and intact round. The balance of this is the effort it takes to split the round, so take this for what it is worth in your situation.

Principles for making an efficient stove

Most of us can not go into the stove creation business, but I must admit, I want to build my own wood burning stove. There are options for the adventurous. Have you every heard of a "thermal mass heater"? These are large (massive) stone or cob structures built into a home through which the exhaust from a fire passes. Most all of the exhaust energy is absorbed by the mass of the structure, and by the time the gasses exit from the chimney the air is warm but no longer hot. This makes for a very efficient stove, considering efficiency being measured by how much heat is captured in the home compared to the total released. Many of these stoves work best with a smaller hot fire to heat the mass, which then radiates this heat throughout the following hours maintaining a comfortable room temperature.

For an efficient fire burn, you need small sized fuel. You also want the burn chamber to be hot. So hot that the volatile gasses from the wood completely burn. For this to happen the temperature of the burn chamber must be around 800 degrees F. One idea is to have the combustion chamber enclosed in an insulative material. You can also preheat the burn air by the intake air passing through the coals (to warm it) and then provide the air of active combustion above. An insulated chimney directly above the burn chamber gives a place for the volatile gasses to mix with oxygen and any remaining gasses to burn. This also improves the air draw and air flow through the combustion chamber. This design is commonly called a "rocket stove" which holds a lot of interest.

Putting these two ideas together, and you have a "rocket stove mass heater".

Before I get too busy with spring planting, I think I will play with some designs, and see what I can come up with. I will add photos to this post as I go along. (so check back for this article).

Stay warm!


Resources:


Thursday, January 31, 2013

Jar Spouts

A few posts ago we talked about how Sunshine has been making soymilk from raw soy beans, and that process has really been working well for our family. We are sure we have paid for the machine already, and we like being able produce our own soymilk, which is a daily food item for our family.

We are hesitant to put hot liquids into plastics because of the potential of leaching of plastic chemicals into the food, and therefore into our bodies. For this reason, we have been searching for a glass container which would hold an ample supply of soymilk. We purchased a glass pitcher from Amazon, but found the spout not properly crafted for leak-less pour when the pitcher was completely full. It would do fine with the pitcher about 1/2 full, where the angle of the spout was ideal. Until trying the pitcher for myself I was not able to understand how some reviewers would complain about the pouring and others would say it did just fine.

I thought I would share with you are current solution. We found some screw on lids for normal canning jars. The lid pours well no matter how full the jar, and we have located small and large mouth lids. This has allowed us to use the 2 quart jars for our soymilk, which is an ideal size for our volume of use. I took a picture of these lids (note the gray lids with spouts while the white lids are solid) so you could get an idea of what we found. Here is a link to purchase the small mouth lids. These worked so well, we then ordered the large mouth lids as well.

We have found these lids are just what we have been looking for, and have been working well for a variety of liquid storage needs.

Tuesday, January 15, 2013

Tool Repair

The days are short in the north winter. The temps dive to the bottom of the thermometer flask, and the night winter air seems to stab at you more than any other time of year. I have a pile of gardening and seed catalogs always close by with wonderful pictures of ripe harvest products. I decided that if I look at too many pretty pictures, I will want to move south, and get a jump on spring planting! If you have not obtained your spring seed, yes it is past time for that. Not that you will be planting really soon, but some seeds may already be sold out. Make your selections early, and assure yourself of the seeds you will need for the coming year. Better yet is to have saved your own seed from your previous crops. We are saving more and more of our seed, and look forward to being seed independent.

So what should we be doing in these cold winter nights? Tool repair.

Now is a good time to clean, sharpen and oil the tools. I suggest a wooden handle rub to keep the wood in good condition. I have a small hammer that had some considerable summer abuse, and whose wooden neck is broken in two. This is an ideal project to fill some evening time, and return the tool to service, as good as new again.

You may want to organize your tools as well, and come up with a way to keep them orderly and neatly arranged.

If you like me find yourself straying back to the seed catalogs; consider making a planting schedule and crop rotation map, so you have a plan on where and when for your spring and summer planting goals.

It is only mid January, and I am thinking about playing in the dirt. Spring will not come too soon, I am sure. Get ready, and stay active in the dark nights of winter!


Tuesday, December 18, 2012

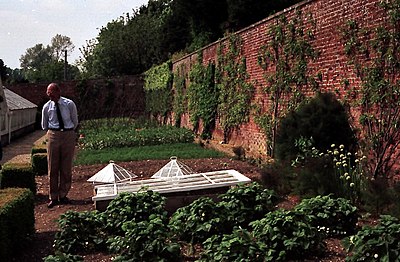
The Victorian Kitchen Garden

I am fond of 1800's history, and was pleasantly surprised to learn about the program "The Victorian Kitchen Garden". This apparently was a BBC series of the mid 1980's.

Source: Wikipedia on Harry Dodson
Back in the Victorian period (1800's) there were large walled gardens in each large estate in England. Food production was on a very local scale, and a team of people were employed as gardeners. All of this was new to me, but what I found especially interesting was to learn the tips and techniques from master gardeners of a hundred years ago. A time when there were no commercial fertilizers, few pesticides and a lot of attention to detail and the crop. There was no mono culture in these gardens!

The head gardener was one of the highest seniority staff members on the estate, and he was tasked with producing all of the food needed by the estate-- year round.

I have enjoyed the program, so I will organize links to the videos on you tube. I would caution you to beware of inappropriate content in the "suggested" videos area. It is sad to have good resources thrown in with the filth of a morals lacking society. Click the video link, and go full screen as soon as you can, and of course skip the ads if they are thrust upon you.

Note as of Jan 21, 2013, these video links are not working. The interview with Thoday is working which would give you an idea about the program.

April
May (first 10 mins)
July part 1, July part 2
September part 1, September part 2
November

Wednesday, November 21, 2012

Soy Milk

Gadgets can fill a kitchen. We prefer items that do not require electricity, but some of our most used appliances are electric. We recently purchased a soy milk maker, and we like it a lot.

You take 3/4 cup of dry soy beans, soak them, and then put the soft beans into the soy milk maker, and about 15 mins later, you have soy milk. You pour the milk through a strainer to collect the solids, and then add 2 T sugar, 1/4 t salt and 1/8 t vanilla. That is it! We like the result, and likely this method is costing pennies on the dollar compared to purchasing soy milk from the grocery. We have made tofu from the milk as well.

The reason for this post is not an infomercial for a soy milk maker, but to explain something that will help in eating soybeans in any form. We have found a dramatic taste improvement if we sort beans, and use only whole, intact beans. After sorting them, we prepare boiling water in a pressure cooker. We add the dry beans to the boiling water, and immediately bring them up to 15 pounds pressure. We let them cook for 15 minutes, and then set them aside to slowly cool. The result of this effort is a product that has markedly less "bean-y" flavor.

I suspect that there is an enzyme related to oxidation that causes the "bean-y" flavor. By keeping exposure to oxygen limited (whole beans), and cooking with high heat destroys the enzyme involved in oxidizing a substance in the bean. By following these two steps, we find the end product of the soy milk is much improved, and perhaps even comparable to store-purchased soy milk.

I suggest you get non-GMO (organic) soy beans for your soy milk and tofu production.

Monday, September 24, 2012

Kitchen Tools

If you were to outfit the perfect homestead kitchen, what would you include? This was my question to Sunshine a few days ago. This post will outline some of what we have to suggest.

She asked for what setting: On grid or off grid slants the answers quite a bit. I replied that I wanted to know everything, and she rolled her eyes. Well, here is a start to the list.


Basic categories:

1) Food cleaning / prep
2) Water supply
3) Food cooking
4) Food preservation


If you are on grid, you need to consider ways you would achieve the desired goals without power. There will be extensive and prolonged outages in the future. One way would be a self powered system such as solar power or wind / hydro power.

Some of the tools Sunshine likes best use a lot of power. She likes the VitaMix blender, and a grain grinding mill.

For cooking, we have an electric cook top and oven, a portable propane double burner, and a restored antique wood fueled cook stove.

For canning, you need glass jars and reusable canning lids.

Various pots, pans and pressure cookers are useful for everyday cooking, simmering and pressure canning.

Sunshine likes two small pressure cookers to cook rice, beans, potatoes or other long cooking items. Bringing them up to pressure cooks the food much faster.

We enjoy a food dehydrator, and these foods do perfectly in winter soups.


Tuesday, March 6, 2012

Building Construction

Proverbs 24:27 "Prepare thy work without, and make it fit for thyself in the field; and afterwards build thine house."

We need to set our priorities when starting to develop a homestead. Preparing our crop land would take priority. Crop land and orchards need to be planned, prepared and planted. For even the work of preparing the soil, you will need to properly store tools. You could store tools in a covered trailer. Or you could build a garage, or workshop structure to store tools. Remember to focus on the crops and to not get distracted with the early construction of structures.

If you are starting with bare land, you will have the advantage of being able to plan the ideal placement of your home, a barn, tool shed, etc. I encourage you to develop a master plan, so that you do not constantly have to redo previous work. If you have a master plan at the onset, you can coordinate projects to compliment each other, and in the end make the process more efficient.

Once you decide on your building master plan, set a time-line for the included projects. Organize your projects in order of importance, and so that the projects interact in ideal efficiency. Pray at each step for the Lord's blessing. Psalm 127:1 "Except the LORD build the house, they labour in vain that build it: except the LORD keep the city, the watchman waketh [but] in vain."

I like the idea of having an exact materials list for what the project will need, and obtaining the materials in an efficient manner. The more you plan, the less you will have to make miscellaneous trips to the store for materials. The farther you are out, the more important this will be!


Structures

Structures that you may want to consider in your homestead (some of these may be combined):
  • home
  • root cellar
  • firewood storage under cover
  • garage
  • tool shed
  • work shop
  • pole barn for tractor and implement storage
  • greenhouse
  • seed starting room
  • produce washing / packing area
  • canning kitchen
  • maple sugar shack
  • animal barn(s)
  • chicken coup
I encourage you to take time and plan out your homestead even before you are ready to build. You can start dreaming of how you would best want these structures to work together and in what proximity.


Construction Tools

The minimum would be a good hammer, nails and lumber. A pneumatic nail gun can save a lot of nailing time! If you add nail guns, then you will need an air compressor, hoses and power to run the compressor. A good quality power hand saw, a chop saw and a good table saw will be indispensable. A speed square, framing square, plum bob, level, masonry string, and layout marking pencil are small tools that are also needed.

I hate to say it, but when looking at power tools, you need to condition yourself to looking for and purchasing the most expensive (ie best quality) versions of the tools you need. The economy (plastic) tools are not meant to last for what you will need when building a variety of homestead structures.


Permits and building codes

Find out what is required in your area for permits, inspections and building codes. You will want the best practices for your structure, and some locations allow the home owner to do their own construction. (I would have you find out about this before you even select your property, and don't go to a place with a lot of regulation and control.) Build with better than modern standards and safety, even if no inspections are required. Building codes have been created because of past tragedies, and you do not want to cut corners with safety on your own homestead. Also keep in mind that we will experience more and more damaging wind and storms as time goes by.


Home construction video series

Structures, Tips and Plans

Wednesday, February 22, 2012

Spring Planting

The days are ticking down toward spring planting. This is exciting! I would like to outline the steps our farm undergoes in late February to get ready for spring planting. We start planting seeds indoors on the week of March 8th. This is based on our zip codes last frost date. We generally have our last frost around May 3. We don't set out tender plants till May 10 (and then look at the 10 day forecast just to be sure). Remember that frosts can sneak up on you on clear sky nights without weather forecast warning. I have even seen light frost with 10 degrees safety margin in the forecast.

If you have not yet obtained your seeds, now is the time! Following are the seed companies we have used over the past several years:

It is also time to setup your start trays in which you will start your transplants. We use recycled 4x8 foot drop ceiling light fixtures (4 bulbs), placed on 4x4 inch blocks which lifts the light fixtures just above the trays. The light should be as close to the plant as possible to give the maximum light exposure. If your plants are tall and leggy, they do not have enough light.

We have used grow heating mats in the past. I found that if I cover the light fixture with a blanket, the heat of the light fixture warms the under contents adequately as measured with a soil probe thermometer. Be careful if you try this. Make sure you don't have too much heat creating a fire danger. I set up several test configurations on my seed starting setup, and measured the temperatures obtained. The variables: no light or added heat, light on, heating pad and blanket cover. All of these measures were taken on the same light unit, at a room temperature of 60-70 degrees. In my testing, I found:
  1. Soil at room temp, no light or heat added    60 deg
  2. Heating pad on only                                    80 deg
  3. Heating pad on covered with a blanket       86 deg
  4. Light on only                                               62 deg
  5. Light on covered with a blanket                  82 deg
  6. Light on + heating pad on                           84 deg
  7. Light on + heating pad on + blanket            96 deg

When we plant, we want to remember the goal is a progressive harvest, and this means not planting all of the cabbage for a single harvest, but progressive plantings. Elliot Coleman, in the book Four Seasons Harvest, suggests this schedule on page 88:
  • Beans - every 2 weeks
  • Beets - every 2 weeks
  • Carrots - every 2 weeks
  • Celery - twice: early spring, and 3 months before fall frost
  • Corn - every 2 - 3 weeks (some varieties vary in length so keep this in mind)
  • Cucumbers - two or three plantings: at month intervals
  • Lettuce and greens - every week or two, extending the entire season
  • Peas - twice: early spring and midsummer
  • Radishes - every week
  • Spinach - every week during spring and late summer
  • Summer squash - two or three plantings at month intervals

We have created charts for planting dates based on the projected last frost date in spring. I will describe how we have constructed our chart, and then you can modify the specific dates based on your last frost date. I will only list the first planting of a variety here, though remember the suggested schedule above related to progressive plantings.

In the chronology below, the word "start" means seeding a transplant tray to start seedlings in side under lights. "Transplant to soil" means taking some of these seedlings and transplanting these into their final location in the garden. "Plant in soil" means we seed directly to the garden. We do not notate seedling transplants to larger pots indoors, but in several cases, this is needed. We have eggplant inside a long time before we set it out, as an example. We largest pot we use inside is 1 gallon.

Eight weeks before last frost date (Mar 8), we start the cold crops: cabbage, cauliflower, kale and lettuce.
Seven weeks before last frost date (Mar 15), we start egg plant and broccoli. Eggplant is a slow growing, warm loving plant, but it needs a long growing time to get it to harvest, so we start some really early. Onions can be planted in soil.
Six weeks before last frost date (Mar 22), we plant in soil: arugula, spinach and peas. 
Five weeks before last frost date (Mar 29), we start endive and turnip. We transplant to soil: cabbage, cauliflower. Plant in soil: radishes. 
Four weeks before last frost date (Apr 5), we start peppers and tomatoes. We plant in soil: beets and potatoes.
Three weeks before last frost date (Apr 12), we transplant to the soil: broccoli and lettuce.
Two weeks before last frost date (Apr 19), we start beans. We plant in soil carrots and chard.
One week before last frost date (Apr 26), we start cucumbers, summer squash and melons.
Week of last frost date (May 3), we start okra, another warm loving plant that we will transplant to soil in 4 weeks.
One week post frost date (May 10), we start pumpkins. We transplant to soil the beans. We plant corn and a successive planting of beans into soil.
Two weeks post frost date (May 17), we transplant to soil cucumbers, summer squash and melons.
Three weeks post frost date (May 24), we transplant to soil peppers and tomatoes.
Four weeks post frost date (May 31), we transplant to soil the okra and pumpkins.

While the seedlings or transplants are being established in soil, more diligent effort with weeding will be required. As soon as the plants are large enough to withstand some side dressing of mulch, apply this and add to it as you are able. This will do wonders for controlling your weeks, and lessening your hoeing work.


Soil

I wanted to have you think about the soil you use for your starter trays. We have used commercial starting mixes with good results in the past. Some references talk about using pasteurized soil, where harmful bacteria have been killed, but not so hot that the organic material is turned to charcoal. Be aware that if you use untreated garden soil, you may have more problems with damping off when used in a greenhouse or starter house application. I don't have a lot of experience pro or con, but pass on the word of caution from others.


Hardening off

When plants are started inside or in a greenhouse, the plants are tender. If placed directly outside, they may be burned and die. In our experience there are two key issues: light intensity and stem strength. New plants that have been inside have been shielded from the full intensity of the sun, and if the plant is directly transplanted outside with no hardening, the plant may be set back by leaf burn. Stem strength is also an issue, as indoors the plants are not subjected to wind stress, and stem strength develops based on need. I have sometimes set an oscillating fan to blow across the plant trays. I set plants out in the middle of the spring day that is sunny and warm for a limited amount of time. This time I increase an hour a day leading up to the date we transplant to soil.


Transplanting

When you are ready to transplant to soil, you will want to mark out the transplant bed in advance. We use a transplant trowel which is perfectly shaped to open the soil to receive the new plant. Take care to adjust the roots and rootlets to prevent root ball. Gently firm the soil around the plant, as this will improve capillary action to bring water to the roots. Generally you will want to plant the seedling at the same soil depth as they were grown prior. An exception is tomatoes, which will root out of a buried stem. There may be benefit to transplanting to the base of the first leaves.


Resources

Sunday, February 19, 2012

Maple Syrup

If you live around maple trees, you could tap the trees to gather sap, and boil this down to maple syrup. Generally this is done in the north, as here we have a longer season of usable sap flow. You can collect sap on any maple tree when the sap is flowing and before the tree buds out.


Time to tap

I cut off a branch from a maple the other day, and a stream of sap came flowing from the wound. It is really hard to believe that in early February, we are having sap flow. But the trees have good thermometers, and this winter (2012) has been unusually mild in our area. We have had regular sunny days, and often temps into the 40's or above. The ideal temperature for sap flow are day temperatures above 40 and night temperatures below 32 F. The tree pumps up sap to get the branches and buds ready for spring, and during freezing temps, the sap is drawn back down to the roots for storage. This pumping action is ideal for collecting sap as it passes by the tap hole. We have some cold temps this weekend, but after that the 10 day forecast looks like above freezing in the day, and below at night. Perhaps it is now time to tap. Note this winter I have had the concern of tapping too early. If you tap too early and it gets cold and the sap flow stops, then the taps could dry up and be sealed off, causing you to miss later spring flow. For us a good sap season is 4-6 weeks, and for our area the good sap flow starts mid February to early March. Some areas like Vermont have 8 weeks or longer of sap flow.

Once the tree begins to open the leaf buds and the photosynthesis products return in the phloem (downward flow channels) it gives an unpleasant taste to the sap. So the available window is started by day time temps above freezing, and ended when the trees bud out. Some make syrup seasons are short, and some are long, it all depends on the weather.


Tools

The tools are really very simple. You need a drill that matches your tap size, some tubing unless you can hang your buckets on the tap, and a large flat pan to boil the sap down. It really is that simple. I tap low on the tree, and use tubing to drain the sap into food grade 5 gal bucket set on the ground. I found that one tap will offer 0.5 to 1 gallon a day, depending on the size and condition of the tree and the weather. You will want to check on the buckets each day. It is no fun discover an overflowing bucket. You hate to waste the sap!

If you use plastic buckets to collect sap or store syrup, be sure the buckets are food safe containers.

To set the spile, drill a hole angled slightly up, so the sap will run out. Drill to a depth of 1.5 inches for 5/16-inch spiles. Place the spile into the hole and lightly tap it in place with a hammer. If the sap is running, it will start coming down the spile within a matter of seconds.


Number of taps per tree

When you work tapping, you really can see how dynamic the sap flow is. You get the idea that you are tapping into the trees blood supply. You do not want to drain the tree of too much sap, or you could hurt the growth of the tree.
  • Tap only trees with a diameter larger than 12"
  • You can place two taps in trees with a diameter larger than 20"
  • Limit yourself to three taps total in trees with a diameter larger than 26"

Boiling to syrup

Sap will spoil. It is dilute sugar water, and you can not really just leave it sitting. I found I had to process it daily.  If you have 60 taps, giving 0.5 to 1 gallon each, then you may have around 40-50 gallons of sap each day. We purchased a 2' x 4' evaporator pan, which we can make a fire under to boil down the sap. It takes us around 6 hours of flame to boil down 50 gallons to syrup concentration. The ending volume would be around 1 gallon of syrup.

Now this is an interesting point that I did not know before working with maple trees: not all maple trees have the same sugar concentration in their sap. There are genetic differences, and there are differences depending on how much light the tree is exposed to. We have maple trees in a forest, and our light exposure is basically the top of the tree. Our average sugar concentration is weaker than a tree in a fence row, obtaining light from all sides. Generally you hear of 40:1 ratios, and I calculated our ratios at 50:1. This means that I have to boil down 50 gallons of sap to get 1 gallon of syrup. The effort required for maple syrup is in moving the sap around, and in boiling down the sap to syrup.

My sugar shack is not a formal building, but a rather crude covering over a fire pit evaporator pan. I have built a low to the ground block frame on which to set the evaporator pan. Inside the concrete blocks, I set fire bricks to help protect the block from heat. At the far end, I have created a chimney to both draw the fire across the pan and smoke up and away from the syrup. I have supported the metal tube chimney with guy wires. There are 2 sheets of plywood supported on poles to provide cover from rain or snow.

I am ready to boil a batch when I have 30 to 50 gallons of sap ready to boil. I fill the evaporating pan with sap and light a fire in the fire box. Some like to preheat sap as possible to speed up the boiling process. Occasionally skim the surface of the boiling liquid to remove surface foam and other materials.

With a good fire, my pan will produce a huge rolling cloud of steam. Do not try boiling sap down indoors. If you are tempted to do so, just think about spreading 40 gallons of water around your kitchen. In such cases, I have heard of drywall falling off the ceiling, wall paper falling off, or mold taking over the home. The initial boil must be done outside or in a sugar shack!

Continue the process until the sap changes color and the boiling point begins to rise above the boiling point of water. Finished syrup boils at nine degrees (9° F) above the boiling point of water. As the temperature of the boiling sap approaches this point, boiling should be carefully controlled to prevent burning and overheating. If you are able to use a hydrometer or refractometer, you are looking for 66+% sugar. 67% sugar will form crystals over time on the bottom of the container, but I see that as some insurance against mold, and the crystals are edible.

Tear Jerker Syrup Burn
We do not take the sap to completion in our large wood fired pan. We get it close to final concentration, and then drain it off, and do the finishing boil on a smaller scale where we can monitor it more carefully. A wood fire is not a precise heat source, and you surely can not "turn it off" at a moments notice. There is real danger of over heating your syrup if you are not very careful. After tending a fire for hours, you do not want to burn a batch. This has happened to me, and I hope to never experience it again! Note: it is really hard to clean up your large pan from burned syrup.

I have the habit of always having a few gallons of fresh sap on hand to add to the pan if needed. If you are being called away from tending the pan, add more sap. It may stop the boil for a while, or leave you with weaker syrup than you hoped for this first stage, but at least you will not burn the batch.

When you finish off your syrup to the proper temperature or concentration, you will notice some solids that come out of suspension. There is a gritty particulate called "sugar sand" that you can filter from your syrup. Some batches have more than others, but it may surprise you how much sugar sand you will strain out. It is common for the maple syrup to bubble up and boil over as it approaches the final concentration. This last step requires constant attention.


Filtering & Storage

If you allow the raw syrup to set for a day or two, the sugar sand will settle to the bottom of the container. I have dipped pure syrup from the top of the settling pot, and processed it to finished syrup. To be most efficient with removing the remaining syrup from the settled sugar sand, you will want to filter it. To filter the raw syrup, heat it to 190 degrees, and pour it through pre-filters and finishing filters. These three filters are set on top of each other: 2 pre-filters, and 1 finishing filter. These filters are reusable year after year. The batch should be small for the syrup should remain hot for it to efficiently move through the filtering process. Some people have the filtering setup be within a pot that has a low heat applied, so that the syrup being filters remains hot.

If you heat the syrup above 200 degrees, more sugar sand can precipitate from the syrup solution. So in the finishing process post filtering, you want to heat to 190 to sterilize the syrup, but not heat above 200.

Once the syrup is at the proper concentration, it can be stored in the refrigerator till you are ready to permanently can it. We have found a bottle of syrup with a small amount of mold on the top surface. I measured the concentration of this batch, and it was close to 70 % sugar. This means that the ideal 67% sugar content will not prevent mold. You have to sterilize the syrup for storage in any long term storage. We plan to sterilize pint canning jars in the oven, and pour in syrup heated to 190° F. Place filled and capped containers on their side or upside down so the hot syrup sterilizes the lid or cap. After cooling, store in a cool, dry place.


Time Line for 2012
  • Feb 9:   Sterilized spiles, T's and tubing.
  • Feb 15: Laid out the location and dimensions of the sugar shack: 6x8 feet. Set 9 taps. Sap is dripping.
  • Feb 16: Set the vertical poles and leveled the top plate of the sugar shack. Set 7 new taps. Sap is dripping. Collected around 6 gallons from the 9 taps of yesterday.
  • Feb 17: Finished fire box placement. Set 3 new taps. Started first boil of 14 gallons sap.
  • Feb 19: Arch complete with firebrick and chimney set in mortar. First boil of 35 gallons late in the afternoon. I have stoked the fire, and will let it burn out tonight. Not enough boil time to worry with a scorch so I can leave it unattended. (Pictures coming when I clean up the new sugar shack.)
  • Feb 21: Ate our first syrup on waffles. MMMMM good. Set more taps today. Total of all taps now flowing: 39. Boiling down around 50 gals now.
  • Feb 22: Third boil burned ;(. Now working to clean up the pan.
  • Feb 29: Boiling again. I have quite a sap backlog! All buckets were full. Finished the roof on the sugar shack.
  • Mar 2:   Finished all of the backlog and current sap, with all buckets empty on the trees. 4 gallons of excellent grade syrup! That was the longest boil we have done to date!
  • Mar 6:   Boiling again.
  • Mar 12: Last collection and boil. The sap is not as clean now as the first run, and the weather has warmed significantly. Buds are swelling, and we will pull the taps today. Total take in syrup was close to 10 gallons for our season.

Resources

Monday, January 16, 2012

Tractor Safety

Farming is a dangerous profession, and there is one item that creates this risk: the tractor. I personally know several people who have been killed on their tractors. The most likely cause of death is the tractor rolling over and crushing the driver. There simply is not enough time to jump free. Do not consider this your avenue of escape. Tractors can tip to the side on an incline. They can also tip nose up and overturn. ROPS (roll over protection systems) and seat belts save lives. Do not operate a tractor without both of these safety systems.

The next dangerous area of a tractor is the PTO. This rotating shaft at the rear of the tractor that can lead to death or worse. I don't want to be graphic. Loose clothing can be caught in the PTO, and faster than it takes to tell about it, you can be wound around the shaft and loosing body parts left and right. Never wear loose clothing around a tractor, and never approach an engaged PTO. Note: the tractor will not stop or bog down even if you or body parts are being wound around the shaft.

The older the tractor, the fewer the safety systems will be available. Some older tractors do not disengage their PTO. This means that you can not turn off the PTO in some situations where you would like to, and if connected to an implement, it is always working. This makes these older tractors especially dangerous. Get a tractor that you can disengage the PTO.

Some tractors have one nose wheel, like a tricycle, called row crop tractors. This wheel configuration narrows the wheel base, making the tipping potential greater. I suggest you avoid this type of tractor.

I have experienced the nose of the tractor rising when pulling a large stump from the ground. Be prepared and don't overturn.


One person dies in a tractor accident nearly every day in the United States, according to the National Institute for Occupational Safety and Health (NIOSH). Don't be a statistic, think before you move, and anticipate danger.


Resources:

I considered these articles when we were looking for a good farm tractor:

Our tractor wish list items:
  1. Has or able to add ROPS and seat belt
  2. Spread front wheels (not tricycle)
  3. Has rear PTO, able to disengage.
  4. 32 - 45 hp. You need power in this range to plow.

Our tractor selection:
  1. Kubota 3800, 38 hp
  2. 66" wide front end loader
  3. 7.7' backhoe
  4. box blade
  5. single roll over plow
  6. small disc unit
  7. single tine chisel (considering)
  8. rototiller (considering)
  9. mower (later)
  10. snow blower (later)

Wednesday, January 4, 2012

Garden Tools

There are a variety of tasks where the homesteader will need tools. Let's start with gardening tools. A verse of wisdom: "Prepare thy work without, and make it fit for thyself in the field; and afterwards build thine house." Proverbs 24:27.

Every gardener needs good tools. Tools have varying quality. Metal tools are the most variable in this regard. Some tools are made of low quality, low strength, non-hardened metal and simply are not worth you time to use or fix them. When looking to purchase tools, you may be looking for the most expensive tools of the highest quality available. Seek out brands that have good recommendations from others.

Garden tools should be sharp. Dress the edge of cutting and chopping tools regularly. A sharp hoe works a lot more easily than a dull one.

To clear land, you will want a pick, ax, grub hoe, shovel and a long pry bar. To be truthful the best tool for stump removal is some form of large machinery, but digging by hand works as a second option.

Gather your favorite tools by function:
With tools that have a metal head: take care that the head does not rust, and keep the blade sharp. Tools with wooden handles should be conditioned with handle rub each year, and more often as needed.

I have learned through repeated experience: If you put a tool away, you will always know where to find it again. Perhaps I have proven the converse true enough, that I see the wisdom in always putting tools back where they belong. Wooden handles should not be left about, at in the heat of the sun, or on the ground, or out  in the rain. I have tried a home made wooden handle rub that I like a lot:
  1. 1/3 part paraffin, bees or candle wax
  2. 1/3 part linseed oil
  3. 1/3 part turpentine
Warm to melt the wax (careful -- do this outside), and mix all together. Let it harden in a tub or jar. It makes a thick paste that can be applied to wooden handles and rubbed down smooth.

I am still looking for the best way to preserve metal tools. I thinly coat the metal with WD-40 and wrap the tool in newspaper, and store in as dry environment as possible. I am still looking for the best method of storing metal tools.

Gather good hand tools, and keep them in good repair.


Resources: