If your area is like ours, it is a very early and unseasonably warm spring. We are planting the cold crops, and it feels like we could plant more!
Check out our spring planting post for details.
Yesterday we volunteered with a friend to prune a vineyard, and we were able to take all the trimming we wanted to propagate new grape plants. If all of these live, we will have lots of grape plants to share!
I have a lot of information I want to post in this blog, but I find less time available for the computer. My posts will have to slow down for the summer, but I will not forget you! I will keep learning and will share as soon as possible!
Thursday, March 15, 2012


Tuesday, March 13, 2012
Blueberries
Blueberries have gotten some good press about their health giving properties. As perennials, small fruits and berries will perform year after year without the startup work required for vegetables. Since we live in the north, blueberry fields are common in our area, and we have grown to love them.
Our plan is to plant 10-20 blue berry plants this spring. The biggest challenge we face is that our soils are alkaline, and as noted below, these plants love acidic soils. This will be a major challenge to change the soil pH around this growing area.
Growing preferences
Blueberries come from bushy plants that love boggy and wet areas. They do not want to be covered with water, but they do like to keep their roots moist. We have a wet area along the side of our field that we think would be ideal for our new blue berry plants.
They also like acidic soil, as is found in a bog. Your target pH is 4.5 to 5.5, and most soil will need amendments to assist in the lowering of the pH. Amend the soil to a depth of 14 inches by two feet wide. Pine needles, pine bark, elemental sulfur, ammomium sulfate and peat moss can lower the pH in your garden bed that will hold your blue berries. Canadian sphagnum peat moss has a pH of 3.0 to 4.5 making it an ideal amendment for blueberries. If necessary lower pH and supply nitrogen by adding 1 lb. of ammonium sulfate commercial fertilizer to 100 feet per inch depth of sawdust. Organic growers can use elemental sulfur and cottonseed meal or feather meal. It takes several months to a year for sulfur to lower the pH. Prepare blueberry planting site well in advance for best results.
Varieties
Follow this link for a beautiful chart of blueberry varieties. (web)
Our plan is to plant 10-20 blue berry plants this spring. The biggest challenge we face is that our soils are alkaline, and as noted below, these plants love acidic soils. This will be a major challenge to change the soil pH around this growing area.
Growing preferences
Blueberries come from bushy plants that love boggy and wet areas. They do not want to be covered with water, but they do like to keep their roots moist. We have a wet area along the side of our field that we think would be ideal for our new blue berry plants.
They also like acidic soil, as is found in a bog. Your target pH is 4.5 to 5.5, and most soil will need amendments to assist in the lowering of the pH. Amend the soil to a depth of 14 inches by two feet wide. Pine needles, pine bark, elemental sulfur, ammomium sulfate and peat moss can lower the pH in your garden bed that will hold your blue berries. Canadian sphagnum peat moss has a pH of 3.0 to 4.5 making it an ideal amendment for blueberries. If necessary lower pH and supply nitrogen by adding 1 lb. of ammonium sulfate commercial fertilizer to 100 feet per inch depth of sawdust. Organic growers can use elemental sulfur and cottonseed meal or feather meal. It takes several months to a year for sulfur to lower the pH. Prepare blueberry planting site well in advance for best results.
Varieties
Follow this link for a beautiful chart of blueberry varieties. (web)
Elliott has one of the highest levels of antioxidants of
all blueberry varieties.
Once picked Elliott has a storage life of up to 12 weeks. (web)
Varieties we have planted in 2012, and updated in 2014 replacing a dead Bluecrop.
Duke x1
Bluecrop x9
Blue Ray x10
Earliblue x10
Ka-Bluey x5
Chandler x5
Planting and soil preparation
"Select a sunny location with well-drained soil that is free of weeds and is well-worked. It's best to locate your blueberry plants in an area where irrigation is readily available as best results will be achieved by keeping the root zone moist throughout the growing season.
"Blueberries prefer acidic soils. A fail-safe way to grow blueberries in almost any soil is to incorporate peat moss into the planting medium. For planting directly in the ground, work up a planting area approximately 2½ feet in diameter and 2 foot deep for each plant. Remove 1/3 to 1/2 of the soil. Add an equal amount of pre-moistened peat moss and mix well. (One 4 cubic foot compressed bale will usually be sufficient for 2-4 plants.)" (web)
Space your bushes from 4 to 6 feet apart with 7 to 10 feet between rows. Commercial farms space the rows 10 feet apart which is large enough for tractor access down the row. The home gardener can plant them 3 to 4 feet apart in any arrangement fitting the home landscape. Set at the same depth plants grew in container or ground. Planting too deeply will smother the roots. Little or no pruning is needed for the first two years except to remove broken or rubbing branches. Strip off all blossoms and fruits until the plant is well established (36 to 42 inches tall).
Mulch
Blueberries require mulch. For the first year mulch with fir, pine, or hemlock well rotted sawdust extending out 2 feet around plant to a depth of 3 inches so roots will not grow up into the mulch. After the first year increase mulch to a depth of 6 inches mounded around the crown. As plants mature extend the mulch out to the drip line. Mulch will gradually break down to help feed the plant and supply the high rate of organic matter blueberries need. More important, mulch provides a cool root run and conserves moisture, both requirements for blueberries. Other materials may be used as mulch such as composted pine needles or shredded leaves. General compost made from vegetable materials may be too high in pH for blueberries. Fresh grass clippings can heat up and damage surface roots. (web)
Planting History 2012
We ordered one Ka-Bluey plant online via a sale, and 4 more from another online site. The 30 other plants were picked up at a wholesaler, at a much better per unit price. The single Ka-Bluey came in the mail a week before we had scheduled to get the other plants from the wholesaler, so we put it in the ground on April 2. We were gone to a retreat for the next week, and there were some cold nights while we were gone. We watered well, and a friend also watered the plant, but when we returned, the once green leaves were brown red. I thought it was dying. Looking this up on the Internet, I see this is common for plants that were used to the warm, being transplanted into the cold of early spring to have the leaves turn red. This is the normal coinsurance in the fall due to cold temps. I hope the plant pulls through. Since we have been back to the homestead, I have protected the plant by covering it with an overturned bucket on the nights of frost danger.
We have waited to plant any additional plants till the 10 day forecast does not include the chance of frost. Hopefully we will plant the rest of the blueberry plants this Friday, April 13. Since our soil is alkaline, I wanted to dig a large hole and amend the soil with ag sulfur deeply. With the backhoe, I dug a trench 2 feet wide and about 3 feet deep. I will mix peat, ag sulfur, and compost and return the soil to the trench, and then will plant the blueberries with a generous amount of peat around its roots (say 2 shovels full).
We are planting the blueberries in 2 rows of 20 plants. We are setting our plants 4 feet apart within the row, and the rows 7 feet apart. We are not planning to need to drive the tractor down the row, and can therefore save the space, and have the rows closer together.
Pruning
"One of the biggest mistakes home gardeners make with their blueberries is lack of pruning. Aggressive, annual pruning will result in healthier, more vigorous plants and more prolific fruit production. Here are some simple tips:
Propagation
When you prune your blueberry plants, remember to save your clippings to start new plants. Clip the root end of the swig at an angle, and the top cut flat. Dip the angle cut end in rooting hormone, and plant in growth medium, and keep the atmosphere moist.
When roots have developed, plant in a location where you can protect it through the first winter. Some suggest building a mimi-greenhouse of plastic, straw and more plastic. This would sandwich the straw between the plastic to keep the straw warm, and preserve the thermal blanket effect.
Resources
Varieties we have planted in 2012, and updated in 2014 replacing a dead Bluecrop.
Duke x1
Bluecrop x9
Blue Ray x10
Earliblue x10
Ka-Bluey x5
Chandler x5
Planting and soil preparation
"Select a sunny location with well-drained soil that is free of weeds and is well-worked. It's best to locate your blueberry plants in an area where irrigation is readily available as best results will be achieved by keeping the root zone moist throughout the growing season.
"Blueberries prefer acidic soils. A fail-safe way to grow blueberries in almost any soil is to incorporate peat moss into the planting medium. For planting directly in the ground, work up a planting area approximately 2½ feet in diameter and 2 foot deep for each plant. Remove 1/3 to 1/2 of the soil. Add an equal amount of pre-moistened peat moss and mix well. (One 4 cubic foot compressed bale will usually be sufficient for 2-4 plants.)" (web)
Space your bushes from 4 to 6 feet apart with 7 to 10 feet between rows. Commercial farms space the rows 10 feet apart which is large enough for tractor access down the row. The home gardener can plant them 3 to 4 feet apart in any arrangement fitting the home landscape. Set at the same depth plants grew in container or ground. Planting too deeply will smother the roots. Little or no pruning is needed for the first two years except to remove broken or rubbing branches. Strip off all blossoms and fruits until the plant is well established (36 to 42 inches tall).
Mulch
Blueberries require mulch. For the first year mulch with fir, pine, or hemlock well rotted sawdust extending out 2 feet around plant to a depth of 3 inches so roots will not grow up into the mulch. After the first year increase mulch to a depth of 6 inches mounded around the crown. As plants mature extend the mulch out to the drip line. Mulch will gradually break down to help feed the plant and supply the high rate of organic matter blueberries need. More important, mulch provides a cool root run and conserves moisture, both requirements for blueberries. Other materials may be used as mulch such as composted pine needles or shredded leaves. General compost made from vegetable materials may be too high in pH for blueberries. Fresh grass clippings can heat up and damage surface roots. (web)
Planting History 2012
We ordered one Ka-Bluey plant online via a sale, and 4 more from another online site. The 30 other plants were picked up at a wholesaler, at a much better per unit price. The single Ka-Bluey came in the mail a week before we had scheduled to get the other plants from the wholesaler, so we put it in the ground on April 2. We were gone to a retreat for the next week, and there were some cold nights while we were gone. We watered well, and a friend also watered the plant, but when we returned, the once green leaves were brown red. I thought it was dying. Looking this up on the Internet, I see this is common for plants that were used to the warm, being transplanted into the cold of early spring to have the leaves turn red. This is the normal coinsurance in the fall due to cold temps. I hope the plant pulls through. Since we have been back to the homestead, I have protected the plant by covering it with an overturned bucket on the nights of frost danger.
.JPG) |
| 10 Bluecrop ready for planting |
We are planting the blueberries in 2 rows of 20 plants. We are setting our plants 4 feet apart within the row, and the rows 7 feet apart. We are not planning to need to drive the tractor down the row, and can therefore save the space, and have the rows closer together.
Pruning
"One of the biggest mistakes home gardeners make with their blueberries is lack of pruning. Aggressive, annual pruning will result in healthier, more vigorous plants and more prolific fruit production. Here are some simple tips:
- Pruning is best done in the spring before the leaves come out.
- Remove low growth around the base.
- Remove the dead wood, leaving bright colored lateral branches. Cut out any short, discolored branches.
- Continue pruning until you have removed 1/3 to 1/2 of the wood out your plants each year. Remember, this will promote growth and berry production so prune away!" (web)
Propagation
When you prune your blueberry plants, remember to save your clippings to start new plants. Clip the root end of the swig at an angle, and the top cut flat. Dip the angle cut end in rooting hormone, and plant in growth medium, and keep the atmosphere moist.
When roots have developed, plant in a location where you can protect it through the first winter. Some suggest building a mimi-greenhouse of plastic, straw and more plastic. This would sandwich the straw between the plastic to keep the straw warm, and preserve the thermal blanket effect.
Resources
Tuesday, March 6, 2012
Building Construction
Proverbs 24:27 "Prepare thy work without, and make it fit for thyself in the field; and afterwards build thine house."
We need to set our priorities when starting to develop a homestead. Preparing our crop land would take priority. Crop land and orchards need to be planned, prepared and planted. For even the work of preparing the soil, you will need to properly store tools. You could store tools in a covered trailer. Or you could build a garage, or workshop structure to store tools. Remember to focus on the crops and to not get distracted with the early construction of structures.
 If you are starting with bare land, you will have the advantage of being able to plan the ideal placement of your home, a barn, tool shed, etc. I encourage you to develop a master plan, so that you do not constantly have to redo previous work. If you have a master plan at the onset, you can coordinate projects to compliment each other, and in the end make the process more efficient.
Once you decide on your building master plan, set a time-line for the included projects. Organize your projects in order of importance, and so that the projects interact in ideal efficiency. Pray at each step for the Lord's blessing. Psalm 127:1 "Except the LORD build the house, they labour in vain that build it: except the LORD keep the city, the watchman waketh [but] in vain."
I like the idea of having an exact materials list for what the project will need, and obtaining the materials in an efficient manner. The more you plan, the less you will have to make miscellaneous trips to the store for materials. The farther you are out, the more important this will be!
Structures
Structures that you may want to consider in your homestead (some of these may be combined):
Construction Tools
The minimum would be a good hammer, nails and lumber. A pneumatic nail gun can save a lot of nailing time! If you add nail guns, then you will need an air compressor, hoses and power to run the compressor. A good quality power hand saw, a chop saw and a good table saw will be indispensable. A speed square, framing square, plum bob, level, masonry string, and layout marking pencil are small tools that are also needed.
I hate to say it, but when looking at power tools, you need to condition yourself to looking for and purchasing the most expensive (ie best quality) versions of the tools you need. The economy (plastic) tools are not meant to last for what you will need when building a variety of homestead structures.
Permits and building codes
Find out what is required in your area for permits, inspections and building codes. You will want the best practices for your structure, and some locations allow the home owner to do their own construction. (I would have you find out about this before you even select your property, and don't go to a place with a lot of regulation and control.) Build with better than modern standards and safety, even if no inspections are required. Building codes have been created because of past tragedies, and you do not want to cut corners with safety on your own homestead. Also keep in mind that we will experience more and more damaging wind and storms as time goes by.
Home construction video series
Resources
We need to set our priorities when starting to develop a homestead. Preparing our crop land would take priority. Crop land and orchards need to be planned, prepared and planted. For even the work of preparing the soil, you will need to properly store tools. You could store tools in a covered trailer. Or you could build a garage, or workshop structure to store tools. Remember to focus on the crops and to not get distracted with the early construction of structures.

Once you decide on your building master plan, set a time-line for the included projects. Organize your projects in order of importance, and so that the projects interact in ideal efficiency. Pray at each step for the Lord's blessing. Psalm 127:1 "Except the LORD build the house, they labour in vain that build it: except the LORD keep the city, the watchman waketh [but] in vain."
I like the idea of having an exact materials list for what the project will need, and obtaining the materials in an efficient manner. The more you plan, the less you will have to make miscellaneous trips to the store for materials. The farther you are out, the more important this will be!
Structures
Structures that you may want to consider in your homestead (some of these may be combined):
- home
- root cellar
- firewood storage under cover
- garage
- tool shed
- work shop
- pole barn for tractor and implement storage
- greenhouse
- seed starting room
- produce washing / packing area
- canning kitchen
- maple sugar shack
- animal barn(s)
- chicken coup
Construction Tools
The minimum would be a good hammer, nails and lumber. A pneumatic nail gun can save a lot of nailing time! If you add nail guns, then you will need an air compressor, hoses and power to run the compressor. A good quality power hand saw, a chop saw and a good table saw will be indispensable. A speed square, framing square, plum bob, level, masonry string, and layout marking pencil are small tools that are also needed.
I hate to say it, but when looking at power tools, you need to condition yourself to looking for and purchasing the most expensive (ie best quality) versions of the tools you need. The economy (plastic) tools are not meant to last for what you will need when building a variety of homestead structures.
Permits and building codes
Find out what is required in your area for permits, inspections and building codes. You will want the best practices for your structure, and some locations allow the home owner to do their own construction. (I would have you find out about this before you even select your property, and don't go to a place with a lot of regulation and control.) Build with better than modern standards and safety, even if no inspections are required. Building codes have been created because of past tragedies, and you do not want to cut corners with safety on your own homestead. Also keep in mind that we will experience more and more damaging wind and storms as time goes by.
Home construction video series
- Framing Floors and Stairs (video)
- Framing Walls (video)
- Framing Roofs (video)
- Construction Companion Book (pdf)
Structures, Tips and Plans
- Greenhouse Structures (pdf)
- Farm Structures and Plans (web list)
- Farm Information, videos and information NDSU (web list)
- Root Cellar (pdf)
Resources
Sunday, March 4, 2012
Sunday Observance Legislation
You would think that we would be excited about government promotion and regulation of worship. We are very religious. We adhere to and promote the Christian faith. We believe in the Bible as God's Word to mankind. We want nothing more than for a revival and reformation to sweep across America, and beyond to include the entire world. Why would legislated Christianity be a concern?
The Bible tells us of two opposing forces at the end of time. Both will take on the claim of Christianity. There will be a true form of Christianity, represented by a minority who keep the commandments of God and have the faith of Jesus. The other group will be a vast majority, who follow a power that appears Christian, but who's counterfeit is marked by enacting laws regarding the day of worship.
The reasons for legislating worship are admirable. The proponents talk of the need for balance in a time of financial and economic crisis, the need for family and social cohesion, the need for time for recreation and sports, and the need to return to spirituality. I can agree with these ideas! But in light of Bible prophecy, I see this movement is walking in the shadow of a sinister power. When religion and government unite, there comes a drastic loss of liberty. This is not a new scenario. This exact recipe took place in the dark ages of 538 AD to 1798 AD. This time period is the 1260 years of Bible prophecy. And in the end times, the beast's deadly wound is healed, and it returns to the same modus operandi.
You can read about the promotion of Sunday observance legislation to the EU at the proponent website: http://www.europeansundayalliance.eu/
Today, March 4, is the day that this group devotes to Sunday legislation agitation in the EU. Today, I post this article as an opposing voice. I oppose the union of church and state. I oppose the legislation of conscience. I see the need for the Bible to be the basis of our actions, not the rule of law. Americans: never forget the reason the pilgrims sought a new land, so they could enjoy religious freedom. Religious freedoms were unknown in Europe, from whence they fled. And it appears Europe will lead the world in a return to legislated Christianity.
How should we respond? I find these quotes from a favorite author to be instructive:
Do Americans think that decrying the loss of liberty is crying wolf? If so, have you considered how many civil liberties have been lost since September 11, 2001? This is not only concern from a religious point of view. Consider this article regarding NDAA, and the loss of liberty in America. I quote:
Let's band together in prayer for a little more time!
Resources
The Bible tells us of two opposing forces at the end of time. Both will take on the claim of Christianity. There will be a true form of Christianity, represented by a minority who keep the commandments of God and have the faith of Jesus. The other group will be a vast majority, who follow a power that appears Christian, but who's counterfeit is marked by enacting laws regarding the day of worship.
The reasons for legislating worship are admirable. The proponents talk of the need for balance in a time of financial and economic crisis, the need for family and social cohesion, the need for time for recreation and sports, and the need to return to spirituality. I can agree with these ideas! But in light of Bible prophecy, I see this movement is walking in the shadow of a sinister power. When religion and government unite, there comes a drastic loss of liberty. This is not a new scenario. This exact recipe took place in the dark ages of 538 AD to 1798 AD. This time period is the 1260 years of Bible prophecy. And in the end times, the beast's deadly wound is healed, and it returns to the same modus operandi.
You can read about the promotion of Sunday observance legislation to the EU at the proponent website: http://www.europeansundayalliance.eu/
Today, March 4, is the day that this group devotes to Sunday legislation agitation in the EU. Today, I post this article as an opposing voice. I oppose the union of church and state. I oppose the legislation of conscience. I see the need for the Bible to be the basis of our actions, not the rule of law. Americans: never forget the reason the pilgrims sought a new land, so they could enjoy religious freedom. Religious freedoms were unknown in Europe, from whence they fled. And it appears Europe will lead the world in a return to legislated Christianity.
How should we respond? I find these quotes from a favorite author to be instructive:
"We as a people have not accomplished the work which God has committed to us. We are not ready for the issue to which the enforcement of the Sunday law will bring us. It is our duty, as we see the signs of approaching peril, to arouse to action. Let none sit in calm expectation of the evil, comforting themselves with the belief that this work must go on because prophecy has foretold it, and that the Lord will shelter His people. We are not doing the will of God if we sit in quietude, doing nothing to preserve liberty of conscience. Fervent, effectual prayer should be ascending to heaven that this calamity may be deferred until we can accomplish the work which has so long been neglected. Let there be most earnest prayer, and then let us work in harmony with our prayers. It may appear that Satan is triumphant and that truth is overborne with falsehood and error; the people over whom God has spread His shield, and the country which has been an asylum for the conscience-oppressed servants of God and defenders of His truth, may be placed in jeopardy. But God would have us recall His dealings with His people in the past to save them from their enemies. He has always chosen extremities, when there seemed no possible chance for deliverance from Satan’s workings, for the manifestation of His power. Man’s necessity is God’s opportunity." – CCh 336.1And notice this quote as well:
"There must be more spirituality, a deeper consecration to God, and a zeal in His work that has never yet been reached. Much time should be spent in prayer, that our garments of character may be washed and made white in the blood of the Lamb.
"Especially should we, with unwavering faith, seek God for grace and power to be given to His people now. We do not believe that the time has fully come when He would have our liberties restricted. The prophet saw “four angels standing on the four corners of the earth, holding the four winds of the earth, that the wind should not blow on the earth, nor on the sea, nor on any tree.” Another angel, ascending from the east, cried to them, saying: “Hurt not the earth, neither the sea, nor the trees, till we have sealed the servants of our God in their foreheads.” This points out the work we have now to do. A vast responsibility is devolving upon men and women of prayer throughout the land to petition that God will sweep back the cloud of evil and give a few more years of grace in which to work for the Master. Let us cry to God that the angels may hold the four winds until missionaries shall be sent to all parts of the world and shall proclaim the warning against disobeying the law of Jehovah." – Pr 274.2-3I don't know how these events will unfold. According to Bible prophecy, it is not a matter of "if", but "when". My concern is not only for the EU. This movement is foretold in Bible prophecy to be a world wide movement. I am praying that we have a few more years of grace. Join me, and pray for world wide religious liberty. God's judgments will surely follow the disregard of the 4th commandment Sabbath rest, via the legislation of a Sunday worship day.
Do Americans think that decrying the loss of liberty is crying wolf? If so, have you considered how many civil liberties have been lost since September 11, 2001? This is not only concern from a religious point of view. Consider this article regarding NDAA, and the loss of liberty in America. I quote:
"Yes, the worst things you may have heard about the National Defense Authorization Act, which has formally ended 254 years of democracy in the United States of America, and driven a stake through the heart of the bill of rights, are all really true." (web)It does not take a leap of faith any longer to see the lamb like beast (America in Bible prophecy) to speak like a dragon. There is a change from being lamb like to dragon like, and we are seeing changes now so rapidly, that I could no longer call America lamb like!
Let's band together in prayer for a little more time!
Resources
Friday, March 2, 2012
Book: Root Cellaring
The best book on Root Cellaring I have read is: Root Cellaring by Mike and Nancy Bubel. I like where the author starts in the first chapter, in a discussion of what crops to grow for winter storage. Having a plan for what you plan to store in your root cellar will assure success.
 I especially enjoyed chapter 2, which not only suggest "beets" but lists beet varieties that have proven good keepers, and suggested suppliers for that variety of beets. There is a list of several varieties for each food type.
In the last part of the book, there are some excellent drawings and photos of root cellars. There are ample notes, stories and ideas to help guide in your own cellar project.
I came away after reading the book being sold on our need for a root cellar. I think it is an excellent way to remove dependence on electricity to keep food cool and preserved for a longer time period. Before you start a cellar project, I would suggest your reading this book. There is enough reference material in it, I would suggest you purchase it.
Following are the Book Contents:
Chapter 1 Planting Crops for Fall Storage
Chapter 2 Good Keepers
Chapter 3 Growers Keepers: How to raise top-quality storage vegetables
Chapter 4 How to Harvest and Prepare Vegetables for Storage
Chapter 5 Life After Picking
Chapter 6 Spoilage
Chapter 7 Food Value in Winter Keepers
Chapter 8 Vegetables
Chapter 9 Fruits
Chapter 10 The Underground Garden
Chapter 11 Other Good Foods to Keep in Natural Cold Storage
Chapter 12 Trenches, Keeping-Closets, and Other Vegetable and Fruit Hideaways
Chapter 13 Planning Your Root Cellar
Chapter 14 Keeping Things Humming in the Root Cellar
Chapter 15 The Basement Root Cellar
Chapter 16 The Excavated Root Cellar
Chapter 17 Root Cellaring Experiences
Chapter 18 Cooking Sturdy Keepers
In the last part of the book, there are some excellent drawings and photos of root cellars. There are ample notes, stories and ideas to help guide in your own cellar project.
I came away after reading the book being sold on our need for a root cellar. I think it is an excellent way to remove dependence on electricity to keep food cool and preserved for a longer time period. Before you start a cellar project, I would suggest your reading this book. There is enough reference material in it, I would suggest you purchase it.
Following are the Book Contents:
Chapter 1 Planting Crops for Fall Storage
Chapter 2 Good Keepers
Chapter 3 Growers Keepers: How to raise top-quality storage vegetables
Chapter 4 How to Harvest and Prepare Vegetables for Storage
Chapter 5 Life After Picking
Chapter 6 Spoilage
Chapter 7 Food Value in Winter Keepers
Chapter 8 Vegetables
Chapter 9 Fruits
Chapter 10 The Underground Garden
Chapter 11 Other Good Foods to Keep in Natural Cold Storage
Chapter 12 Trenches, Keeping-Closets, and Other Vegetable and Fruit Hideaways
Chapter 13 Planning Your Root Cellar
Chapter 14 Keeping Things Humming in the Root Cellar
Chapter 15 The Basement Root Cellar
Chapter 16 The Excavated Root Cellar
Chapter 17 Root Cellaring Experiences
Chapter 18 Cooking Sturdy Keepers
Tuesday, February 28, 2012
Greenhouses
A greenhouse is a weather protecting structure for your garden plants. It could be as simple as a cold frame (a low wooden box covered with glass) to a tube frame, plastic covered high tunnel, to a stud framed glass house. With a greenhouse it is easy to extend your growing season a month earlier in spring, and a month later in fall. Depending on your greenhouse, and your crops, you can extend your harvest into winter.
Uses
Important concepts
Design considerations
 The ground warms and cools with the surrounding temperatures. As we cover the ground with the greenhouse, the earth under the house can offer stored heat. Utilize this heat battery to your advantage. In sunny areas, the solar input of energy will be more significant than earth heat radiation. If you are using glass for your glazing, then you will want to orient the angle of the glass to the perpendicular to the elevation of the sun during the winter. This angle is your latitude at the winter solstice. You want the angle of incidence to be low so that most of the light will completely penetrate the glass, and not loose some of it through reflection.
Using a GPS, property map or Google Earth, determine the latitude of your location. Add between 10 and 20 degrees to your site latitude to determine the orientation of your greenhouse glazing. For instance, if your latitude is 35 degrees north, your glazing should be angled at a 45 to 55 degree angle.
Heat storage / sources
Resources
Uses
- Seed starter greenhouse
- Forth season production
- Flower / cash production
Important concepts
- base temperature
- optimum temperature
- temperature integration
- photo period
- irradiance
- poly sun degradation
Design considerations

Using a GPS, property map or Google Earth, determine the latitude of your location. Add between 10 and 20 degrees to your site latitude to determine the orientation of your greenhouse glazing. For instance, if your latitude is 35 degrees north, your glazing should be angled at a 45 to 55 degree angle.
Heat storage / sources
- Water stored inside the greenhouse, in black containers to absorb as much daytime heat as possible. This heat would then be radiated at night to moderate temperatures. One friend of ours has used 55 gallon metal drums full of water in the center of their greenhouse with planter boxes on top of the drums. Another has water containers on the backside of the greenhouse. Another greenhouse we reviewed had a small pool of water within and under the floor.
- Rock mass as a thermal heat sink. Another greenhouse we have reviewed has a rock wall on the north side of the lean-to greenhouse. Another example is a solarium made with massive amounts of rock as thermal mass.
- Earth-air tubes are tubes buried deep in the ground and air passed through the tube to take the constant heat from the ground into the air and then into the greenhouse. Electricity is needed to move the air.
- Below ground radiant heat, with heat being added from a boiler or solar heater.
- Wood stove heater within the greenhouse.
- Greenhouse lowered into the surrounding ground, to encourage more earth-heat coupling.
- Cold sink trench within the greenhouse to hold coldest air down within the soil.
Resources
- Improving Greenhouse Production Efficiency (pdf)
- Greenhouse Information (pdf)
- Planning and Building a Greenhouse (web)
- Solar panel optimum angle (web)
- Greenhouse structures (overview pdf)
- The Solar Greenhouse That's Right for You (web)
Wednesday, February 22, 2012
Spring Planting
The days are ticking down toward spring planting. This is exciting! I would like to outline the steps our farm undergoes in late February to get ready for spring planting. We start planting seeds indoors on the week of March 8th. This is based on our zip codes last frost date. We generally have our last frost around May 3. We don't set out tender plants till May 10 (and then look at the 10 day forecast just to be sure). Remember that frosts can sneak up on you on clear sky nights without weather forecast warning. I have even seen light frost with 10 degrees safety margin in the forecast.
If you have not yet obtained your seeds, now is the time! Following are the seed companies we have used over the past several years:
 It is also time to setup your start trays in which you will start your transplants. We use recycled 4x8 foot drop ceiling light fixtures (4 bulbs), placed on 4x4 inch blocks which lifts the light fixtures just above the trays. The light should be as close to the plant as possible to give the maximum light exposure. If your plants are tall and leggy, they do not have enough light.
We have used grow heating mats in the past. I found that if I cover the light fixture with a blanket, the heat of the light fixture warms the under contents adequately as measured with a soil probe thermometer. Be careful if you try this. Make sure you don't have too much heat creating a fire danger. I set up several test configurations on my seed starting setup, and measured the temperatures obtained. The variables: no light or added heat, light on, heating pad and blanket cover. All of these measures were taken on the same light unit, at a room temperature of 60-70 degrees. In my testing, I found:
When we plant, we want to remember the goal is a progressive harvest, and this means not planting all of the cabbage for a single harvest, but progressive plantings. Elliot Coleman, in the book Four Seasons Harvest, suggests this schedule on page 88:
 We have created charts for planting dates based on the projected last frost date in spring. I will describe how we have constructed our chart, and then you can modify the specific dates based on your last frost date. I will only list the first planting of a variety here, though remember the suggested schedule above related to progressive plantings.
In the chronology below, the word "start" means seeding a transplant tray to start seedlings in side under lights. "Transplant to soil" means taking some of these seedlings and transplanting these into their final location in the garden. "Plant in soil" means we seed directly to the garden. We do not notate seedling transplants to larger pots indoors, but in several cases, this is needed. We have eggplant inside a long time before we set it out, as an example. We largest pot we use inside is 1 gallon.
While the seedlings or transplants are being established in soil, more diligent effort with weeding will be required. As soon as the plants are large enough to withstand some side dressing of mulch, apply this and add to it as you are able. This will do wonders for controlling your weeks, and lessening your hoeing work.
Soil
I wanted to have you think about the soil you use for your starter trays. We have used commercial starting mixes with good results in the past. Some references talk about using pasteurized soil, where harmful bacteria have been killed, but not so hot that the organic material is turned to charcoal. Be aware that if you use untreated garden soil, you may have more problems with damping off when used in a greenhouse or starter house application. I don't have a lot of experience pro or con, but pass on the word of caution from others.
Hardening off
When plants are started inside or in a greenhouse, the plants are tender. If placed directly outside, they may be burned and die. In our experience there are two key issues: light intensity and stem strength. New plants that have been inside have been shielded from the full intensity of the sun, and if the plant is directly transplanted outside with no hardening, the plant may be set back by leaf burn. Stem strength is also an issue, as indoors the plants are not subjected to wind stress, and stem strength develops based on need. I have sometimes set an oscillating fan to blow across the plant trays. I set plants out in the middle of the spring day that is sunny and warm for a limited amount of time. This time I increase an hour a day leading up to the date we transplant to soil.
Transplanting
When you are ready to transplant to soil, you will want to mark out the transplant bed in advance. We use a transplant trowel which is perfectly shaped to open the soil to receive the new plant. Take care to adjust the roots and rootlets to prevent root ball. Gently firm the soil around the plant, as this will improve capillary action to bring water to the roots. Generally you will want to plant the seedling at the same soil depth as they were grown prior. An exception is tomatoes, which will root out of a buried stem. There may be benefit to transplanting to the base of the first leaves.
Resources
If you have not yet obtained your seeds, now is the time! Following are the seed companies we have used over the past several years:
 It is also time to setup your start trays in which you will start your transplants. We use recycled 4x8 foot drop ceiling light fixtures (4 bulbs), placed on 4x4 inch blocks which lifts the light fixtures just above the trays. The light should be as close to the plant as possible to give the maximum light exposure. If your plants are tall and leggy, they do not have enough light.
We have used grow heating mats in the past. I found that if I cover the light fixture with a blanket, the heat of the light fixture warms the under contents adequately as measured with a soil probe thermometer. Be careful if you try this. Make sure you don't have too much heat creating a fire danger. I set up several test configurations on my seed starting setup, and measured the temperatures obtained. The variables: no light or added heat, light on, heating pad and blanket cover. All of these measures were taken on the same light unit, at a room temperature of 60-70 degrees. In my testing, I found:
- Soil at room temp, no light or heat added 60 deg
- Heating pad on only 80 deg
- Heating pad on covered with a blanket 86 deg
- Light on only 62 deg
- Light on covered with a blanket 82 deg
- Light on + heating pad on 84 deg
- Light on + heating pad on + blanket 96 deg
When we plant, we want to remember the goal is a progressive harvest, and this means not planting all of the cabbage for a single harvest, but progressive plantings. Elliot Coleman, in the book Four Seasons Harvest, suggests this schedule on page 88:
- Beans - every 2 weeks
- Beets - every 2 weeks
- Carrots - every 2 weeks
- Celery - twice: early spring, and 3 months before fall frost
- Corn - every 2 - 3 weeks (some varieties vary in length so keep this in mind)
- Cucumbers - two or three plantings: at month intervals
- Lettuce and greens - every week or two, extending the entire season
- Peas - twice: early spring and midsummer
- Radishes - every week
- Spinach - every week during spring and late summer
- Summer squash - two or three plantings at month intervals
 We have created charts for planting dates based on the projected last frost date in spring. I will describe how we have constructed our chart, and then you can modify the specific dates based on your last frost date. I will only list the first planting of a variety here, though remember the suggested schedule above related to progressive plantings.
In the chronology below, the word "start" means seeding a transplant tray to start seedlings in side under lights. "Transplant to soil" means taking some of these seedlings and transplanting these into their final location in the garden. "Plant in soil" means we seed directly to the garden. We do not notate seedling transplants to larger pots indoors, but in several cases, this is needed. We have eggplant inside a long time before we set it out, as an example. We largest pot we use inside is 1 gallon.
Eight weeks before last frost date (Mar 8), we start the cold crops: cabbage, cauliflower, kale and lettuce.
Seven weeks before last frost date (Mar 15), we start egg plant and broccoli. Eggplant is a slow growing, warm loving plant, but it needs a long growing time to get it to harvest, so we start some really early. Onions can be planted in soil.
Six weeks before last frost date (Mar 22), we plant in soil: arugula, spinach and peas.
Five weeks before last frost date (Mar 29), we start endive and turnip. We transplant to soil: cabbage, cauliflower. Plant in soil: radishes.
Four weeks before last frost date (Apr 5), we start peppers and tomatoes. We plant in soil: beets and potatoes.
Three weeks before last frost date (Apr 12), we transplant to the soil: broccoli and lettuce.
Two weeks before last frost date (Apr 19), we start beans. We plant in soil carrots and chard.
One week before last frost date (Apr 26), we start cucumbers, summer squash and melons.
Week of last frost date (May 3), we start okra, another warm loving plant that we will transplant to soil in 4 weeks.
One week post frost date (May 10), we start pumpkins. We transplant to soil the beans. We plant corn and a successive planting of beans into soil.
Two weeks post frost date (May 17), we transplant to soil cucumbers, summer squash and melons.
Three weeks post frost date (May 24), we transplant to soil peppers and tomatoes.
Four weeks post frost date (May 31), we transplant to soil the okra and pumpkins.
While the seedlings or transplants are being established in soil, more diligent effort with weeding will be required. As soon as the plants are large enough to withstand some side dressing of mulch, apply this and add to it as you are able. This will do wonders for controlling your weeks, and lessening your hoeing work.
Soil
I wanted to have you think about the soil you use for your starter trays. We have used commercial starting mixes with good results in the past. Some references talk about using pasteurized soil, where harmful bacteria have been killed, but not so hot that the organic material is turned to charcoal. Be aware that if you use untreated garden soil, you may have more problems with damping off when used in a greenhouse or starter house application. I don't have a lot of experience pro or con, but pass on the word of caution from others.
Hardening off
When plants are started inside or in a greenhouse, the plants are tender. If placed directly outside, they may be burned and die. In our experience there are two key issues: light intensity and stem strength. New plants that have been inside have been shielded from the full intensity of the sun, and if the plant is directly transplanted outside with no hardening, the plant may be set back by leaf burn. Stem strength is also an issue, as indoors the plants are not subjected to wind stress, and stem strength develops based on need. I have sometimes set an oscillating fan to blow across the plant trays. I set plants out in the middle of the spring day that is sunny and warm for a limited amount of time. This time I increase an hour a day leading up to the date we transplant to soil.
Transplanting
When you are ready to transplant to soil, you will want to mark out the transplant bed in advance. We use a transplant trowel which is perfectly shaped to open the soil to receive the new plant. Take care to adjust the roots and rootlets to prevent root ball. Gently firm the soil around the plant, as this will improve capillary action to bring water to the roots. Generally you will want to plant the seedling at the same soil depth as they were grown prior. An exception is tomatoes, which will root out of a buried stem. There may be benefit to transplanting to the base of the first leaves.
Resources
Sunday, February 19, 2012
Maple Syrup
If you live around maple trees, you could tap the trees to gather sap, and boil this down to maple syrup. Generally this is done in the north, as here we have a longer season of usable sap flow. You can collect sap on any maple tree when the sap is flowing and before the tree buds out.
Time to tap
 I cut off a branch from a maple the other day, and a stream of sap came flowing from the wound. It is really hard to believe that in early February, we are having sap flow. But the trees have good thermometers, and this winter (2012) has been unusually mild in our area. We have had regular sunny days, and often temps into the 40's or above. The ideal temperature for sap flow are day temperatures above 40 and night temperatures below 32 F. The tree pumps up sap to get the branches and buds ready for spring, and during freezing temps, the sap is drawn back down to the roots for storage. This pumping action is ideal for collecting sap as it passes by the tap hole. We have some cold temps this weekend, but after that the 10 day forecast looks like above freezing in the day, and below at night. Perhaps it is now time to tap. Note this winter I have had the concern of tapping too early. If you tap too early and it gets cold and the sap flow stops, then the taps could dry up and be sealed off, causing you to miss later spring flow. For us a good sap season is 4-6 weeks, and for our area the good sap flow starts mid February to early March. Some areas like Vermont have 8 weeks or longer of sap flow.
Once the tree begins to open the leaf buds and the photosynthesis products return in the phloem (downward flow channels) it gives an unpleasant taste to the sap. So the available window is started by day time temps above freezing, and ended when the trees bud out. Some make syrup seasons are short, and some are long, it all depends on the weather.
 Tools
Tools
The tools are really very simple. You need a drill that matches your tap size, some tubing unless you can hang your buckets on the tap, and a large flat pan to boil the sap down. It really is that simple. I tap low on the tree, and use tubing to drain the sap into food grade 5 gal bucket set on the ground. I found that one tap will offer 0.5 to 1 gallon a day, depending on the size and condition of the tree and the weather. You will want to check on the buckets each day. It is no fun discover an overflowing bucket. You hate to waste the sap!
If you use plastic buckets to collect sap or store syrup, be sure the buckets are food safe containers.
To set the spile, drill a hole angled slightly up, so the sap will run out. Drill to a depth of 1.5 inches for 5/16-inch spiles. Place the spile into the hole and lightly tap it in place with a hammer. If the sap is running, it will start coming down the spile within a matter of seconds.
Number of taps per tree
When you work tapping, you really can see how dynamic the sap flow is. You get the idea that you are tapping into the trees blood supply. You do not want to drain the tree of too much sap, or you could hurt the growth of the tree.
Boiling to syrup
Sap will spoil. It is dilute sugar water, and you can not really just leave it sitting. I found I had to process it daily. If you have 60 taps, giving 0.5 to 1 gallon each, then you may have around 40-50 gallons of sap each day. We purchased a 2' x 4' evaporator pan, which we can make a fire under to boil down the sap. It takes us around 6 hours of flame to boil down 50 gallons to syrup concentration. The ending volume would be around 1 gallon of syrup.
 Now this is an interesting point that I did not know before working with maple trees: not all maple trees have the same sugar concentration in their sap. There are genetic differences, and there are differences depending on how much light the tree is exposed to. We have maple trees in a forest, and our light exposure is basically the top of the tree. Our average sugar concentration is weaker than a tree in a fence row, obtaining light from all sides. Generally you hear of 40:1 ratios, and I calculated our ratios at 50:1. This means that I have to boil down 50 gallons of sap to get 1 gallon of syrup. The effort required for maple syrup is in moving the sap around, and in boiling down the sap to syrup.
My sugar shack is not a formal building, but a rather crude covering over a fire pit evaporator pan. I have built a low to the ground block frame on which to set the evaporator pan. Inside the concrete blocks, I set fire bricks to help protect the block from heat. At the far end, I have created a chimney to both draw the fire across the pan and smoke up and away from the syrup. I have supported the metal tube chimney with guy wires. There are 2 sheets of plywood supported on poles to provide cover from rain or snow.
I am ready to boil a batch when I have 30 to 50 gallons of sap ready to boil. I fill the evaporating pan with sap and light a fire in the fire box. Some like to preheat sap as possible to speed up the boiling process. Occasionally skim the surface of the boiling liquid to remove surface foam and other materials.
With a good fire, my pan will produce a huge rolling cloud of steam. Do not try boiling sap down indoors. If you are tempted to do so, just think about spreading 40 gallons of water around your kitchen. In such cases, I have heard of drywall falling off the ceiling, wall paper falling off, or mold taking over the home. The initial boil must be done outside or in a sugar shack!
Continue the process until the sap changes color and the boiling point begins to rise above the boiling point of water. Finished syrup boils at nine degrees (9° F) above the boiling point of water. As the temperature of the boiling sap approaches this point, boiling should be carefully controlled to prevent burning and overheating. If you are able to use a hydrometer or refractometer, you are looking for 66+% sugar. 67% sugar will form crystals over time on the bottom of the container, but I see that as some insurance against mold, and the crystals are edible.
We do not take the sap to completion in our large wood fired pan. We get it close to final concentration, and then drain it off, and do the finishing boil on a smaller scale where we can monitor it more carefully. A wood fire is not a precise heat source, and you surely can not "turn it off" at a moments notice. There is real danger of over heating your syrup if you are not very careful. After tending a fire for hours, you do not want to burn a batch. This has happened to me, and I hope to never experience it again! Note: it is really hard to clean up your large pan from burned syrup.
I have the habit of always having a few gallons of fresh sap on hand to add to the pan if needed. If you are being called away from tending the pan, add more sap. It may stop the boil for a while, or leave you with weaker syrup than you hoped for this first stage, but at least you will not burn the batch.
When you finish off your syrup to the proper temperature or concentration, you will notice some solids that come out of suspension. There is a gritty particulate called "sugar sand" that you can filter from your syrup. Some batches have more than others, but it may surprise you how much sugar sand you will strain out. It is common for the maple syrup to bubble up and boil over as it approaches the final concentration. This last step requires constant attention.
Filtering & Storage
If you allow the raw syrup to set for a day or two, the sugar sand will settle to the bottom of the container. I have dipped pure syrup from the top of the settling pot, and processed it to finished syrup. To be most efficient with removing the remaining syrup from the settled sugar sand, you will want to filter it. To filter the raw syrup, heat it to 190 degrees, and pour it through pre-filters and finishing filters. These three filters are set on top of each other: 2 pre-filters, and 1 finishing filter. These filters are reusable year after year. The batch should be small for the syrup should remain hot for it to efficiently move through the filtering process. Some people have the filtering setup be within a pot that has a low heat applied, so that the syrup being filters remains hot.
If you heat the syrup above 200 degrees, more sugar sand can precipitate from the syrup solution. So in the finishing process post filtering, you want to heat to 190 to sterilize the syrup, but not heat above 200.
Once the syrup is at the proper concentration, it can be stored in the refrigerator till you are ready to permanently can it. We have found a bottle of syrup with a small amount of mold on the top surface. I measured the concentration of this batch, and it was close to 70 % sugar. This means that the ideal 67% sugar content will not prevent mold. You have to sterilize the syrup for storage in any long term storage. We plan to sterilize pint canning jars in the oven, and pour in syrup heated to 190° F. Place filled and capped containers on their side or upside down so the hot syrup sterilizes the lid or cap. After cooling, store in a cool, dry place.
Time Line for 2012
Resources
Time to tap

Once the tree begins to open the leaf buds and the photosynthesis products return in the phloem (downward flow channels) it gives an unpleasant taste to the sap. So the available window is started by day time temps above freezing, and ended when the trees bud out. Some make syrup seasons are short, and some are long, it all depends on the weather.

The tools are really very simple. You need a drill that matches your tap size, some tubing unless you can hang your buckets on the tap, and a large flat pan to boil the sap down. It really is that simple. I tap low on the tree, and use tubing to drain the sap into food grade 5 gal bucket set on the ground. I found that one tap will offer 0.5 to 1 gallon a day, depending on the size and condition of the tree and the weather. You will want to check on the buckets each day. It is no fun discover an overflowing bucket. You hate to waste the sap!
If you use plastic buckets to collect sap or store syrup, be sure the buckets are food safe containers.
To set the spile, drill a hole angled slightly up, so the sap will run out. Drill to a depth of 1.5 inches for 5/16-inch spiles. Place the spile into the hole and lightly tap it in place with a hammer. If the sap is running, it will start coming down the spile within a matter of seconds.
Number of taps per tree
When you work tapping, you really can see how dynamic the sap flow is. You get the idea that you are tapping into the trees blood supply. You do not want to drain the tree of too much sap, or you could hurt the growth of the tree.
- Tap only trees with a diameter larger than 12"
- You can place two taps in trees with a diameter larger than 20"
- Limit yourself to three taps total in trees with a diameter larger than 26"
Boiling to syrup
Sap will spoil. It is dilute sugar water, and you can not really just leave it sitting. I found I had to process it daily. If you have 60 taps, giving 0.5 to 1 gallon each, then you may have around 40-50 gallons of sap each day. We purchased a 2' x 4' evaporator pan, which we can make a fire under to boil down the sap. It takes us around 6 hours of flame to boil down 50 gallons to syrup concentration. The ending volume would be around 1 gallon of syrup.

My sugar shack is not a formal building, but a rather crude covering over a fire pit evaporator pan. I have built a low to the ground block frame on which to set the evaporator pan. Inside the concrete blocks, I set fire bricks to help protect the block from heat. At the far end, I have created a chimney to both draw the fire across the pan and smoke up and away from the syrup. I have supported the metal tube chimney with guy wires. There are 2 sheets of plywood supported on poles to provide cover from rain or snow.
I am ready to boil a batch when I have 30 to 50 gallons of sap ready to boil. I fill the evaporating pan with sap and light a fire in the fire box. Some like to preheat sap as possible to speed up the boiling process. Occasionally skim the surface of the boiling liquid to remove surface foam and other materials.
With a good fire, my pan will produce a huge rolling cloud of steam. Do not try boiling sap down indoors. If you are tempted to do so, just think about spreading 40 gallons of water around your kitchen. In such cases, I have heard of drywall falling off the ceiling, wall paper falling off, or mold taking over the home. The initial boil must be done outside or in a sugar shack!
Continue the process until the sap changes color and the boiling point begins to rise above the boiling point of water. Finished syrup boils at nine degrees (9° F) above the boiling point of water. As the temperature of the boiling sap approaches this point, boiling should be carefully controlled to prevent burning and overheating. If you are able to use a hydrometer or refractometer, you are looking for 66+% sugar. 67% sugar will form crystals over time on the bottom of the container, but I see that as some insurance against mold, and the crystals are edible.
 |
| Tear Jerker Syrup Burn |
I have the habit of always having a few gallons of fresh sap on hand to add to the pan if needed. If you are being called away from tending the pan, add more sap. It may stop the boil for a while, or leave you with weaker syrup than you hoped for this first stage, but at least you will not burn the batch.
When you finish off your syrup to the proper temperature or concentration, you will notice some solids that come out of suspension. There is a gritty particulate called "sugar sand" that you can filter from your syrup. Some batches have more than others, but it may surprise you how much sugar sand you will strain out. It is common for the maple syrup to bubble up and boil over as it approaches the final concentration. This last step requires constant attention.
Filtering & Storage
If you allow the raw syrup to set for a day or two, the sugar sand will settle to the bottom of the container. I have dipped pure syrup from the top of the settling pot, and processed it to finished syrup. To be most efficient with removing the remaining syrup from the settled sugar sand, you will want to filter it. To filter the raw syrup, heat it to 190 degrees, and pour it through pre-filters and finishing filters. These three filters are set on top of each other: 2 pre-filters, and 1 finishing filter. These filters are reusable year after year. The batch should be small for the syrup should remain hot for it to efficiently move through the filtering process. Some people have the filtering setup be within a pot that has a low heat applied, so that the syrup being filters remains hot.
If you heat the syrup above 200 degrees, more sugar sand can precipitate from the syrup solution. So in the finishing process post filtering, you want to heat to 190 to sterilize the syrup, but not heat above 200.
Once the syrup is at the proper concentration, it can be stored in the refrigerator till you are ready to permanently can it. We have found a bottle of syrup with a small amount of mold on the top surface. I measured the concentration of this batch, and it was close to 70 % sugar. This means that the ideal 67% sugar content will not prevent mold. You have to sterilize the syrup for storage in any long term storage. We plan to sterilize pint canning jars in the oven, and pour in syrup heated to 190° F. Place filled and capped containers on their side or upside down so the hot syrup sterilizes the lid or cap. After cooling, store in a cool, dry place.
Time Line for 2012
- Feb 9: Sterilized spiles, T's and tubing.
- Feb 15: Laid out the location and dimensions of the sugar shack: 6x8 feet. Set 9 taps. Sap is dripping.
- Feb 16: Set the vertical poles and leveled the top plate of the sugar shack. Set 7 new taps. Sap is dripping. Collected around 6 gallons from the 9 taps of yesterday.
- Feb 17: Finished fire box placement. Set 3 new taps. Started first boil of 14 gallons sap.
- Feb 19: Arch complete with firebrick and chimney set in mortar. First boil of 35 gallons late in the afternoon. I have stoked the fire, and will let it burn out tonight. Not enough boil time to worry with a scorch so I can leave it unattended. (Pictures coming when I clean up the new sugar shack.)
- Feb 21: Ate our first syrup on waffles. MMMMM good. Set more taps today. Total of all taps now flowing: 39. Boiling down around 50 gals now.
- Feb 22: Third boil burned ;(. Now working to clean up the pan.
- Feb 29: Boiling again. I have quite a sap backlog! All buckets were full. Finished the roof on the sugar shack.
- Mar 2: Finished all of the backlog and current sap, with all buckets empty on the trees. 4 gallons of excellent grade syrup! That was the longest boil we have done to date!
- Mar 6: Boiling again.
- Mar 12: Last collection and boil. The sap is not as clean now as the first run, and the weather has warmed significantly. Buds are swelling, and we will pull the taps today. Total take in syrup was close to 10 gallons for our season.
- How to tap maple trees (pdf)
- Tips on tapping maple trees (web)
- Spiles, T's and tubing (web order)
- Boiling pan, stainless steel (web order)
- Air Flow and Velocities due to Natural Draft (web)
- Maple Trader Forum (web)
- Sugar Shack Design (pdf)
- Maple Syrup Grading (pdf)
Monday, February 13, 2012
Micro Greens & Sprouts
Microgreens are tiny leafed vegetables. Microgreens are just baby vegetable plants, used as greens. They are beyond sprouts stage, and are harvested when less than two inches tall. Some call them "vegetable confetti."
 Commonly grown varieties of microgreens include: Amaranth, Arugula, Beets, Basil, Cabbage, Celery, Chard, Chervil, Cilantro, Cress, Fennel, Kale, Mustard, Parsley, Radish, and Sorrel. Several varieties can be mixed together to create combinations of tastes, textures and colors. The crops used for microgreens usually do not include lettuces because they are too delicate and wilt easily. Both baby greens and microgreens lack any legal definition. The terms "baby greens" and "microgreens" are marketing terms used to describe their respective categories.
Health Claims
There are many Internet sites that claim superior nutritional benefit from eating microgreens. As outlined in an article, Fresh Origins points out that most of these have not been backed up by scientific nutritional analysis. We need to be cautious about calling microgreens the next "wonder" food.
Why?
So why the interest in microgreens? For one the flavors of these small plants are almost explosive. You can enjoy a dazzling array of new flavors. Plants are at their absolute peak of flavor intensity at the microgreens stage of life.
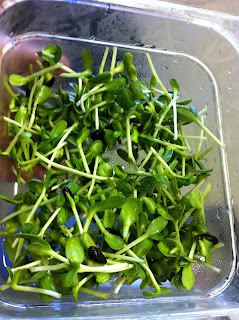 The greens are easy to grow indoors, in a greenhouse or in a garden. Some refer to microgreens as the perfect counter-top gardening.
Chefs favor microgreens as a garnish, but these plants are versatile enough to be used as a sandwich topper, salad, in a soup or as a centerpiece to a main dish.
Growing Microgreens
Often microgreens are grown in trays with the seeds being dense enough to fill the tray with greens (as in the first image in this post). Many plants will grow fine with a mesh or fiber bedding and water. You can place around 2 cups of slightly acidic water in a tray with your seeds. Keep them in the dark for several days, and then expose them to light to green up for harvest.. A few plants do best with actual soil, such as sunflower, buckwheat, pea, cilantro and beet.
Various crops will be ready for microgreen harvest from 10 days to several weeks. You can experiment with the size of greens you prefer, and harvest as you desire. Since the plants will continue to grow, you have a range of sizes to choose from.
Sunflower, buckwheat, beet and pea all need to be pre-soaked in cold water. Each should be soaked for 6 to 8 hours, except for beet seeds which should only be pre-soaked for an hour or two.
Amaranth, Bok Choi, and arugula do not like full sun. They do best with indirect light.
Sprouts
Sprouts are germinated seeds and are typically consumed as an entire plant (root, seed, and shoot), depending on the species. For example, sprouts from almond, pumpkin, and peanut reportedly have a preferred flavor when harvested prior to root development. Sprouts are legally defined, and have additional regulations concerning their production and marketing due to their relatively high risk of microbial contamination compared to other greens. Growers interested in producing sprouts for sale need to be aware of the risks and precautions, and oversight required by the FDA.
Resources

Health Claims
There are many Internet sites that claim superior nutritional benefit from eating microgreens. As outlined in an article, Fresh Origins points out that most of these have not been backed up by scientific nutritional analysis. We need to be cautious about calling microgreens the next "wonder" food.
Why?
So why the interest in microgreens? For one the flavors of these small plants are almost explosive. You can enjoy a dazzling array of new flavors. Plants are at their absolute peak of flavor intensity at the microgreens stage of life.
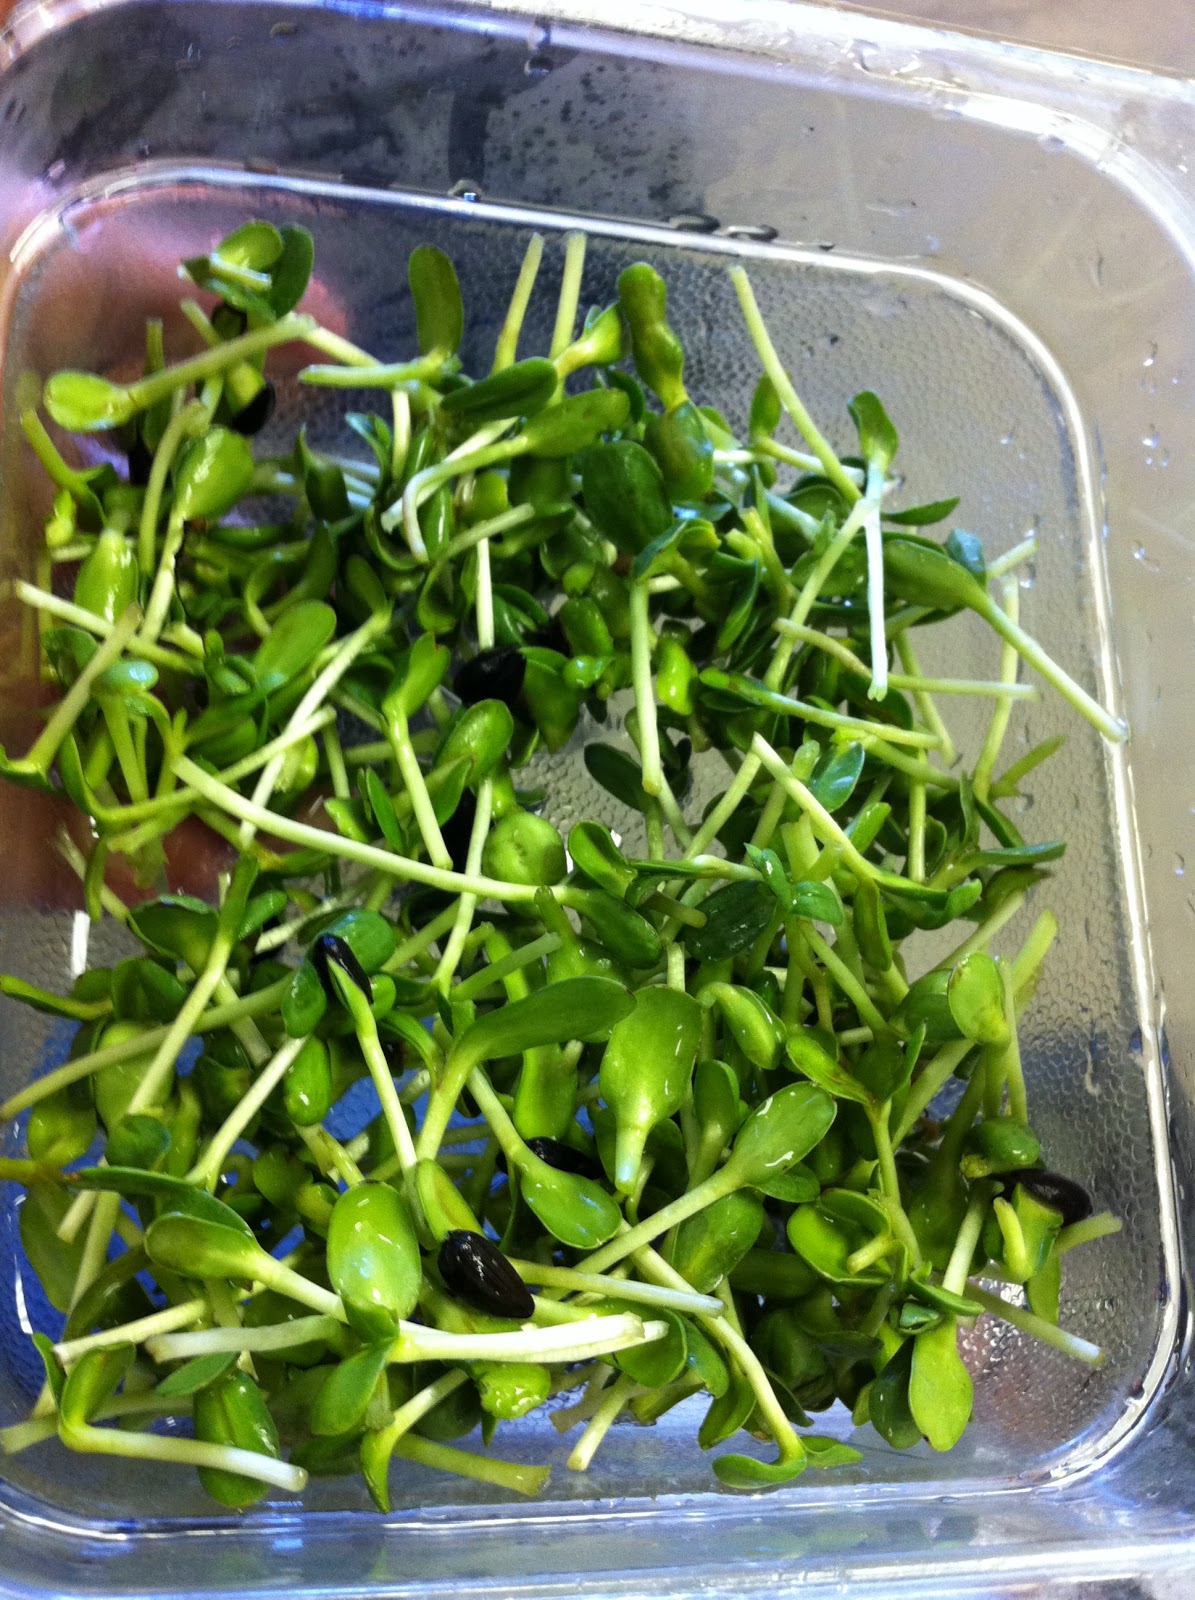 The greens are easy to grow indoors, in a greenhouse or in a garden. Some refer to microgreens as the perfect counter-top gardening.
Chefs favor microgreens as a garnish, but these plants are versatile enough to be used as a sandwich topper, salad, in a soup or as a centerpiece to a main dish.
Growing Microgreens
Often microgreens are grown in trays with the seeds being dense enough to fill the tray with greens (as in the first image in this post). Many plants will grow fine with a mesh or fiber bedding and water. You can place around 2 cups of slightly acidic water in a tray with your seeds. Keep them in the dark for several days, and then expose them to light to green up for harvest.. A few plants do best with actual soil, such as sunflower, buckwheat, pea, cilantro and beet.
Various crops will be ready for microgreen harvest from 10 days to several weeks. You can experiment with the size of greens you prefer, and harvest as you desire. Since the plants will continue to grow, you have a range of sizes to choose from.
Sunflower, buckwheat, beet and pea all need to be pre-soaked in cold water. Each should be soaked for 6 to 8 hours, except for beet seeds which should only be pre-soaked for an hour or two.
Amaranth, Bok Choi, and arugula do not like full sun. They do best with indirect light.
Sprouts
Sprouts are germinated seeds and are typically consumed as an entire plant (root, seed, and shoot), depending on the species. For example, sprouts from almond, pumpkin, and peanut reportedly have a preferred flavor when harvested prior to root development. Sprouts are legally defined, and have additional regulations concerning their production and marketing due to their relatively high risk of microbial contamination compared to other greens. Growers interested in producing sprouts for sale need to be aware of the risks and precautions, and oversight required by the FDA.
Resources
- Food Safety with Sprouts (pdf)
- Microgreens: A New Specialty Crop (web)
- Seeds for Sprouts (web order)
Sunday, February 12, 2012
Recipe: Curing Olives
If you have access to raw olives in your area, as we did when we lived in California, you should consider curing them yourself. The process is not all that hard, and quite fun to have buckets full of olives, rather than just a small can. We still have some treasured cans of home cured olives.
We have found that curing olives is easy. The suggested times are approximate, and if you go shorter or longer, the process is very forgiving. The times listed are for moving the process along efficiently. If you had to let the olives sit in a mixture hours longer, it really would not matter.
Uncured (raw) olives have a very strong, bitter taste. This can be soaked out with regular water changes over a months time. A much shorter method would be to immerse the olives in a lye solution, as described below. Take precautions when working with lye. Lye can cause burns. Wear chemical-resistant gloves and safety glasses whenever you're working with lye. The lye is a strong base, and nutralizes the raw olive acid. Once pH neurtal, you will want to infiltrate the olives with salt for taste. Then you can preserve the olives for later use.
It helps if you separate the olives into groups of similar size and ripeness. The black raw olives will cure a little faster than the green raw olives. Another benefit to sorting when the olives are raw is that the olives are easier to handle as firm and raw rather than after they are cured and soft.
Recipe
 At this point, the olives are cured, and ready to eat. You can refrigerate the olives and eat them fresh for several weeks. If you have more olives than you can use in this time period, then the olives should preserved in brine or by being canned or frozen.
Since you have removed the acid from the olive in the curing process, you would need to can then in a pressure caner: for a quart: 10 lbs pressure for 30 minutes. If you are at altitude, remember to make a time correction.
If you want to preserve the olives in brine:
We really enjoyed working with olives, and would continue if we still lived in California. At our high point, we were processing 50 gallons of olives at a time. Some time is required, but not a lot. The time would depend on the volume your are having to rinse, perhaps 5 minutes per 5 gallon bucket. I found placing a garden hose in the bottom of the bucket, and allowing the water to overflow the bucket would keep most of the olives in the bucket, and after a few minutes, they would be fully rinsed.
If you have access to olives, cure them yourself!
We have found that curing olives is easy. The suggested times are approximate, and if you go shorter or longer, the process is very forgiving. The times listed are for moving the process along efficiently. If you had to let the olives sit in a mixture hours longer, it really would not matter.
Uncured (raw) olives have a very strong, bitter taste. This can be soaked out with regular water changes over a months time. A much shorter method would be to immerse the olives in a lye solution, as described below. Take precautions when working with lye. Lye can cause burns. Wear chemical-resistant gloves and safety glasses whenever you're working with lye. The lye is a strong base, and nutralizes the raw olive acid. Once pH neurtal, you will want to infiltrate the olives with salt for taste. Then you can preserve the olives for later use.
It helps if you separate the olives into groups of similar size and ripeness. The black raw olives will cure a little faster than the green raw olives. Another benefit to sorting when the olives are raw is that the olives are easier to handle as firm and raw rather than after they are cured and soft.
Recipe
- Mix 4 T lye in each gallon of water. Be sure the lye is completely dissolved. Cover the olives with the lye solution. Stir occasionally to be sure the olives on the surface are completely cured. Let the olives soak for 48 hours.
- Pour off the lye solution and rinse the olives. I found the lye and the fat made soap suds when rinsed.
- Mix 2 T lye in each gallon of water, and again cover the olives with this solution. Stir occasionally. Let the olives soak for another 48 hours.
- Cut into a few olives to see if the lye has reached the pit. You can see the penetration of the lye as a color change in the flesh of the olive. If the penetration is not to the pit: rinse, and prepare a fresh lye solution as in step 3. Let the olives soak for 6 to 12 hours and test again.
- Rinse olives thoroughly for 24 to 48 hours by changing the water 4 times a day. This will wash out the lye and you can test to see if the lye is gone by tasting an olive. If there is a very little of the lye left, it will be washed out in the next few steps which adds salt to the olives.
- Mix 2 T salt per each gallon of water. Cover the olives and let them soak for 24 hours.
- Rinse well. Mix 3 T salt per each gallon of water. Cover the olives and let them soak for 24 hours.
- Rinse well. Mix 4 T salt per each gallon of water. Cover the olives and let them soak for 24 hours.
- Rinse well. Mix 5 T salt per each gallon of water. Cover the olives and let them soak for a final 24 hours.

Since you have removed the acid from the olive in the curing process, you would need to can then in a pressure caner: for a quart: 10 lbs pressure for 30 minutes. If you are at altitude, remember to make a time correction.
If you want to preserve the olives in brine:
- 3/4 C salt per gallon of water 1 week
- 1 3/4 C salt per gallon of water 1-2 weeks
- 1 3/4 C salt per gallon of water Put into jars and exclude air
We really enjoyed working with olives, and would continue if we still lived in California. At our high point, we were processing 50 gallons of olives at a time. Some time is required, but not a lot. The time would depend on the volume your are having to rinse, perhaps 5 minutes per 5 gallon bucket. I found placing a garden hose in the bottom of the bucket, and allowing the water to overflow the bucket would keep most of the olives in the bucket, and after a few minutes, they would be fully rinsed.
If you have access to olives, cure them yourself!
Thursday, February 9, 2012
Pruning Fruit Trees
Pruning a fruit tree is a critical step for tree growth and fruit production. There is a variety of ways to prune trees, and some types of trees have different needs. I am a learner in this topic, so we will start with listing resources I am using to practice and learn techniques related to pruning.
Goals of pruning
When to prune
You do not want to do heavy pruning during the active growing season, but you need to take care that you do not prune just before a cold snap either. Pruning is reported to lower a trees cold tolerance. It is suggested that you prune trees just before they bud out which would be after the danger of really hard freezes and very low temperatures. The larger the tree, and the older the tree, the more able it is to withstand cold after pruning. Apples can withstand winter pruning better than peaches.
General methods and techniques
 Apples
Cherries
Pears
Peaches
Plums
Goals of pruning
- Remove dead wood
- Remove any crossing branches
- Open the tree to get even sunlight and good air movement
When to prune
You do not want to do heavy pruning during the active growing season, but you need to take care that you do not prune just before a cold snap either. Pruning is reported to lower a trees cold tolerance. It is suggested that you prune trees just before they bud out which would be after the danger of really hard freezes and very low temperatures. The larger the tree, and the older the tree, the more able it is to withstand cold after pruning. Apples can withstand winter pruning better than peaches.
General methods and techniques
- Training & Pruning Fruit Trees (web)
- Pruning Fruit Trees (pdf)

- Pruning Apple Trees part 1 (video)
- Pruning Apple Trees part 2 (video)
Cherries
- Pruning Cherry Trees (web)
- Pruning Cherry Trees (video)
Pears
- Pruning Pear Trees (web)
Peaches
- Second year pruning (video)
- Third year pruning (video)
- Fourth year pruning (video)
- Pruning old growth (video)
Plums
- Plum trees should be pruned in the spring, to minimize fungus attack.
Monday, February 6, 2012
Garden Recipes
I love food. I love growing it. I love eating it.
 Most Americans don't eat many vegetables. I think many realize we should eat more vegetables, and cut down on packaged edible food like substances.
So you grow a wonderful garden... What do you do with all these vegetables? Well you eat a lot of it fresh from the garden: some raw, some cooked. The simpler the combination the better. Think simple foods, in simple combinations should be our focus for menu planning. What is left over you work to preserve for the winter.
Nutrient rich foods look and taste great. I can not wait to try some of these recipes from my garden.
Here are some excellent resources for you and your CSA:
Perhaps you can locate a recipe that uses an ingredient food you have not grown before. Take this challenge: grow the food, and try out the new recipe. Expand your garden variety and recipe favorites.

So you grow a wonderful garden... What do you do with all these vegetables? Well you eat a lot of it fresh from the garden: some raw, some cooked. The simpler the combination the better. Think simple foods, in simple combinations should be our focus for menu planning. What is left over you work to preserve for the winter.
Nutrient rich foods look and taste great. I can not wait to try some of these recipes from my garden.
Here are some excellent resources for you and your CSA:
- Natural Earth Farms recipes
- Live Earth CSA recipes by ingredient
- Mariquita CSA vegetable recipes A to Z
- A Veggie Venture's Recipe Box
- Top 10 Recipes for CSA Veggies
- Anchor Run Farm recipes
- Sang Lee Farm recipes
- Kayam Farm recipes
- Prairieland CSA recipes
- Full Belly Farm recipes
Perhaps you can locate a recipe that uses an ingredient food you have not grown before. Take this challenge: grow the food, and try out the new recipe. Expand your garden variety and recipe favorites.
Do you have a garden favorite? Post it as a comment. Let's get cooking.
Sunday, February 5, 2012
Trial by Fire
We have been clearing an overgrown field in order to expand our food growing potential. I feel that we have a window of opportunity to prepare a garden for the coming hard times. In my experience, you can grow food on new land, but the prep of the land takes time. You have to clear it, test and amend it, and incorporate it into your garden master plan. We all have no time to loose.
There is only so much land you can clear by hand, especially if your land has trees. The largest tree we removed was around 50 feet tall and had a diameter of around 2 feet. To remove stumps like these takes a lot of work. We have added mechanical horsepower to help in the process.
 In the center of the field, there is a large depression in the earth. Perhaps it is a sink hole, or perhaps an ancient homestead basement. Into this hole we piled brush, cotton wood trees (not good wood for us to save for fire wood), roots and brambles. We lit the pile on fire, and have had it actively burning for several days. Every now and then we stir the pile and get the brush at the edges positioned into the center so it will also burn. After sundown I came to the pile to check on it, and it needed a stir to keep it burning through the night, so I whipped out our brand new tractor with a front end loader to push the logs and brush better into the center of the pile. As I pushed a large pile of brush into the fire, I was not focused on exactly where I was around the pit. The front tires of the tractor fell over a small two foot cliff into the pit, and I soon realized the tractor was completely stuck. Even with 4 wheel drive and all tires spinning, the tractor would not back out over that small cliff.
With the tractor half in the pit and half out I became rather anxious. The pile of new material I had just pushed in was starting to ignite. I lifted the front end loader away from the flames, and wondered what I could do. I could not drive forward, as that would be directly into a now raging inferno, and would assure the total loss of the tractor.
I quickly called a friend who lived several miles away for his help, asking him to bring a chain to add power to pull the tractor out. The short call was ended abruptly with my friend saying, "I am on my way. Click." Next I called Sunshine to bring water in what ever she could find to carry it in. She immediately started filling two 5 gallon buckets at the house. I could walk around the front of the tractor and it was not in the flames and was not too hot to touch. The moments seemed like a long time, and the fire was building. Before Sunshine was able to fill 10 gallons, my neighbor charged up the drive. Oh what a joy to see his headlights coming.
He ran over with his chain, and hopped on the tractor. He knew a trick he had used many times to get unstuck, which I was to green to have understood. I had tried to lift the front end up using the front end loader while backing out, but to no avail. He set the bucket full tilt down, lifted the front of the tractor, and then rotated the tilt of the bucket outward adding a powerful push backwards. This with the four wheel drive and wheel differential engaged he was able to slowly inch the tractor back out of the pit. Just as he got off the tractor, Sunshine flew up with the car, and ran over buckets in hand. What a relief to see the tractor out of the pit on on level ground. We doused the front end loader for good measure, to make sure it was cooled down.
All ended well with not a scratch on the new tractor. This story is a bit humbling. If I was into this blog for ego, I would not retell it. The biggest problem was my lack of experience. A special thanks to a quick responding friend who literally flew in an instant to my side. It seemed impossible to get there as fast as he did. Perhaps angels propelled him onward.
Trials of life
Not every trial in life is one that we drive into. Not every fire is self inflicted. Our 5 year old nephew is recovering from a diagnosis of leukemia. A close friend is in the fire of a preliminary diagnosis of bone cancer. Suffering makes us want to ask, Why? In many cases, the best answer I have found is in Matthew 13:28: "An enemy hath done this."
There is a song that I really appreciate: Walking Through the Flames. It talks about fire. Many years ago, three Hebrew youths where commanded to worship an idol image, or be burned alive. They stood, literally, for their faith in God. They faced the fury of the king. The only part on them that burned was the ropes that had bound them. You can read the entire story in the Bible: Daniel chapter 3.
With this introduction, read the words of this poem, and notice the 3rd verse. This applies to you and to me. It applies to our times today.
Walking Through the Flames (audio)
Many years ago In a time of woe
Three young men faced a bitter test.
For the king decreed that they not be freed,
But instead he had bound them fast
Because they would not bow the knee except to God on high.
Into the flames with great disdain, these men were thrown to die.
But who would have thought that the flames would set them free?
And who would have thought that they’d gain the victory?
When with God our lot we cast,
We have more than we could ask
We’ll go walking through the flames with the Son of God.
When this evil king had performed this thing,
He sat down upon his throne.
But when he took yet a second look
He cried out with astonished tone,
“Did we not cast into the fire a group that numbered three?
Now they’re walking round as though unbound with a fourth like Deity!”
But who would have thought that the flames would set them free?
And who would have thought that they’d gain the victory?
When with God our lot we cast,
We have more than we could ask
We’ll go walking through the flames with the Son of God.
God has made it known to His very own
Tribulations they must bear.
For this world is not any friend to God.
In His cross we have a share.
But when the hour of trial comes and fire is all around
We’ll find the place we’re walking on is really holy ground.
And praise be to God that the flames will set us free
And praise be to God, we shall gain the victory.
When with God our lot we cast,
We’ll have more than we could ask.
We’ll go walking through the flames with the Son of God.
When with God our lot we cast,
We’ll have more than we could ask.
We’ll go walking, walking, walking through the flames with the Son of God.
With the Son of God!
There is only so much land you can clear by hand, especially if your land has trees. The largest tree we removed was around 50 feet tall and had a diameter of around 2 feet. To remove stumps like these takes a lot of work. We have added mechanical horsepower to help in the process.

With the tractor half in the pit and half out I became rather anxious. The pile of new material I had just pushed in was starting to ignite. I lifted the front end loader away from the flames, and wondered what I could do. I could not drive forward, as that would be directly into a now raging inferno, and would assure the total loss of the tractor.
I quickly called a friend who lived several miles away for his help, asking him to bring a chain to add power to pull the tractor out. The short call was ended abruptly with my friend saying, "I am on my way. Click." Next I called Sunshine to bring water in what ever she could find to carry it in. She immediately started filling two 5 gallon buckets at the house. I could walk around the front of the tractor and it was not in the flames and was not too hot to touch. The moments seemed like a long time, and the fire was building. Before Sunshine was able to fill 10 gallons, my neighbor charged up the drive. Oh what a joy to see his headlights coming.
He ran over with his chain, and hopped on the tractor. He knew a trick he had used many times to get unstuck, which I was to green to have understood. I had tried to lift the front end up using the front end loader while backing out, but to no avail. He set the bucket full tilt down, lifted the front of the tractor, and then rotated the tilt of the bucket outward adding a powerful push backwards. This with the four wheel drive and wheel differential engaged he was able to slowly inch the tractor back out of the pit. Just as he got off the tractor, Sunshine flew up with the car, and ran over buckets in hand. What a relief to see the tractor out of the pit on on level ground. We doused the front end loader for good measure, to make sure it was cooled down.
All ended well with not a scratch on the new tractor. This story is a bit humbling. If I was into this blog for ego, I would not retell it. The biggest problem was my lack of experience. A special thanks to a quick responding friend who literally flew in an instant to my side. It seemed impossible to get there as fast as he did. Perhaps angels propelled him onward.
Trials of life
Not every trial in life is one that we drive into. Not every fire is self inflicted. Our 5 year old nephew is recovering from a diagnosis of leukemia. A close friend is in the fire of a preliminary diagnosis of bone cancer. Suffering makes us want to ask, Why? In many cases, the best answer I have found is in Matthew 13:28: "An enemy hath done this."
There is a song that I really appreciate: Walking Through the Flames. It talks about fire. Many years ago, three Hebrew youths where commanded to worship an idol image, or be burned alive. They stood, literally, for their faith in God. They faced the fury of the king. The only part on them that burned was the ropes that had bound them. You can read the entire story in the Bible: Daniel chapter 3.
With this introduction, read the words of this poem, and notice the 3rd verse. This applies to you and to me. It applies to our times today.
Walking Through the Flames (audio)
Many years ago In a time of woe
Three young men faced a bitter test.
For the king decreed that they not be freed,
But instead he had bound them fast
Because they would not bow the knee except to God on high.
Into the flames with great disdain, these men were thrown to die.
But who would have thought that the flames would set them free?
And who would have thought that they’d gain the victory?
When with God our lot we cast,
We have more than we could ask
We’ll go walking through the flames with the Son of God.
When this evil king had performed this thing,
He sat down upon his throne.
But when he took yet a second look
He cried out with astonished tone,
“Did we not cast into the fire a group that numbered three?
Now they’re walking round as though unbound with a fourth like Deity!”
But who would have thought that the flames would set them free?
And who would have thought that they’d gain the victory?
When with God our lot we cast,
We have more than we could ask
We’ll go walking through the flames with the Son of God.
God has made it known to His very own
Tribulations they must bear.
For this world is not any friend to God.
In His cross we have a share.
But when the hour of trial comes and fire is all around
We’ll find the place we’re walking on is really holy ground.
And praise be to God that the flames will set us free
And praise be to God, we shall gain the victory.
When with God our lot we cast,
We’ll have more than we could ask.
We’ll go walking through the flames with the Son of God.
When with God our lot we cast,
We’ll have more than we could ask.
We’ll go walking, walking, walking through the flames with the Son of God.
With the Son of God!
Wednesday, February 1, 2012
Food Safety
We all know that food safety is important. Eating contaminated food brings very upsetting gastric results. All of us likely have had at some time the unpleasant effects of food poisoning. Some forms of contamination can lead to death.
When I was young (a long time ago :), the concern I heard was about leaving meat and dairy out of the refrigerator, where it could culture harmful bacteria. These days we hear of massive food recalls, of both meat products and vegetables. What has changed that fruits and vegetables are now killing people like meat has for ages?
 Recently there was a massive recall on lettuce and cantaloupe. Food that I have not considered at risk for e-coli contamination before. Thousands of tons of food has been destroyed in large multi-state food recalls. How is it possible that people in 18 states were made sick, 72 ill, 13 deaths, and that the contamination was linked to one farm? (web) The answer rests in how food is processed and packaged. We have monopolized and consolidated the food industry to a point that only a few companies control the entire food system. This is even of real food such as cantaloupes! (See my article on edible food like substances.)
It is really unfortunate that any food is contaminated, but it is worse to have this one contamination have such a large reach across the country! When I was a child, food was processed for a more local distribution area. Today, large companies will compete offering the lowest prices to grocery outlets. The way they obtain efficiency is in consolidating the packing processes to one large facility. They truck the food into and out of that facility. If contamination begins, it now has access to spread to a very large geographical distribution area. In this way, costs are lowered, but food safety risks are increased. Having to move food around like this is part of the reason we spend 10 calories of petroleum for every calorie of food. (Commercial fertilizers and pesticides made from petroleum, and fuel to power the massive equipment also consume petroleum.)
The corporate multi-national food industry responds to contamination issues as a mechanical problem. They gather their engineers together and come up with a bacteria control solution. Perhaps they can douse the food with stronger chemicals to kill the bacteria. Perhaps they can heat it so hot the threat is killed, no matter what happens to food quality. (After all if it does not look fresh, just add some artificial coloring chemicals.) It is a vicious cycle of adding chemicals to fix a broken system, and no one is looking at the root cause of the problem. It was the consolidation and mechanization that created the potential for cross contamination in the first place.
I do not believe that the solution to food safety is government regulation. This is not a problem the government will be able to correctly fix, because they are not looking at the root issues of what is wrong. Any response that does not bring food back to local responsibility is doomed to put more band-aids on a festering wound.
Eating locally grown food just makes so much sense! You eliminate the massive waste in transportation. You reduce the potential of cross contamination. You support your local economy, not the international corporate conglomerates bottom line. You know who grew your food. You know that no poisons were lathered upon what you will eat. You know it is safe to eat. The ultimate in eating locally, is to grow your food yourself.
On the farm
Perhaps we should turn our attention to more practical matters: how do we assure food safety on our own farms? Below are some ideas I would like to suggest:
How safe is your food? Eat local.
When I was young (a long time ago :), the concern I heard was about leaving meat and dairy out of the refrigerator, where it could culture harmful bacteria. These days we hear of massive food recalls, of both meat products and vegetables. What has changed that fruits and vegetables are now killing people like meat has for ages?

It is really unfortunate that any food is contaminated, but it is worse to have this one contamination have such a large reach across the country! When I was a child, food was processed for a more local distribution area. Today, large companies will compete offering the lowest prices to grocery outlets. The way they obtain efficiency is in consolidating the packing processes to one large facility. They truck the food into and out of that facility. If contamination begins, it now has access to spread to a very large geographical distribution area. In this way, costs are lowered, but food safety risks are increased. Having to move food around like this is part of the reason we spend 10 calories of petroleum for every calorie of food. (Commercial fertilizers and pesticides made from petroleum, and fuel to power the massive equipment also consume petroleum.)
The corporate multi-national food industry responds to contamination issues as a mechanical problem. They gather their engineers together and come up with a bacteria control solution. Perhaps they can douse the food with stronger chemicals to kill the bacteria. Perhaps they can heat it so hot the threat is killed, no matter what happens to food quality. (After all if it does not look fresh, just add some artificial coloring chemicals.) It is a vicious cycle of adding chemicals to fix a broken system, and no one is looking at the root cause of the problem. It was the consolidation and mechanization that created the potential for cross contamination in the first place.
I do not believe that the solution to food safety is government regulation. This is not a problem the government will be able to correctly fix, because they are not looking at the root issues of what is wrong. Any response that does not bring food back to local responsibility is doomed to put more band-aids on a festering wound.
Eating locally grown food just makes so much sense! You eliminate the massive waste in transportation. You reduce the potential of cross contamination. You support your local economy, not the international corporate conglomerates bottom line. You know who grew your food. You know that no poisons were lathered upon what you will eat. You know it is safe to eat. The ultimate in eating locally, is to grow your food yourself.
On the farm
Perhaps we should turn our attention to more practical matters: how do we assure food safety on our own farms? Below are some ideas I would like to suggest:
- Keep animal products separate from vegetable prep areas. I would suggest dedicated cutting boards for each, and don't mix the two.
- Clean and disinfect sinks between uses, especially if preparing animal products.
- If canning, pressure cook low acid vegetables per USDA canning time and pressure recommendations.
- Keep produce as cool as possible, to the ideal temps per the food item.
- Wash hands often and for an adequate duration.
- Clean and sterilize lugs and storage bins between uses.
How safe is your food? Eat local.
Subscribe to:
Posts (Atom)
